How to Fix a Soft Spot in Vinyl Plank Flooring for Good
There’s nothing more unsettling than walking across your beautiful vinyl plank flooring and feeling a sudden dip or bounce. That “sinking feeling” isn’t just in your head; it’s a soft spot, a common and frustrating problem for many homeowners. Left ignored, these seemingly minor issues can lead to bigger headaches like broken planks and unsightly gaps.
This comprehensive guide will walk you through exactly how to fix a soft spot in vinyl plank flooring. We’ll uncover the root causes, explore multiple repair methods, and provide you with actionable steps to restore the solid, stable feel your floor once had.
You'll Learn About
Understanding the Enemy: What Causes Soft Spots in LVP?
Before you can tackle the repair, it’s crucial to understand why your vinyl plank floor has developed a soft spot. The problem rarely lies with the vinyl planks themselves; instead, it’s almost always an issue with what’s happening underneath.
The most common culprit is an uneven subfloor. Vinyl plank flooring, especially the popular “floating” click-lock style, requires a flat and level surface to perform correctly. When there are low spots or depressions in the subfloor, the planks bridge over these voids, creating an air gap that results in that bouncy, spongy sensation when you step on them.
Common Subfloor Issues Leading to Soft Spots:
- Low Spots or Depressions: The subfloor wasn’t properly leveled before installation.
- Water Damage: Moisture from leaks or high humidity can degrade the subfloor material (like plywood or OSB), causing it to weaken and create soft areas. Signs of this often include musty smells or discoloration.
- Poor Installation: Sometimes, the underlayment is installed incorrectly, or debris was left on the subfloor, creating an uneven surface.
- Structural Problems: In more severe cases, issues with the home’s foundation or floor joists can cause sagging and uneven floors.
The Two Main Repair Strategies: Injection vs. Replacement
When it comes to fixing a soft spot, you have two primary methods to choose from. The best option for you will depend on the size of the soft area, your comfort level with DIY projects, and the type of vinyl flooring you have.
The first and least invasive method is using an injectable filler. This approach is ideal for small, isolated soft spots where the issue is clearly a void between the plank and the subfloor. The second, more involved method, requires removing the planks to level the subfloor directly.
Method 1: The Injection Fix (For Minor Voids)
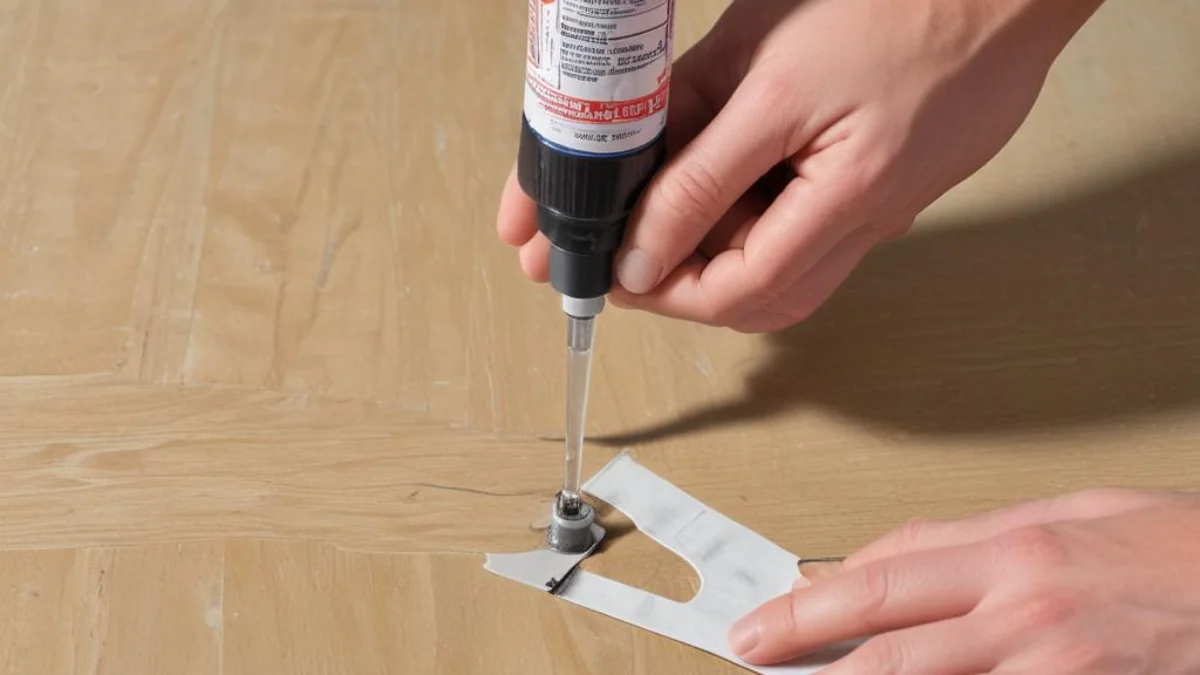
This technique is a favorite among DIYers for its simplicity and effectiveness in treating minor “trampoline” spots. It involves drilling a tiny, inconspicuous hole in the vinyl plank and injecting a flexible filler material into the void below. This fills the gap, providing the necessary support to eliminate the bounce.

Tools and Materials You’ll Need:
- Drill with a small drill bit (1/8″ or smaller)
- Flooring repair adhesive or a flexible, non-expanding sealant (like DAP Extreme Stretch or Big Stretch caulk)
- Caulking gun
- Injector syringe (a meat marinade injector works well)
- Painter’s tape
- Color-matched wood putty or wax pencil
- A heavy object (like a stack of books or a bucket of water)
Step-by-Step Injection Repair Guide:
- Locate the Void: Carefully walk over the area to pinpoint the center of the soft spot. Mark it with a small piece of painter’s tape.
- Drill the Injection Hole: Drill a small, clean hole through the vinyl plank at your marked spot. If the soft spot is near a seam, you can drill two holes for better filler distribution.
- Prepare and Inject the Filler: Load your flexible sealant into the injector syringe. Insert the syringe tip into the drilled hole and slowly inject the filler into the void. As you fill, gently tap the surrounding area to help the material spread evenly and release air pockets.
- Weight It Down: Once you feel resistance and the void is full, stop injecting. Wipe away any excess filler immediately. Place a piece of wax paper over the hole and then set a heavy object on top to keep the plank pressed firmly against the subfloor while the filler cures.
- Patch the Hole: After the filler has fully cured (check the product’s instructions, usually 24 hours), you can conceal the hole. Use a color-matched putty or a wax pencil to fill the tiny hole, making the repair nearly invisible.
Method 2: The Subfloor Leveling Fix (For Major Issues)
If you’re dealing with a large soft area, multiple spots, or suspect underlying water damage under your Lifeproof flooring, the injection method may not be sufficient. In these cases, the proper solution is to remove the planks, address the subfloor directly, and then reinstall the flooring.
Tools and Materials You’ll Need:
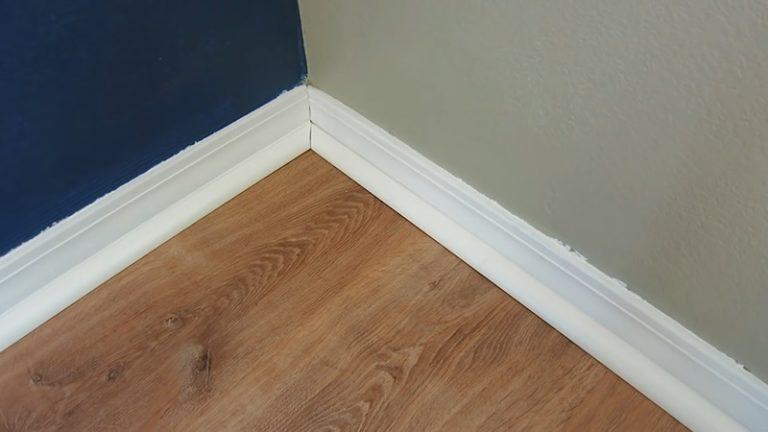
- Pry bar and mallet (for removing baseboards)
- Flooring pull bar and tapping block
- Self-leveling compound or floor patch
- Trowel
- Shop vacuum
- Straightedge or level
Step-by-Step Subfloor Repair Guide:
- Remove Baseboards and Planks: Carefully remove the baseboard from the wall closest to the soft spot. Starting from that edge, begin uninstalling the vinyl planks one by one until you have exposed the problem area. Keep the planks in order so you can easily reinstall them.
- Assess and Prep the Subfloor: Once the subfloor is exposed, clean it thoroughly with a shop vacuum. Use a long straightedge or level to identify the low spots causing the issue. If you find signs of moisture, you must resolve the source of the leak before proceeding.
- Apply Leveling Compound: Mix the self-leveling compound or floor patch according to the manufacturer’s instructions. Pour it into the low spots and use a trowel to feather the edges, creating a smooth, flat surface.
- Cure and Reinstall: Allow the leveling compound to cure completely. Once it’s hard and dry, you can begin reinstalling the vinyl planks in the reverse order you removed them, using the tapping block and pull bar to ensure tight seams.
- Replace Baseboards: Finish the job by reinstalling the baseboards.
Comparing Repair Methods
Choosing the right approach is key to a successful repair. This table breaks down the pros and cons of each method to help you decide.
| Feature | Injection Method | Subfloor Leveling Method |
|---|---|---|
| Best For | Small, isolated soft spots and minor voids. | Large soft areas, multiple spots, or known subfloor damage. |
| Difficulty | Easy / DIY-Friendly | Moderate / Requires more skill and effort |
| Time Required | 1-2 hours (plus curing time) | 4-6 hours (plus curing time for leveler) |
| Cost | Low ($20 – $50 for materials) | Moderate ($50 – $150+ for materials) |
| Invasiveness | Minimal (small drill hole) | High (requires removing flooring and baseboards) |
Prevention is the Best Medicine: Avoiding Future Soft Spots
The best way to fix a soft spot is to prevent it from happening in the first place. Whether you’re installing new flooring or have just completed a repair, proper subfloor preparation is non-negotiable. Always ensure your subfloor is clean, dry, and, most importantly, flat to within the flooring manufacturer’s specifications (typically 1/8″ over a 6′ span or 3/16″ over a 10′ span).
For those considering different flooring types, it’s worth comparing options like Malibu Wide Plank vs Lifeproof to see which is best suited for your home’s conditions. Additionally, understanding installation specifics, such as whether you can put Lifeproof vinyl flooring under cabinets, can prevent future structural issues.
Final Thoughts on Restoring Your Floor’s Integrity
A soft spot in your vinyl plank flooring can be a nuisance, but it’s a fixable problem. For minor voids, the injection method offers a quick and easy solution that can be done in an afternoon. For more significant subfloor issues, taking the time to remove the planks and level the subfloor properly will provide a permanent, professional-quality repair.
By correctly diagnosing the cause and choosing the appropriate repair strategy, you can eliminate that annoying bounce and restore the solid, stable feel to your floors, ensuring they look and perform their best for years to come.
Frequently Asked Questions
What causes soft spots in vinyl plank flooring?
Soft spots in vinyl plank flooring are most commonly caused by an uneven subfloor. If the subfloor has low spots or depressions, the planks can flex or bounce when walked on, creating a soft feeling. Other causes can include moisture damage to the subfloor, which weakens it, or issues with the flooring installation itself.
How can I fix a small soft spot without replacing the plank?
For minor soft spots due to small voids under the flooring, you can drill a small hole in the affected plank and inject a flexible caulking or a purpose-made floor repair adhesive. After filling the void, the hole can be sealed with a color-matched putty or wax. This method avoids the need to remove the entire plank.
When does a soft spot indicate a more serious problem?
A soft spot can signal a more significant issue if it is accompanied by signs of water damage, such as discoloration, musty odors, or if the soft area is widespread and growing. These could be symptoms of a subfloor problem or a plumbing leak that requires immediate attention to prevent further structural damage. In such cases, it is advisable to consult a professional.
Is it expensive to repair soft spots in vinyl plank flooring?
The cost of repairing soft spots can vary significantly depending on the underlying cause and the extent of the damage. Minor repairs, like injecting a filler, can be a low-cost DIY project. However, if the subfloor is damaged and needs to be repaired or leveled, the costs can range from a few hundred to over a thousand dollars, especially if professional help is required.
Can I prevent soft spots from developing in my new vinyl plank flooring?
Yes, proper subfloor preparation is the most critical step to prevent soft spots. Ensure your subfloor is clean, flat, and level according to the flooring manufacturer’s specifications before installation. Addressing any unevenness, dips, or high spots beforehand will provide a solid foundation for the vinyl planks and prevent them from flexing.

