How to Fix a Hole in the Bottom of a Fire Pit: A Pro Guide
There’s nothing quite like gathering around a crackling fire. But discovering a hole in the bottom of your fire pit can quickly extinguish the fun. A compromised fire pit isn’t just an eyesore; it’s a safety hazard that can leak hot embers and damage the surface beneath it. Fortunately, you don’t have to rush out and buy a new one. With the right materials and a little DIY spirit, you can repair that hole and extend the life of your beloved backyard centerpiece.
This comprehensive guide will walk you through everything you need to know, from understanding why holes form to detailed, step-by-step instructions for repairing metal, brick, and stone fire pits. We’ll cover the tools, techniques, and safety precautions necessary to get the job done right, ensuring many more seasons of safe and enjoyable fires.
You'll Learn About
Understanding the Enemy: What Causes Holes in a Fire Pit?
Before jumping into the repair, it’s crucial to understand what caused the damage in the first place. Identifying the root cause will not only help you perform a more effective repair but also prevent future problems. The culprits are often simple but relentless adversaries working against your fire pit’s materials.
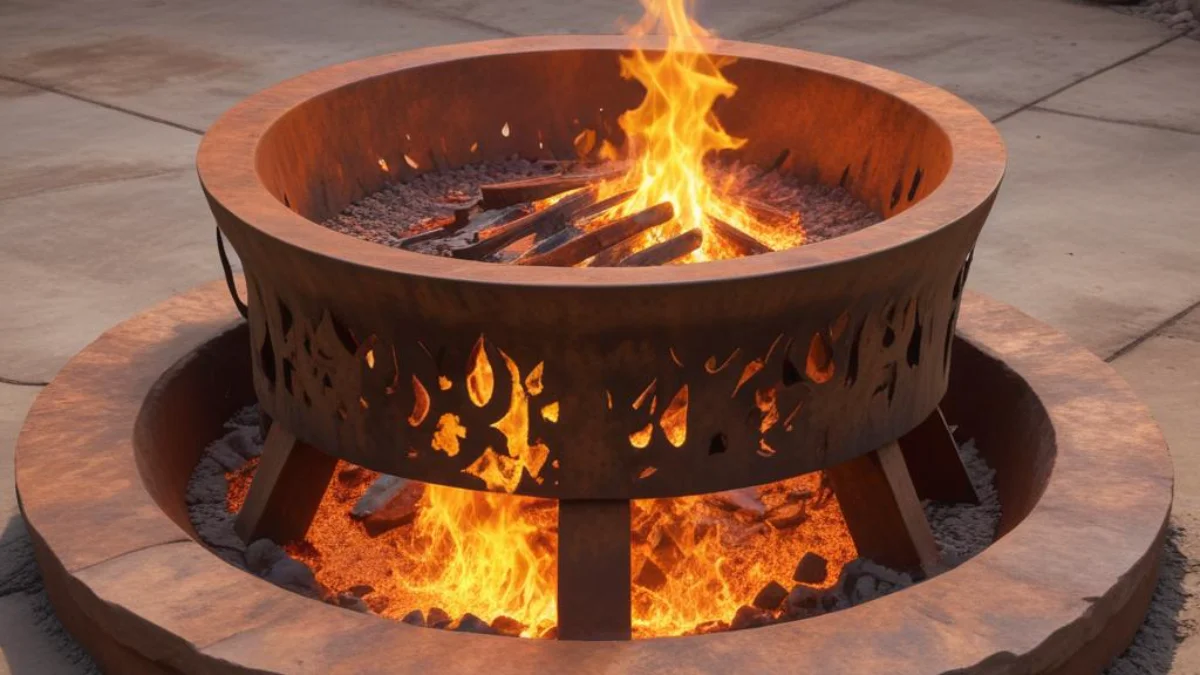
The primary cause of deterioration in most fire pits is the combination of intense heat and environmental exposure. For metal fire pits, this usually means one thing: rust. When the protective coating on steel or cast iron wears away, moisture from rain, snow, and even morning dew begins the oxidation process. The ash left after a fire is particularly damaging, as it absorbs moisture and creates a corrosive sludge that eats away at the metal. Over time, this corrosion thins the metal, leading to cracks and eventually, gaping holes.
Common Causes of Fire Pit Deterioration
- Moisture and Ash: Wet ash is highly corrosive and a leading cause of rust in metal fire pits. Always clean out ashes after the fire is completely cool.
- Extreme Temperature Changes: Rapid heating and cooling can cause materials to expand and contract, leading to stress cracks. Dousing a hot fire with cold water is a common cause of such damage.
- Material Breakdown: Over time, even durable materials like brick and stone can degrade. Mortar joints can crumble, and porous stones can crack from absorbing water that freezes and expands.
Safety First: Preparing for Your Fire Pit Repair
Any DIY project involving repairs requires a focus on safety. Before you begin, ensure you have the proper personal protective equipment (PPE). This includes heavy-duty gloves to protect your hands from sharp metal edges or rough masonry, and safety glasses to shield your eyes from debris, dust, and sparks.
Work in a well-ventilated area, especially when you’re grinding metal or mixing cement-based products. Ensure the fire pit is completely cool and cleaned of all ash and debris. A clean workspace is a safe workspace and also ensures that your repair materials will adhere properly.
Fixing a Hole in a Metal Fire Pit
Repairing a metal fire pit is the most common scenario, and you have a few effective options depending on the size of the hole and your comfort level with different tools. The goal is to create a durable, heat-resistant patch that restores the integrity of the fire pit’s basin.
Step 1: Clean and Prepare the Damaged Area
The first and most critical step is preparation. You cannot apply a patch over rust and expect it to hold. Use a wire brush or an angle grinder with a wire wheel to remove all loose rust, paint, and debris from the area around the hole. You need to get down to the bare, solid metal for the best adhesion.
After removing the rust, wipe the area clean with a damp cloth to remove any remaining dust and allow it to dry completely. This ensures that your patching material or sealant will bond directly and securely to the metal surface.
Step 2: Choose Your Repair Method
For small cracks or pinholes, a high-temperature sealant might be sufficient. For larger holes, you’ll need to create a more substantial patch using either metal sheeting or a castable refractory cement.
Method 1: High-Temperature Sealant for Small Holes
For very small openings, a product like a high-temperature fireplace sealant or furnace cement is an excellent choice. These products are designed to withstand extreme temperatures without cracking or failing. Apply the sealant with a caulking gun, forcing it into the hole and smoothing the surface with a putty knife. Follow the manufacturer’s instructions for curing times, which may require a small fire to properly set the material.
Method 2: Metal Patch for Medium to Large Holes
A more robust solution for larger holes involves creating a metal patch. You will need a piece of sheet metal (steel is a good choice) slightly larger than the hole. Cut the patch to size using tin snips, rounding the corners to avoid sharp edges. Place the patch over the hole on the inside of the fire pit bowl. Secure it using 1/4-inch bolts, nuts, and washers. Drill holes through both the patch and the fire pit bowl, then fasten the bolts tightly. For added durability, apply a layer of high-temperature sealant around the edges of the patch before tightening the bolts.
Method 3: Castable Refractory Cement for Severe Damage
If the bottom of your fire pit is severely deteriorated with multiple holes or is extremely thin, rebuilding the base with castable refractory cement is the best long-term solution. This material is designed for high-heat applications like kilns and fireplaces and creates a new, solid floor for your pit. Mix the cement according to the package directions to an oatmeal-like consistency. Line the bottom of the fire pit with the mixture, ensuring it’s at least an inch thick and covers all the holes completely. Smooth the surface with a trowel and allow it to cure fully, which typically takes at least 24 hours. This method creates an incredibly durable, seamless new bottom for your fire pit.
Step 3: Finish and Protect
After your repair has fully cured, it’s a good idea to protect the entire fire pit bowl. Apply a few coats of high-heat spray paint, like the kind used for grills and wood stoves. This will not only give your fire pit a fresh, new look but will also provide a protective barrier against moisture and help prevent future rust. Be sure to follow the application and curing instructions on the paint can for the best results.
Repairing a Brick or Stone Fire Pit
Masonry fire pits are built to last, but even they can suffer from cracks and holes over time. The repair process is different from metal pits and focuses on replacing damaged materials and reinforcing the structure with the right kind of mortar.
Step 1: Assess and Clean the Damage
Carefully inspect your brick or stone fire pit. Are individual bricks cracked? Is the mortar between the joints crumbling away? Use a hammer and chisel to carefully remove any loose or damaged bricks and crumbling mortar. It’s important to create a solid base for the new materials. Once the damaged sections are removed, use a stiff brush and water to clean out all dust and debris from the repair area.
Step 2: Use the Right Mortar
You cannot use standard mortar for a fire pit repair. Standard mortar will crack and fail under the high temperatures of a fire. You must use a refractory mortar or high-temperature fireplace mortar. These products are specifically formulated with additives that allow them to withstand extreme heat cycles without breaking down. Understanding this is as crucial as knowing how to fill a gap between hearth and fireplace; the right material is everything.
Mix the refractory mortar according to the manufacturer’s instructions. The consistency should be similar to peanut butter—stiff enough to hold its shape but workable enough to be applied with a trowel.
Step 3: Replace Bricks and Fill Joints
Lightly dampen the existing bricks and the new bricks with water. This prevents them from drawing moisture out of the new mortar too quickly, which can cause a weak bond. Apply a layer of refractory mortar to the bottom and sides of the hole where the new brick will go, a technique known as “buttering.” Firmly press the new brick into place, ensuring it is level with the surrounding bricks. Use the trowel to scrape away any excess mortar.
For filling crumbled mortar joints, use a technique called tuckpointing. Load some mortar onto a trowel and use a smaller pointing trowel to push the mortar deep into the joints. Pack the joints tightly, then use a jointer tool to create a smooth, concave finish that matches the rest of your fire pit.
Step 4: Cure the Repair
Proper curing is essential for the strength of refractory mortar. Most products require at least 24-72 hours to air dry. After the initial air-drying period, some refractory mortars require a small curing fire. This involves building a small, low-temperature fire and gradually increasing the heat over several hours. This process drives out any remaining moisture and tempers the mortar, giving it maximum strength. Always follow the specific curing instructions for the product you used.
Comparing Fire Pit Repair Materials
Choosing the right material is the key to a successful and long-lasting repair. The table below outlines the best uses, pros, and cons of the most common materials for fixing a hole in your fire pit.
| Repair Material | Best For | Pros | Cons |
|---|---|---|---|
| High-Temperature Sealant | Small cracks and pinholes in metal pits | Easy to apply, quick fix, readily available | Not suitable for large holes, may not be a permanent solution |
| Sheet Metal Patch | Medium to large holes in metal fire bowls | Durable, strong, relatively inexpensive | Requires tools (drill, tin snips), can be sharp to work with |
| Castable Refractory Cement | Severely rusted/damaged metal bottoms, masonry repair | Extremely durable, creates a new solid surface, heat resistant up to 2200°F+ | Requires mixing, longer curing time, more labor-intensive |
| Refractory Mortar | Replacing bricks and filling mortar joints in masonry pits | Specifically designed for high heat, creates strong bonds | Cannot be used for large surface patches, requires proper curing |
Preventative Maintenance: Keeping Your Fire Pit Healthy
An ounce of prevention is worth a pound of cure. Once you’ve repaired your fire pit, adopting a simple maintenance routine can prevent future holes and significantly extend its lifespan.
Key Maintenance Tips:
- Clean Out Ashes Regularly: Never leave ashes in your fire pit. Once cool, remove them and dispose of them in a metal container.
- Use a Cover: A high-quality, weather-resistant cover is the single best investment to protect your fire pit from rain and moisture.
- Avoid Dousing with Water: Let fires burn out naturally whenever possible. The thermal shock from cold water can crack metal and masonry alike.
- Inspect Regularly: Periodically check for small rust spots or cracked mortar joints. Catching these issues early makes for a much easier repair.
- Proper Fuel: Only burn dry, seasoned firewood. Avoid using trash, plastics, or pressure-treated wood, which can release toxic chemicals and damage the fire pit. Just as a humidifier clogging furnace filter can signal problems with your HVAC system, using improper fuel signals trouble for your fire pit’s longevity.
By following these repair and maintenance guidelines, you can ensure your fire pit remains a safe and inviting focal point in your outdoor space for years to come. Whether it’s a trusty metal bowl or a custom-built stone hearth, a little care and timely repair can save you the cost of a full replacement and keep the warm memories glowing. If you ever notice issues with other heating appliances, like a gas fireplace uneven flame, causes and fixes can often be found with similar attention to maintenance and detail.