How to Finish an Unfinished Room: Your Ultimate DIY Guide
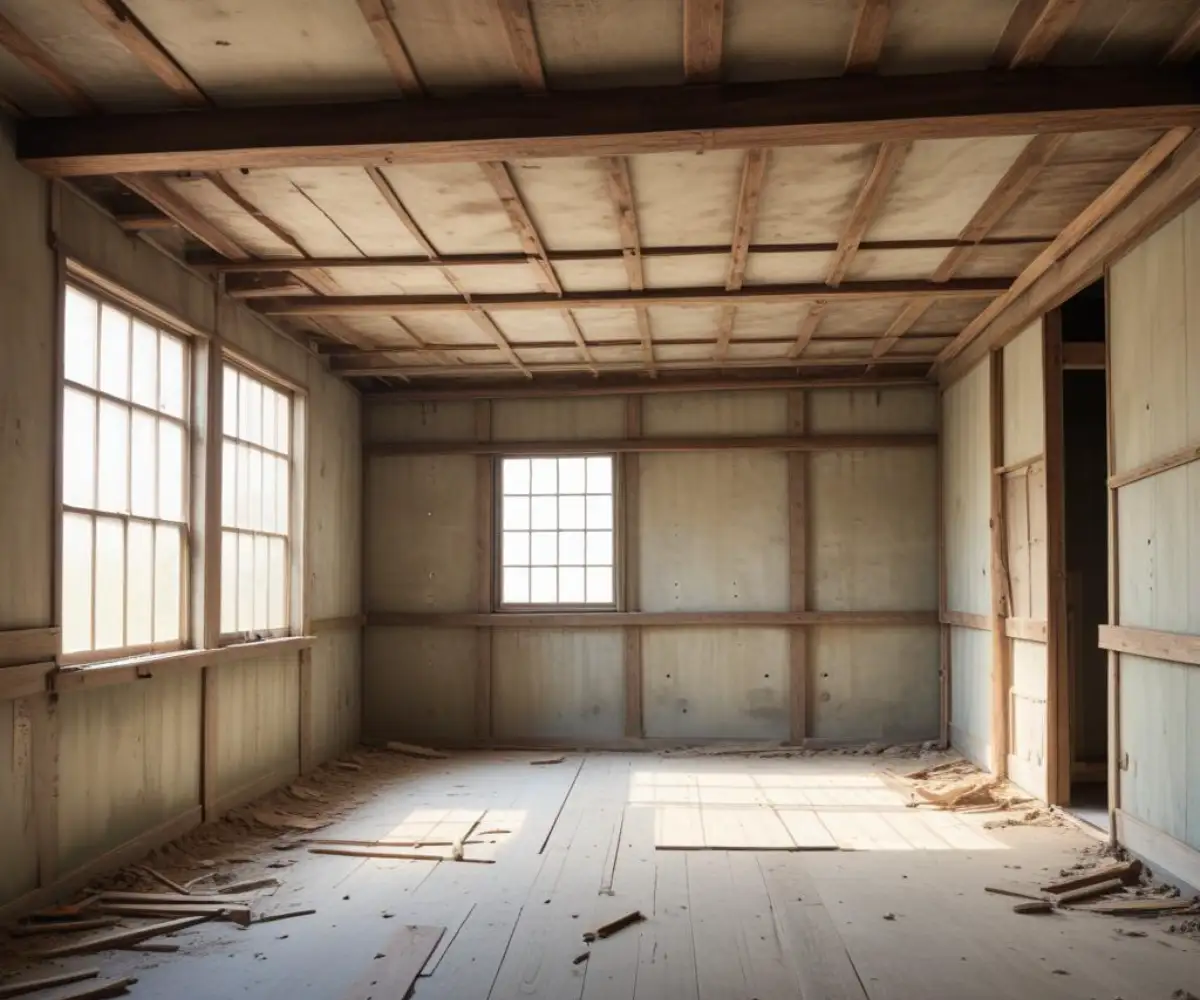
That unfinished room—be it a basement, attic, or bonus space above the garage—represents a world of untapped potential. It’s a blank canvas waiting to become a home gym, a cozy guest suite, a bustling home office, or the ultimate family rec room. Yet, for many homeowners, it remains just that: an unfinished space filled with exposed studs, concrete floors, and daunting uncertainty.
The thought of transforming this raw space into a functional, beautiful room can feel overwhelming. Where do you even begin? The process involves more than just putting up some walls; it requires careful planning, a clear sequence of steps, and the right materials to ensure the finished product is safe, comfortable, and built to last. This guide is designed to demystify the process and provide a clear, step-by-step roadmap from bare framing to a fully finished living area.
You'll Learn About
Planning Your Room Transformation: The Blueprint for Success
Before a single hammer is swung, the most critical phase of finishing a room is planning. A well-thought-out plan saves time, prevents costly mistakes, and ensures the final space meets your exact needs. Rushing this stage is a common mistake that can lead to frustration down the road.
Start by defining the room’s purpose. A home theater has different electrical and lighting needs than a bedroom, which requires specific safety features like an egress window. Once you have a clear vision, you can move on to the practicalities of layout, budgeting, and securing the necessary permits for the project.
Budgeting and Permits: The Foundation of Your Project
Understanding the costs involved is crucial for a successful project. On average, finishing a room can cost anywhere from $25 to $50 per square foot, but this can vary significantly based on the materials you choose and how much of the labor you do yourself. Creating a detailed budget helps you allocate funds effectively and avoid unexpected shortfalls.
Equally important is navigating local building codes and permits. Most significant renovations, especially those involving new walls, electrical wiring, or plumbing, require a permit from your local building department. Skipping this step can lead to fines and issues when you decide to sell your home.
| Project Phase | Estimated Cost (Per Sq. Ft.) | Key Considerations |
|---|---|---|
| Permits & Fees | Varies Greatly | Check with your local municipality; costs can range from $50 to over $1,000. |
| Framing | $1 – $2 | Includes lumber for walls and any necessary soffits or closets. |
| Electrical & Plumbing | $4 – $9 | Cost increases significantly if adding a bathroom or wet bar. Hiring a professional is highly recommended. |
| Insulation | $0.60 – $2 | Depends on the R-value and type (fiberglass, foam board, spray foam). |
| Drywall | $1.50 – $3 | Includes panels, tape, mud, and finishing labor. |
| Flooring | $2 – $15+ | Vinyl and laminate are budget-friendly; hardwood and tile are higher-end. |
| Paint & Trim | $2 – $5 | Includes primer, paint, baseboards, and door/window casings. |
Step 1: Framing – Building the Skeleton
With a solid plan in place, the first physical step is framing. This involves building the wood or metal stud walls that will define the new space. If your room is in a basement, you must use pressure-treated lumber for the bottom plate that comes into direct contact with the concrete floor to prevent moisture damage.
Carefully lay out the wall locations on the floor using a chalk line. Build the walls on the floor, spacing studs 16 inches on center, and then lift them into place. Ensure every wall is perfectly plumb (vertically straight) using a level before securing it to the floor and ceiling joists.
Step 2: Rough-In Electrical, Plumbing, and HVAC
Once the walls are framed, it’s time to run the “guts” of the room before they get covered by drywall. This includes electrical wiring for outlets, switches, and light fixtures, as well as any plumbing for a future bathroom or wet bar. It’s also the time to install any necessary HVAC ductwork to heat and cool the space.
This is a critical stage where hiring licensed professionals is strongly advised. Improperly installed electrical wiring is a serious fire hazard, and faulty plumbing can lead to catastrophic water damage. Professionals will ensure all work is done safely and up to code. It’s much easier to deal with a protruding pipe before the drywall goes up than after.
Step 3: Insulation – The Key to Comfort
Insulation is a vital step that regulates temperature, reduces energy bills, and helps with soundproofing. The type of insulation you choose depends on your climate and budget. Common options include fiberglass batts, rigid foam boards, and spray foam.
For exterior walls, especially in basements, a vapor barrier is often required to prevent moisture from passing through and causing mold issues. Ensure insulation fits snugly in every stud cavity without gaps, as these can reduce its effectiveness.
Step 4: Drywall – Creating the Canvas
Hanging drywall transforms the framed skeleton into what finally looks like a room. This process requires precision and patience. Start with the ceiling, as it’s the most challenging part, and then move to the walls. Use a drywall lift if possible to make ceiling installation easier and safer.
Secure the drywall sheets to the studs with drywall screws, being careful not to break the paper face. After hanging, the real artistry begins with taping and mudding. Applying joint compound (mud) and tape to the seams, corners, and screw heads creates a seamless, smooth surface ready for paint.
Step 5: Priming and Painting – Adding Color and Life
Never skip the priming step. Primer is essential as it seals the new drywall and ensures the paint adheres properly and shows its true color. One coat of high-quality primer is usually sufficient.
Once the primer is dry, you can apply your chosen paint color. Two coats are typically needed for a rich, even finish. Use a brush for “cutting in” around edges and corners and a roller for the large, flat surfaces to achieve a professional-looking result.
Step 6: Flooring – The Foundation of Your Design
The type of flooring you choose will dramatically impact the room’s look and feel. For basements and other areas prone to moisture, waterproof options like Luxury Vinyl Plank (LVP) or ceramic tile are excellent choices. Carpet can add warmth and comfort but should only be used in completely dry spaces with a proper subfloor and vapor barrier.
Proper subfloor preparation is key to a long-lasting floor. This may involve leveling the concrete, laying down a moisture barrier, or installing a subfloor system to provide insulation and a smooth surface for the finish flooring.
Step 7: The Finishing Touches – Trim, Doors, and Fixtures
The final construction step is installing the trim work. This includes baseboards, door and window casings, and any crown molding. Trim covers the gaps between the drywall and the floor, doors, and windows, giving the room a clean, polished look.
After the trim is installed and painted, you can hang interior doors and install the final electrical fixtures like outlet covers, switch plates, and lights. These final details are what truly complete the transformation from an unfinished shell to a livable space.
Navigating Common Challenges and Problems
Even with the best plan, unexpected issues can arise. One of the biggest threats during construction is water. If you discover rain on your unfinished project, it’s crucial to address the moisture immediately to prevent long-term damage and mold growth.
Sometimes, a project becomes too much for one person to handle, or you may need specialized skills. Knowing when to call for help is important. However, this can lead to its own set of frustrations, especially when you find yourself wondering why contractors don’t show up. Vet potential hires carefully by checking references and ensuring they are licensed and insured to protect yourself and your investment.
Conclusion: Reaping the Rewards of Your Hard Work
Finishing an unfinished room is a significant undertaking, but it’s also one of the most rewarding home improvement projects you can tackle. You not only add valuable living space to your home but also increase its overall market value. By following a logical sequence of steps—from planning and framing to the final coat of paint—you can turn that forgotten space into your favorite room in the house.