How to Drive PVC Pipe Into the Ground Without Shattering It
Driving PVC pipe into the ground seems straightforward, but it often ends in frustration. Many DIY enthusiasts and gardeners face the common problem of PVC pipe cracking, splitting, or completely shattering upon impact. This issue turns a simple project into a tedious and wasteful task.
The core of the problem lies in the material properties of PVC and the methods used to insert it into the earth. Brute force with a standard hammer is a recipe for disaster, as the focused impact is too much for the pipe’s structure to handle. Soil conditions, like hard clay or rocks, further complicate the process, making it nearly impossible to proceed without damage.
You'll Learn About
Why Does PVC Pipe Break So Easily When Hammered?
Understanding the “why” behind the breakage is the first step toward a solution. PVC (Polyvinyl Chloride) is a rigid plastic, but it’s not designed to withstand sharp, concentrated impacts. When you strike the end of a pipe with a hammer, the force isn’t distributed evenly, leading to stress fractures and breaks.
Another contributing factor is the condition of the pipe’s edge. A rough or uneven cut from a saw can create weak points that are more susceptible to cracking under pressure. The composition of the ground itself plays a significant role; attempting to force a pipe through dense, rocky, or compacted soil is a primary cause of failure.
The Wrong Tools for the Job
Many people grab the nearest heavy object, typically a steel hammer, to drive PVC pipe. This is a fundamental mistake. The hardness of the steel against the plastic creates a high-pressure impact point that PVC simply cannot endure. A rubber mallet is slightly better, but for stubborn ground, it often lacks the necessary force, leading to repeated, damaging blows.
Without a way to protect the pipe’s opening, every strike is a gamble. Even with careful aim, the rim of the pipe is vulnerable and can easily chip or split, rendering it useless for fittings or connections. This can be especially frustrating when dealing with complex setups like those sometimes seen in ring and string electrical systems, where precision is key.

The Solutions: Smarter Ways to Drive PVC Pipe
Fortunately, there are several effective methods to get PVC pipe into the ground without causing damage. These techniques range from using simple protective measures to employing the power of water to do the hard work for you. The best method often depends on your soil type and the diameter of the pipe.
Method 1: The Protective Block Technique
This is the simplest and most common solution for preventing breakage. It involves using a piece of scrap wood, like a short 2×4, as a buffer between the hammer and the pipe. This method helps to distribute the impact force across the entire rim of the pipe instead of concentrating it in one spot.
Step-by-step guide:
- Ensure the end of the PVC pipe is cut squarely and deburred. A clean edge is less likely to split.
- Place the pipe vertically on the desired spot.
- Hold the block of wood firmly on top of the pipe, covering the entire opening.
- Strike the center of the wooden block with a heavy mallet or sledgehammer. Start with gentle taps to set the pipe, then increase the force as needed.
This technique is highly effective for moderately soft to firm soil. For harder ground, you may need a more advanced approach.
Method 2: Creating a Pilot Hole
For dense or rocky soil, forcing the PVC pipe directly is often impossible. Creating a pilot hole first clears a path, making the installation significantly easier. This is arguably the most reliable method for difficult ground conditions.
You can create a pilot hole using a steel T-post, a long piece of rebar, or a soil auger. A T-post driver or a heavy hammer can be used to drive the steel rod into the ground to the desired depth. Once the hole is made, the steel rod is removed, and the PVC pipe can be inserted, often with minimal force required.
Method 3: The Water Jetting Method (Hydro-Excavation)
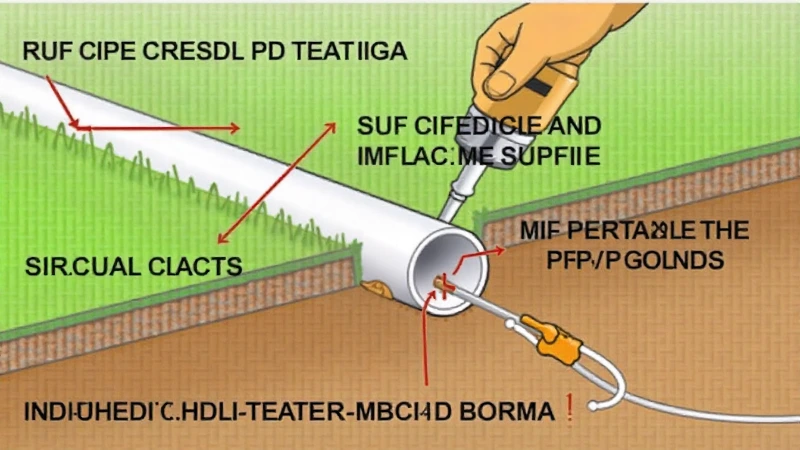
For a clever and surprisingly effective approach, use water pressure to do the digging. This method, sometimes called “jetting,” is excellent for sandy or loamy soils and can even work under sidewalks. It involves turning your PVC pipe into a simple hydro-excavation tool.
How to do it:
- Attach a garden hose to one end of the PVC pipe. You might need an adapter to create a secure connection.
- At the other end, you can attach a jet nozzle or simply use the open end of the pipe.
- Turn on the water and place the pipe against the ground.
- Gently push and twist the pipe. The water will blast away the soil, allowing the pipe to sink into the ground with very little effort.
This process can be messy, creating a muddy area, but it is incredibly effective and avoids any risk of impact damage to the pipe. It’s a game-changer for many projects.
Tips for Success and Advanced Techniques
No matter which method you choose, a few extra tips can ensure a smoother process and a better outcome. Preparation and the right tools can make all the difference.
Preparing the PVC Pipe
A little prep work on the pipe itself can go a long way. For easier insertion, especially in firm soil, consider cutting the bottom end of the pipe at a slight angle. This creates a pointed tip that can more easily penetrate the ground.
Always make sure the top edge of the pipe is smooth. After cutting, use sandpaper or a deburring tool to remove any rough spots or burrs. A clean, flat surface is essential for the protective block method to work effectively.
Choosing the Right Tools for the Job
Investing in the right tools can save you time and materials. A post driver, for example, is an excellent tool for creating pilot holes with rebar or T-posts. It provides more control and force than a standard sledgehammer.
When working on larger projects that require stable power, you might wonder, will a 2000 watt inverter run an air conditioner? While unrelated to driving pipes, having reliable power for tools like drills for creating pilot holes can be crucial for remote job sites.
| Method | Best For | Tools Required | Pros | Cons |
|---|---|---|---|---|
| Protective Block | Soft to medium soil | Mallet/Sledgehammer, Wood Block | Simple, requires minimal tools | Not effective for hard or rocky soil |
| Pilot Hole | Hard, rocky, or clay soil | Rebar/T-Post, Sledgehammer/Post Driver | Highly effective for difficult ground | Requires more effort and tools |
| Water Jetting | Sandy or loamy soil | Garden Hose, Adapters | Effortless, no risk of impact damage | Messy, requires a water source |
When to Call a Professional
While DIY methods can be effective in many home improvement projects, there are certain situations where professional assistance becomes essential. Whether you’re working on a landscaping project, preparing for a construction job, or tackling a larger installation, knowing when to call in the experts can make a significant difference in both the outcome and the safety of the project.
One of the key situations where professional help is required is when you’re dealing with extremely compacted soil. Compacted soil is a common problem in many outdoor spaces, often occurring due to heavy foot traffic, machinery use, or poor drainage. Compact soil restricts root growth, hinders water drainage, and makes it difficult for tools to penetrate the ground. For small areas, a DIYer might be able to manage compacted soil with tools like a garden fork or a manual soil aerator. However, for larger projects or situations where the soil is densely compacted, it becomes much more challenging.
In these cases, professionals have access to heavy machinery such as a rototiller, auger, or even a skid-steer loader that can break through even the most stubborn layers of compacted earth. These machines allow for deeper penetration, faster progress, and the ability to address larger areas, something that would be difficult to achieve with hand tools. Additionally, professionals can bring in specialized soil amendments that help improve soil structure and prepare it for planting, installation, or other uses.
Another scenario that demands professional expertise is when you are dealing with buried utilities. Whether you’re planning to dig a trench for irrigation, install a fence, or lay a foundation, disturbing buried utilities can be dangerous, costly, and legally complicated. In many areas, utilities like water pipes, gas lines, electrical cables, and fiber-optic cables are buried underground, often just a few feet below the surface. If you accidentally strike one of these lines, the result can be a hazardous situation, from water leaks and power outages to gas explosions.
Before any major digging begins, professionals are typically required to locate and map out utilities. They use tools such as utility locators and ground-penetrating radar to determine the precise location of these lines. This service is invaluable because it ensures that you avoid accidental damage to utility systems. Many local governments and utility companies also offer services that mark the location of underground utilities, but professionals can provide the expertise to interpret these markings and help plan the safest course of action.
Lastly, some large-scale installations simply cannot be tackled efficiently by a DIYer. If you are installing a large retaining wall, creating a drainage system for your yard, or completing an extensive patio or driveway, the project might involve heavy equipment, extensive knowledge of construction practices, and specific permits. Even if you have the tools and experience, a large project requires careful planning and execution, including ensuring the proper use of materials, managing waste, and addressing local zoning regulations.
Professionals not only bring the right equipment, but they also have the knowledge to perform work with precision. For example, ensuring proper grading for drainage, correctly laying a foundation for a large structure, or using the right materials for erosion control requires a level of expertise that goes beyond the average DIYer’s skillset.
Sometimes, unexpected issues arise during a project, such as discovering an odorless smoke in house, which could indicate a serious underlying problem that needs immediate expert attention. Similarly, if you hit an obstruction you can’t identify, it’s always best to stop and consult a professional to avoid damaging crucial infrastructure.
Conclusion: Drive PVC Pipe Like a Pro
The frustration of shattering a PVC pipe can be a thing of the past. By abandoning the brute-force approach and adopting smarter techniques, you can drive PVC pipes into the ground efficiently and without damage. Whether you use a simple block of wood, create a pilot hole, or harness the power of water, these methods will ensure your project’s success.
Remember the key principles: protect the pipe from direct impact, prepare the pipe for easier entry, and clear a path in difficult soil. With these strategies, you’ll be able to tackle your next PVC project with confidence and achieve professional-quality results every time.

