Popcorn Ceiling Removal Clean-Up: Your Essential Guide
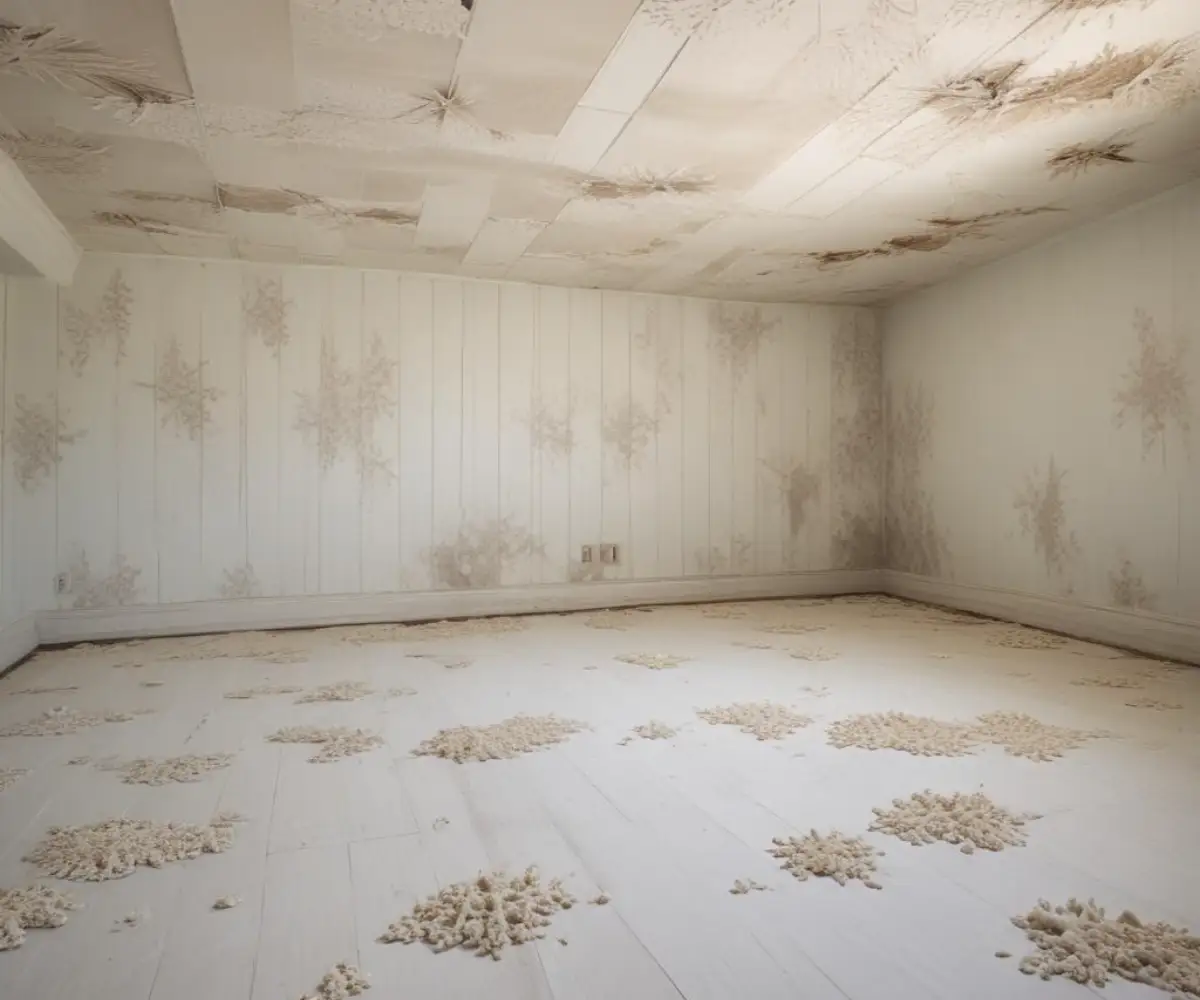
You’ve done it. You’ve scraped away the last of that dated, dusty popcorn ceiling. But as you look around, a new, far more daunting reality sets in: a fine, pervasive layer of white dust has coated every single surface, nook, and cranny of the room. This isn’t just a mess; it’s a renovation battleground, and the cleanup can feel more challenging than the removal itself.
This fine particulate, often a mix of drywall compound, texture material, and potentially older, more hazardous substances, doesn’t just sit on the floor. It clings to walls, settles in light fixtures, and finds its way into your HVAC system, posing risks to both your home’s finishes and your health.
You'll Learn About
Why a Meticulous Cleanup is Non-Negotiable
Tackling the cleanup after popcorn ceiling removal is about more than just aesthetics. It’s a critical step to ensure a healthy living environment and a professional-quality finish for your new, smooth ceiling. Cutting corners here can lead to lingering problems that are much harder to fix later.
The primary concern is the composition of the dust itself. In homes built before the 1980s, popcorn texture often contained asbestos, a hazardous mineral whose fibers can cause serious respiratory issues if inhaled. Even in newer homes, the fine dust from drywall and joint compound can irritate the eyes, nose, and throat and can wreak havoc on your home’s air quality.
The Hidden Dangers of Renovation Dust
Beyond the immediate health concerns, this dust is the enemy of a good paint job. Any particles left on the ceiling or walls will prevent primer and paint from adhering properly, resulting in a blotchy, uneven, and unprofessional finish. Dust that infiltrates your HVAC system can clog filters, reduce efficiency, and circulate particles throughout your entire home for weeks or even months.
Proper cleanup protects your floors, furniture, and electronics from the abrasive nature of drywall dust. It’s the final, crucial step in reclaiming your space and ensuring the hard work of removal wasn’t in vain.
The Ultimate Post-Popcorn Ceiling Cleanup Strategy
Cleaning up after popcorn ceiling removal requires a systematic, top-to-bottom approach. The goal is to capture and remove the debris and dust, not just move it around. By dividing the process into distinct phases, you can tackle the overwhelming mess in manageable steps.
Before you begin, ensure you are still wearing your personal protective equipment (PPE), including an N95 respirator or better, safety goggles, and gloves. The fine dust will become airborne again during cleanup, so protecting yourself remains a top priority.
Phase 1: Removing the Heavy Debris
The first step is to get rid of the big stuff. The wet, scraped-off texture that has fallen onto your plastic sheeting is the easiest to handle. Don’t try to vacuum this material, as the moisture and volume can ruin a standard shop vacuum.
Carefully roll up the plastic sheeting from the walls and floors, folding the edges inward to contain the mess. For large rooms, you may need to cut the plastic into smaller, more manageable sections. Place these bundles into heavy-duty contractor bags. If there’s any chance of asbestos, double-bag the debris and check with your local waste management authority for proper disposal procedures.
Phase 2: The Systematic War on Dust
With the bulk of the mess gone, the real challenge begins: eliminating the fine dust. The golden rule is to clean from the top down. This ensures you aren’t re-contaminating surfaces you’ve already cleaned.
Ceilings and Walls
Your first target is the ceiling itself, followed by the walls. A common mistake is to immediately wipe surfaces with a wet cloth, which can turn the dust into a muddy paste that’s even harder to remove. Start with dry methods.
Use a shop vacuum with a soft brush attachment to gently vacuum the ceiling and walls. The brush agitates the dust, allowing the vacuum to suck it up. A HEPA filter in your shop vacuum is absolutely essential; without it, you’ll simply be blowing the finest, most harmful particles back into the air. After a thorough vacuuming, follow up with a slightly damp microfiber cloth or tack cloth to capture any remaining residue. Do not oversaturate the walls, as this can damage unprimed drywall.
Fixtures, Trim, and Windows
Dust settles everywhere. Pay close attention to light fixtures, ceiling fan blades, window sills, door frames, and baseboards. Use the brush attachment on your vacuum for these areas, followed by a wipe-down with a damp cloth. This is a tedious but necessary step for a truly clean room.
This is also a good time to think about future upgrades. Once the room is clean, you might consider modern lighting. For instance, learning how to attach LED strip lights to concrete can be a great skill for finishing a basement with a newly smoothed ceiling.
Phase 3: Conquering the Floors
The floor, which has caught everything from above, is your final cleaning frontier. The method will depend on the type of flooring you have.
Hard Surfaces (Wood, Tile, Vinyl)
For hard surfaces, never start by mopping. You’ll just be creating a soupy mess. First, sweep gently with a soft-bristled broom to collect the larger particles, but the best first step is to use a shop vacuum with a floor attachment. Vacuum the entire surface thoroughly, getting into every corner.
Once you’ve removed the majority of the dry dust, you can proceed to mop. Use a microfiber mop, which is excellent at trapping fine particles. You may need to mop the floor two or three times, rinsing the mop head frequently in clean water, to completely remove the hazy residue.
Carpeting
If you have carpet, the cleanup is more challenging as the fine dust gets deep into the fibers. A regular household vacuum may not have sufficient filtration and can get clogged. Use a high-quality shop vacuum with a HEPA filter and a beater bar attachment if possible. Vacuum the carpet slowly and in multiple directions to pull up as much dust as possible. For the best results, consider renting a professional-grade carpet cleaner or hiring a professional service after your cleanup is complete.
Don’t Forget the Air: HVAC and Ventilation
One of the most overlooked aspects of post-renovation cleanup is the air quality and the HVAC system. If your system was running at any point during the removal or cleanup, its ducts are likely contaminated.
Your first action should be to replace your HVAC filter immediately. It will be clogged with dust, restricting airflow and circulating particles. After your cleanup is complete and the dust has had a day or two to settle, change the filter again. You should also vacuum the registers and vents in the room. For peace of mind, especially after a large project, you might consider a professional duct cleaning service.
Thinking about larger-scale home improvements after this project is common. Many homeowners move on to other areas, like bathrooms. If you find yourself considering a bathroom remodel, researching options like the Kohler LuxStone price can give you an idea of modern, easy-to-clean shower solutions.
The Final Inspection
Once you believe you are finished, it’s time for the final test. Wait a few hours for any remaining airborne dust to settle. Then, put on a clean pair of dark-colored gloves and wipe your hand across a few surfaces, like a door frame or a windowsill. If your glove comes away dusty, you have more work to do. A final, detailed wipe-down of all surfaces will ensure your room is truly ready for its fresh start.
Properly sealing your home is key to many successful projects. Whether you are containing dust or securing your property, knowing how to fill a gap between a fence post and the house is another example of the small details that make a big difference in home maintenance.
| Tool/Supply | Purpose | Key Recommendation |
|---|---|---|
| Shop Vacuum | Primary tool for removing fine dust from all surfaces. | Must be equipped with a HEPA filter to avoid redistributing dust. |
| N95 Respirator & Goggles | Personal protection from inhaling fine particulate matter. | Wear at all times during cleanup, not just removal. |
| Microfiber Cloths | Trapping the finest dust particles after vacuuming. | Use slightly damp, not wet, to avoid creating mud. |
| Contractor Trash Bags | Disposing of the heavy, wet popcorn ceiling debris. | Use 3 mil or thicker bags to prevent rips and leaks. |
| Soft Brush Attachment | For vacuuming walls and delicate surfaces without scratching. | Essential for the “top-down” cleaning approach. |
| New HVAC Filters | To clean the air and protect your furnace/AC unit. | Replace immediately after cleanup and again a week later. |
| Tack Cloths | Alternative to microfiber for picking up fine dust on smooth surfaces. | Use with a light touch to avoid leaving a waxy residue. |
Moving Forward: A Clean Slate for Your New Ceiling
Cleaning up after removing a popcorn ceiling is a marathon, not a sprint. It requires patience, the right tools, and a methodical approach. By diligently working through these phases, you transform a dusty, chaotic worksite back into a clean, healthy living space.
The reward for your effort is a perfectly clean slate, ready for a flawless application of primer and paint. You’ll be able to enjoy your modern, updated ceiling knowing that no dusty remnants of the past are lurking in the corners or circulating in your air.