How to Address Peeling Paint on Aluminum Fascia Along the Roof Edge?
Peeling paint on aluminum fascia along the roof edge can be an unsightly problem that detracts from your home’s curb appeal and can lead to more serious issues if not addressed promptly.
This article will explore the causes of peeling paint, the steps to repair and repaint the fascia, and preventative measures to avoid future problems. By following this guide, you can restore your aluminum fascia to its former glory and protect your home from potential damage.
You'll Learn About
How to Address Peeling Paint on Aluminum Fascia Along the Roof Edge?
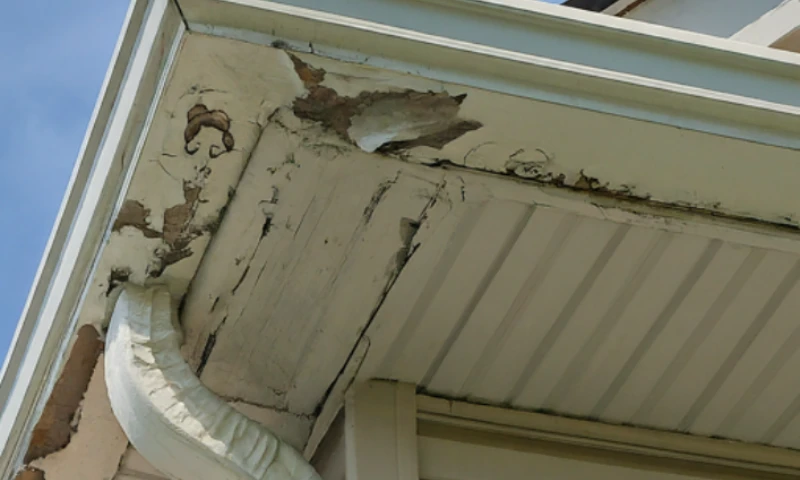
Aluminum fascia, which is often used along roof edges, serves both a functional and aesthetic purpose. It protects the underlying wood structure from water damage and provides a clean, finished look to the roof line.
However, over time, the paint or coating on the aluminum fascia can begin to peel, crack, or fade due to various factors. Addressing this issue promptly is crucial to maintaining the integrity and appearance of your home.
In this comprehensive guide, we will cover the common causes of peeling paint on aluminum fascia, detailed steps for repairing and repainting, and best practices for preventing future peeling.
By understanding the underlying issues and how to effectively deal with them, you can ensure that your aluminum fascia remains in excellent condition for years to come.
Common Causes of Peeling Paint on Aluminum Fascia
1.1 Poor Surface Preparation
One of the primary reasons for peeling paint on aluminum fascia is inadequate surface preparation before painting. If the surface is not properly cleaned and primed, the paint may not adhere correctly, leading to peeling and flaking.
- Dirt and Grease: Contaminants like dirt, grease, and grime can prevent paint from bonding to the aluminum surface.
- Oxidation: Aluminum oxidation forms a thin layer on the surface, which can hinder paint adhesion if not removed.
1.2 Weather Exposure
Exposure to harsh weather conditions can accelerate paint deterioration. Factors such as sunlight, rain, snow, and fluctuating temperatures can cause the paint to expand and contract, leading to peeling over time.
- UV Rays: Prolonged exposure to ultraviolet (UV) rays can break down the paint’s binding agents, causing it to peel.
- Moisture: Water infiltration can seep under the paint, causing it to lift and peel away from the aluminum surface.
1.3 Use of Incorrect Paint
Using the wrong type of paint for aluminum surfaces can result in poor adhesion and premature peeling. It’s essential to use paint specifically formulated for metal surfaces to ensure longevity and durability.
- Acrylic vs. Oil-Based Paint: Acrylic paints are generally more flexible and better suited for metal surfaces than oil-based paints, which can become brittle and crack over time.
1.4 Aging and Wear
Over time, even properly applied paint can begin to wear down due to natural aging and wear. This is a normal process, but regular maintenance can extend the life of the paint.
- Natural Aging: Paint naturally deteriorates over time due to exposure to the elements and general wear and tear.
Steps to Repair and Repaint Aluminum Fascia
2.1 Gather Necessary Materials
Before beginning the repair and repainting process, gather all the necessary materials:
- Scraper or wire brush
- Sandpaper (medium and fine grit)
- Mild detergent and water
- Clean cloths or rags
- Primer for metal surfaces
- Paint specifically formulated for aluminum or metal
- Paintbrushes or rollers
- Painter’s tape
- Drop cloths or plastic sheeting
2.2 Prepare the Surface
Proper surface preparation is crucial for ensuring the new paint adheres well and lasts a long time.
- Clean the Surface: Use a mixture of mild detergent and water to clean the aluminum fascia thoroughly. Remove all dirt, grease, and debris. Rinse with clean water and allow it to dry completely.
- Remove Loose Paint: Use a scraper or wire brush to remove any peeling or loose paint. Be thorough to ensure that all compromised paint is removed.
- Sand the Surface: Sand the entire surface with medium-grit sandpaper to create a smooth and slightly roughened texture for the primer to adhere to. Follow up with fine-grit sandpaper for a smoother finish.
- Clean Again: Wipe down the surface with a clean, damp cloth to remove any dust from sanding. Allow it to dry completely.
2.3 Apply Primer
Priming is a critical step to ensure good adhesion of the paint.
- Choose the Right Primer: Select a primer specifically formulated for metal surfaces. This will help in adhering to the aluminum and providing a good base for the topcoat.
- Apply the Primer: Use a paintbrush or roller to apply a thin, even coat of primer to the aluminum fascia. Make sure to cover all areas, including edges and corners. Allow the primer to dry according to the manufacturer’s instructions.
2.4 Paint the Fascia
After the primer has dried, it’s time to apply the paint.
- Select the Right Paint: Choose a high-quality paint designed for use on metal. Acrylic latex paint is often recommended for aluminum surfaces due to its durability and flexibility.
- Apply the Paint: Apply the first coat of paint using a paintbrush or roller. Make sure to apply thin, even coats to avoid drips and runs. Allow the first coat to dry completely before applying a second coat.
- Apply Additional Coats: Depending on the coverage and color, you may need to apply additional coats. Allow each coat to dry thoroughly before applying the next.
2.5 Finishing Touches
Once the paint is completely dry, remove any painter’s tape and clean up your work area.
- Inspect for Flaws: Check for any missed spots or imperfections and touch them up as necessary.
- Clean Up: Dispose of any debris and clean your brushes and tools.
Preventative Measures to Avoid Future Peeling
3.1 Regular Maintenance
Regular maintenance can help prevent future peeling and extend the life of your paint job.
- Inspect Regularly: Conduct regular inspections of your aluminum fascia to catch any early signs of peeling or damage.
- Clean Periodically: Clean the fascia periodically to remove dirt, debris, and contaminants that can affect the paint.
3.2 Protect from Weather
Take steps to protect your fascia from harsh weather conditions.
- Use Quality Paint: Always use high-quality paint and primer designed for metal surfaces to withstand the elements.
- Consider Overhangs: If possible, extend roof overhangs to provide additional protection to the fascia from direct exposure to rain and sunlight.
3.3 Address Issues Promptly
Address any issues as soon as they arise to prevent them from worsening.
- Touch Up Paint: Promptly touch up any areas where the paint is chipped or damaged to prevent further peeling.
- Repair Damage: Repair any physical damage to the fascia or roof that could contribute to peeling paint.
Informative Table: Common Causes and Solutions for Peeling Paint on Aluminum Fascia
| Problem | Cause | Solution |
|---|---|---|
| Poor Surface Preparation | Dirt, grease, oxidation | Thoroughly clean and sand surface before painting |
| Weather Exposure | UV rays, moisture | Use high-quality, weather-resistant paint and primer |
| Incorrect Paint | Using paint not suited for metal | Use paint specifically formulated for metal surfaces |
| Aging and Wear | Natural deterioration over time | Regular maintenance and timely touch-ups |
| Moisture Infiltration | Water seeping under paint | Ensure proper sealing and use water-resistant coatings |
Conclusion
Peeling paint on aluminum fascia can be a frustrating and unsightly problem, but with proper understanding and action, it can be effectively addressed. By identifying the causes of peeling, properly preparing the surface, using the right materials, and following preventative measures, you can restore and maintain the beauty and integrity of your aluminum fascia.
Regular maintenance and timely repairs are essential to ensure that your fascia remains in good condition. By taking proactive steps and addressing issues promptly, you can prevent future problems and enjoy a well-protected and visually appealing roof edge for years to come.