Washer Overfilling? Here’s How It Knows When to Stop Filling
Ever loaded your washing machine, started a cycle, and walked away, only to return to a sudsy flood spreading across your laundry room floor? An overflowing washer is a frustrating and messy problem that can cause significant water damage. But it also raises a curious question: how is your washing machine supposed to know when it’s full? You don’t measure the water yourself, and it isn’t based on a simple timer, since water pressure can vary. The answer lies in a clever, yet simple, system of components working together to ensure the perfect water level for every load.
Understanding this process is not just for the curious. When your washer starts to overfill or underfill, knowing how the system works is the first step toward diagnosing the problem and finding a solution. Often, the issue is something you can troubleshoot yourself, saving you the cost and hassle of a professional repair call. This guide will demystify the inner workings of your washing machine’s water level controls and empower you to tackle common filling problems head-on.
You'll Learn About
The Unseen Hero: Your Washer’s Water Level Control System
The magic behind your washing machine’s ability to stop filling at just the right moment isn’t magic at all—it’s physics. The entire process is managed by a key component called the water level pressure switch. This small device acts as the brain of the filling operation, using air pressure to sense how much water is in the drum. It’s a surprisingly reliable system that prevents overflows and ensures your clothes are washed with the optimal amount of water.
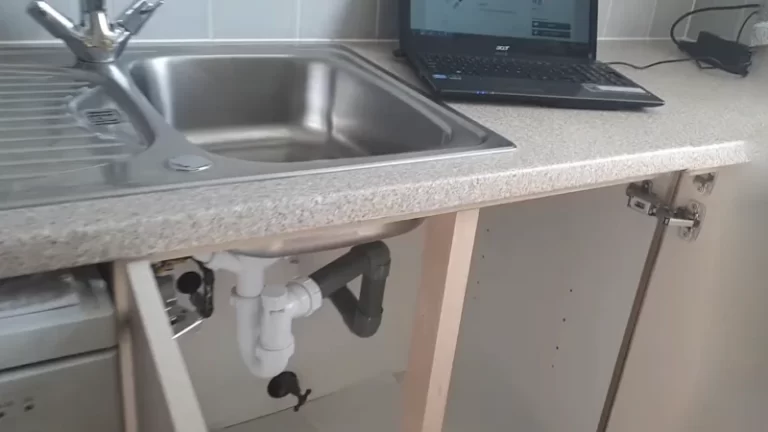
Here’s a step-by-step breakdown of how this ingenious system functions. First, the pressure switch is connected to the bottom of the washer tub by a thin, flexible tube, often called a pressure hose. As water enters the tub, the air trapped inside this hose gets compressed. The more water that flows in, the higher the pressure of the trapped air becomes. This rising air pressure pushes against a diaphragm inside the pressure switch. Once the pressure reaches a specific, predetermined level, it triggers the switch, which then sends an electrical signal to the main control board. The control board instantly shuts off the water inlet valve, stopping the flow of water and allowing the wash cycle to begin.
Key Components of the Water Filling System
To fully grasp how your washer controls its water level, it’s helpful to know the main players involved. Each part has a specific role, and a failure in any one of them can lead to filling issues like overflowing or not filling at all. This system is a great example of simple mechanics and electronics working in harmony to perform a crucial task.
The three primary components are the water inlet valve, the pressure switch, and the pressure hose that connects them. The water inlet valve is the gateway for water entering your machine. The pressure switch is the sensor that monitors the water level. The pressure hose is the communication line, relaying information from the tub to the switch via air pressure. When one of these parts fails, the system breaks down, leading to the frustrating laundry problems many homeowners face. Fortunately, understanding their functions makes troubleshooting much easier.
Problem #1: The Washer That Won’t Stop Filling
An overflowing washing machine is a homeowner’s nightmare. It’s a messy, stressful situation that can lead to water damage if not addressed quickly. When your washer doesn’t stop filling, it’s a clear sign that something in the water level control system has failed. The problem is typically caused by one of three culprits: a faulty water inlet valve, a malfunctioning pressure switch, or a blocked pressure hose.
Before you start troubleshooting, the first and most important step is to shut off the water supply to the machine to prevent a flood. You can then run a drain or spin cycle to empty the excess water from the tub. Once the immediate crisis is averted, you can begin to investigate the cause. Identifying the right component is key to fixing the problem efficiently and preventing it from happening again.
Diagnosing an Overflowing Washer
To pinpoint the cause of the overflow, you can perform a simple diagnostic test. Start a fill cycle and let the washer begin to take on water. While it’s filling, carefully unplug the machine from the wall outlet. If the water continues to flow into the tub even with the power off, the water inlet valve is defective and needs to be replaced. A properly functioning valve should immediately shut off when it loses power. If it doesn’t, it’s stuck in the open position.
If unplugging the machine successfully stops the water flow, the problem lies elsewhere. The issue is likely with the pressure switch or the pressure hose. In this case, the electrical circuit that controls the valve isn’t getting the signal to shut down. This means either the pressure switch isn’t sensing the correct water level, or the signal isn’t being sent because of a blockage in the hose.
Solution: Inspecting and Repairing the Water Level System
Once you’ve determined whether the issue lies with the water inlet valve or the pressure switch system, you can proceed with a more detailed inspection. For issues related to the pressure switch, you’ll need to access the internal components of your washing machine. Always remember to unplug the appliance from the power source before beginning any repair work for your safety.
Accessing the pressure switch and hose usually involves removing the top or back panel of the washer. The switch is a small, round component typically located near the top of the machine, with a thin rubber tube and several wires connected to it. A visual inspection is often enough to identify the problem. Look for any obvious signs of damage, blockages, or loose connections that could be causing the malfunction.
Checking the Pressure Hose for Blockages
The pressure hose is a common point of failure. Over time, it can become clogged with detergent residue, lint, and other debris. A blockage prevents air from being compressed properly, so the pressure switch never receives the signal that the tub is full. To check for a blockage, carefully disconnect the hose from the pressure switch.
Gently blow through the tube. If you meet resistance, there’s likely a blockage that needs to be cleared. You can also listen for the sound of air bubbling through any water remaining in the bottom of the tub, which indicates the hose is clear. Also, inspect the hose for any cracks, holes, or kinks that could allow air to escape. A damaged hose will need to be replaced to restore proper function.
Testing the Pressure Switch
If the pressure hose is clear and in good condition, the next step is to test the pressure switch itself. This component can fail electrically, causing it to send incorrect signals to the control board. To test the switch, you’ll need a multimeter, a tool that measures electrical continuity.
Disconnect the wires from the switch terminals—it’s a good idea to label them or take a picture first so you can reconnect them correctly. Set your multimeter to the continuity setting and test the terminals in pairs. The exact testing procedure can vary by model, but generally, you’ll be checking for a change in continuity when you apply pressure by blowing into the switch’s hose connection port. If the switch fails to show the correct continuity changes, it is faulty and must be replaced.
Problem #2: The Washer That Won’t Fill Enough
Just as frustrating as an overflowing washer is one that doesn’t fill with enough water. When there isn’t enough water in the tub, your clothes may not get properly cleaned, and detergent may not dissolve fully, leaving residue on your laundry. This issue can be caused by several factors, ranging from simple external problems to internal component failures. Underfilling can be a sign that your machine is struggling to get the water it needs or that its sensors are malfunctioning.
Common culprits for an underfilled washer include clogged water inlet screens, kinked hoses, or a faulty water level switch. Low water pressure in your home can also be a contributing factor. Fortunately, many of these issues are relatively easy to diagnose and fix yourself. By systematically checking each potential cause, you can often resolve the problem without needing a professional.
Troubleshooting Low Water Levels
Start with the simplest potential problems first. Ensure that the hot and cold water supply valves behind the washer are fully open. Next, check the fill hoses for any kinks or twists that could be restricting water flow. These simple external checks can sometimes solve the problem instantly.
If the water supply and hoses seem fine, the next place to look is the water inlet valve screens. These small mesh filters are located where the hoses connect to the washer and are designed to catch sediment and debris from your water supply. Over time, they can become clogged, severely restricting the amount of water that can enter the machine. To clean them, turn off the water supply, unscrew the hoses from the back of the washer, and gently pry out the screens. A thorough rinse under a faucet is often all that’s needed to clear them.
Solution: Calibrating and Replacing Components
If external checks don’t resolve the underfilling issue, the problem likely lies with the pressure switch. A faulty switch might be signaling the control board to shut off the water too early. While pressure switches are generally not adjustable on modern machines, understanding their function can help you confirm if a replacement is necessary.
In some older models, the pressure switch could be calibrated by turning a small screw, but this is not recommended for most users as it can easily lead to overfilling if done incorrectly. For most modern washers, if the pressure switch is malfunctioning and causing consistent underfilling, the most effective solution is to replace the part. This ensures the washer operates according to the manufacturer’s specifications for water usage and cleaning performance.
When to Consider Professional Calibration
While DIY replacement of a pressure switch is manageable for many, some advanced washing machines have electronic sensors that may require professional calibration. If your washer has multiple water level settings and consistently fails to fill to the correct level for different load sizes, it might be due to a sensor that has drifted out of alignment. A professional technician will have the diagnostic tools to assess the sensor’s accuracy and perform the necessary adjustments.
This ensures optimal performance and water efficiency. If you’ve tried all the standard troubleshooting steps and are still experiencing issues, or if you’re not comfortable with making repairs yourself, calling a professional is the safest bet. They can accurately diagnose complex issues involving the main control board or other electronic components.
| Problem Symptom | Most Likely Cause | Recommended Solution |
|---|---|---|
| Washer overflows with water. | Faulty Water Inlet Valve, Blocked Pressure Hose, or Defective Pressure Switch. | Test inlet valve by unplugging the machine while filling. Inspect and clear the pressure hose. Test and replace the pressure switch if necessary. |
| Washer does not fill with enough water. | Clogged Inlet Screens, Kinked Hoses, or Faulty Pressure Switch. | Clean inlet screens. Straighten fill hoses. Replace the pressure switch if it’s sending a premature signal. |
| Washer fills with water then stops mid-cycle. | Faulty Pressure Switch or Main Control Board issue. | Test the pressure switch for electrical failure. If the switch is good, the problem may be with the control board, requiring professional diagnosis. |
| No water enters the washer at all. | Water supply is off, Clogged Inlet Screens, or Defective Water Inlet Valve. | Ensure water valves are open. Clean inlet screens. Test and replace the water inlet valve if it’s not opening. |
Preventative Maintenance for a Healthy Washer
To avoid future filling problems, a little preventative maintenance can go a long way. Periodically check your washer’s fill hoses for any signs of wear, such as cracks or bulging. It is also wise to inspect and clean the water inlet valve screens at least once a year, especially if you live in an area with hard water, as mineral buildup can cause blockages over time.
Using the correct amount and type of detergent can also help. High-efficiency (HE) washers require HE detergent, as regular detergents can create excessive suds that may interfere with the pressure sensor’s ability to get an accurate reading. Taking these simple steps can help ensure your washing machine operates reliably for years to come, keeping your laundry routine running smoothly and your floors dry. While some plumbing issues require professional help, knowing what to look for with your washer can prevent bigger problems, like needing to know if you can drive over a drain pipe in your yard after a major leak.