How Do You Hang Christmas Lights Outside?
Christmas is a time of year when the spirit of giving and helping others is celebrated. It is a time of year when families come together, friends hang out, and gifts are shared. However, with all that going on, it is also the time when the home becomes the center of attention, as the lights and decorations of Christmas are placed on the outside.
It’s that time of year again. We’re all ready to hang our Christmas lights. But how do you hang your Christmas lights outside when they are really heavy and you don’t want to injure your back?
You'll Learn About
How to hang Christmas lights
Your job: hang the holiday lights outside. Unlike Christmas lighters and decorators in the past, you will resist the urge to be impulsive and buy too many lamps, not follow instructions, install lamps during a storm, stand at the very top of a ladder, or lean too far forward and to the light as you balance on your sloping roof.
If this is your first time, keep it simple. You can always add to your Christmas lights collection each year by adding more rows, outlining architectural features, or wrapping lights around trees and branches. That way, you’ll get an idea of what works, what doesn’t, what you like, and what you don’t do. By the way, do you know the safe way to use a ladder?
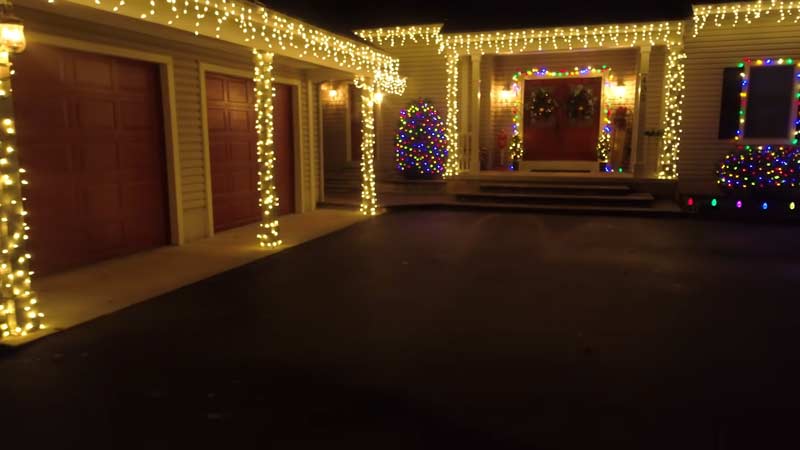
Take a picture across the street
View your home from the perspective of a passerby or driver, as from their vantage point, others will view your Christmas decorations and lights. Unless you dress up as an elf, hire the local high school glee club to perform, and hand out free cocoa, people probably won’t leave their cars to interact with your holiday lights and yard image.
If you step back and look at your home, you can see it in its entirety: the entire house, yard, porch, etc., along with the rooflines, windows, and other architectural details you may want to outline in lights. Taking a picture will give you a rough idea of where you want to hang your Christmas lights and display holiday blow molding decorations and garden props.
For experienced, diehard holiday lighting enthusiasts (introduced through the Griswold family in National Lampoon’s Christmas Vacation and continued in every other holiday movie since), holiday lighting computer programs such as Light-O-Rama are available to design displays and synchronize lights and music.
But first, you need to learn the basics of hanging holiday lights.
Collect tools and supplies
Seriously, that thing about safety? Every local newspaper has a story in the archives of a house lighter that fell while putting up Christmas lights. Just because you’re doing something you might consider neighbor, festive, or even sacred doesn’t mean a higher being will protect you in the process. That said, it’s time to gather supplies and tools to hang Christmas lights outside and get the job done quickly and safely.
Required tools and materials
- An extension ladder
- Stair charger
- Plastic light clips
- Retractable Tape Measure
- Extension cords for outdoor use: medium or heavy duty
Optional
- extension pole
- Plastic Zippers
- Timer
- Power bet
Measure the area where the lights will hang
With a reliable retractable tape measure in hand, estimate the width or height of the area you want to hang light strands on. Make notes on your home’s photo printout so you know how many yards of light strands are needed for each section.
When you’re starting out, it’s best to hang lights in an area of your home, such as the roofline, or by the front door or windows. Add a section every year, rather than all in one season.
If you want to avoid an extra trip up the ladder and if your roofline is flat, another way to estimate the width or length of the area where you want to hang the lights is by measuring the width of the house at the bottom. While not accurate to the centimeter, it will give you a better idea of how many yards of light strands will be needed.
Please make sure the lighting is indoor/outdoor use
When buying light strands, look for a box marked “indoor/outdoor use.” Why? They are made to withstand the elements. You don’t want the more fragile indoor tree lighting decorating anything outdoors, but it will stop working within a week or two. Also, use lamps that are UL (Underwriters Laboratories) certified.
Test light strands before hanging
When unpacking light strands, look for broken or missing light bulbs. Also, check the cord for worn or cut wiring. Untangle light strands and cords.
Plug the cord into an outlet to make sure all lights are working. Many strands come with replacement bulbs if you keep them where you can find them. The older light bulbs are more likely to all stop working if one or two bulbs burn out. LED lamps, on the other hand, usually do not have the same problem and also last longer and are more energy efficient.
Remember: Do not combine LEDs with incandescent bulbs on the same circuit.
Plastic light clips
In his book Holiday Hero: A Man’s Manual for Holiday Lighting, author/lighting designer Brad Finkle has nothing but praise for plastic light clips.
“Whoever invented plastic light clips needs their own shrine in the Holiday Hero Hall of Fame,” he writes. “Luckily, these devices replaced the old hammer-and-nail-on-the-roofline technique a few years ago. They can, quite frankly, take hours of your installation and removal time.”
While the traditional method of installing holiday lights has been using nails or attaching cords with a staple gun, try to avoid it this way even if your father, grandfather, or Mr.Diy Handyman’s neighbor insists this is the only way is to hang lights. Plastic light clips make the job so much easier.
Oh – and the manual is for both men and women – don’t let that title discourage you!
Clamp the light strand in the clip
To install, snap the LED light string into the jaws of the clip, then slide the other end of the clip onto the roofline – in this case, a rain gutter. (Which, judging by the photo, should be cleaned up soon!)
While on the roof or ladder, try to work from the top down. Also, hang holiday lights when it is still light outside. Roofs, ladders, and darkness are not a safe mix.
Attach the clip to the roofline
Clip the plastic clip to gutters, eaves, siding, or railing to hang light strands. These flexible plastic clips can hold any type of light string, including icicles and the larger C7 and C9 bulbs. Since they are not hard plastic, these all-in-one plastic light clips should last a few years or so.
Excess recording for even distance
Since LED light strands come with a foot or so of excess unlit wire, loosely coil this extra cord and snap it into one of the unused portions of the clip. Then roll the wire so that the light distance is even. Place it according to the number of lights; for example, for every four or so lights you would attach it to a light clip. Clips also work on eaves. The clips are quite versatile.
See that gutter with the leaves and debris? While not worthy of Santa’s list of clogged and dirty gutters, it can certainly be cleaned, along with the downspouts, preferably before the lights are attached. This must be done before attaching the lights.
Clip-on light strings along the roofline
The flexible plastic light clips can be used for rooflines, siding, decks, and gutters. Plastic holiday clips can be found at hardware or big-box stores.
To continue the job, clip light clips onto the gutter or eaves every 6 to 10 inches so the lights don’t swing or hang. If you measured accurately, you should have enough lights (or a little extra) to span the width of your roofline. The excess can be attached around the corner of the eaves or roofline.
Fix lights with plastic zip ties
For attaching light strings to areas such as balconies or porch railings, plastic zip ties also work well. Zippers are strong, weather resistant, adjustable, and easy to remove.
Insert the last strand into the extension cord
After the wires are installed, insert the male end of the last wire into an extension cord. Then plug the extension cord into an outdoor outlet, preferably controlled by an on/off switch, automatic timer, or app.
You have holiday lights!
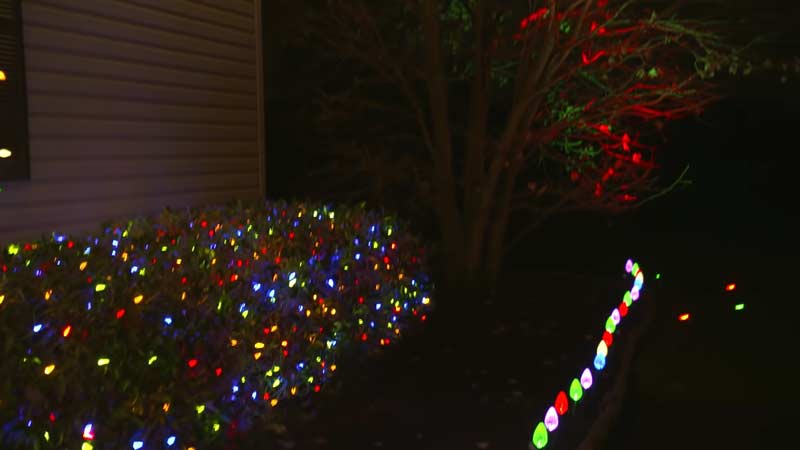
Turn it on or plug it in, and you’ve got holiday lights! Using LEDs, like these colored icicle lights, will save energy and lower your electric bill. You’ve got your base this year – next year you can add a timer, wire frame garden statues, inflatables, retro lighted blow molding figures, net lighting for shrubs, rope lighting for logs and win the ‘most spectacular light display’ prize for your neighborhood.
But for now, enjoy the simple pleasures of the season.
Frequently Asked Questions
What Is the Right Way to Use Christmas Lights?
With the holiday season upon us, you’ll likely see people doing crazy things with Christmas lights. Some folks put them up before Halloween, others wait until December to get the Christmas lights up. The important thing is to make sure you are safe and your lights are securely fastened to prevent them from blowing away.
However, you don’t have to use a ladder. You can use a ladder if you want, but it’s safer to use a fire escape, or even a chair or a stepladder. Another thing to keep in mind is that you want to use lights with batteries, not the power cord. That’s because you don’t want to be running extension cords around your home.
Finally, you want to use lights that are weather-resistant. The good news is that you can find LED lights that are weather-resistant, and that can make a difference in how much work you have to do.
How Do You Keep Your Christmas Lights From Getting Tangled?
If you have ever had a friend or family member try to hang Christmas lights by themselves, you know that it’s a very frustrating and dangerous process.