Hardwire Your Microwave: The Ultimate Guide to a Cleaner Kitchen and Safer Installation
You’re renovating your kitchen, and every detail matters. The sleek new cabinets are in, the countertops gleam, and the over-the-range microwave fits perfectly. But then you see it: a clumsy power cord dangling down, waiting to be plugged into a jarringly visible outlet. This single detail can disrupt the clean, custom look you’ve worked so hard to achieve.
The problem is common, but the solution feels daunting for many. Hardwiring the microwave—connecting it directly to your home’s electrical system—offers a seamless, professional finish. Yet, the thought of cutting wires and navigating electrical codes causes many homeowners to hesitate, opting for the less elegant but simpler plug-in method.
You'll Learn About
Why Hardwire a Microwave? Unpacking the Real Benefits
While the primary motivation to hardwire a microwave is often aesthetic, the advantages go far beyond just hiding a cord. A direct connection provides a more secure and often safer installation. Understanding these benefits can help you decide if this upgrade is the right choice for your kitchen project.
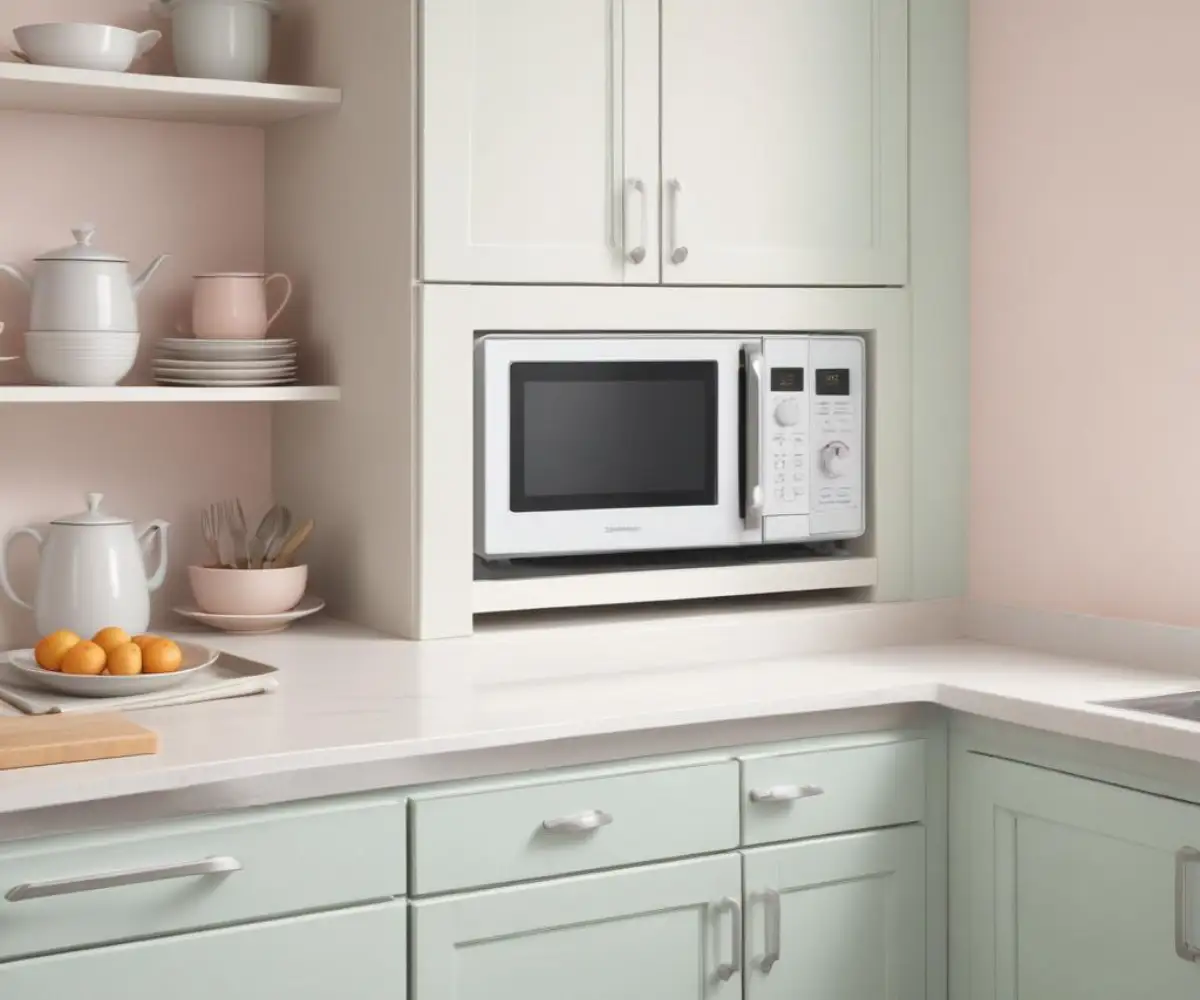
The most immediate advantage is achieving a flawless, integrated appearance. A hardwired microwave sits flush against the wall or cabinet without any visible cords or outlets, contributing to a high-end, custom-built look. It’s a small detail that makes a significant impact on the overall design of your kitchen.
Beyond looks, a hardwired connection is inherently more secure. Plugs can become loose in their outlets over time due to vibrations or accidental tugs, creating a potential arc fault—a dangerous electrical event that can lead to a fire. A hardwired connection within a secured junction box minimizes this risk, providing a stable and reliable power supply. In some commercial or specialized installations, local electrical codes may even require it.
The Space-Saving Advantage of Hardwiring
Another practical benefit is the conservation of space. Installing an outlet for a plug-in microwave, typically inside an upper cabinet, consumes valuable storage real estate. By opting for a hardwired setup, you eliminate the need for a bulky receptacle and its housing, freeing up that cabinet space for dishes, spices, or other kitchen essentials.
This method ensures your appliance is not just visually integrated but also functionally efficient. Every inch of storage is precious in a kitchen, and hardwiring is a smart strategy to maximize it.
Hardwire vs. Plug-In: A Head-to-Head Comparison
Choosing between hardwiring and using a standard plug involves weighing factors like aesthetics, safety, cost, and installation complexity. While a plug-in installation is straightforward, hardwiring offers a permanence and polish that many homeowners desire. This table breaks down the key differences to help you make an informed decision.
| Feature | Hardwired Microwave | Plug-In Microwave |
|---|---|---|
| Aesthetics | Completely hidden wiring for a seamless, custom look. | Visible cord and outlet, often inside a cabinet. |
| Safety & Reliability | More secure connection, reducing the risk of loose plugs and arc faults. | Connection can loosen over time; dependent on outlet quality. |
| Installation Complexity | Requires electrical knowledge; may require a professional. | Simple DIY task; just plug it in. |
| Cost | Higher initial cost if an electrician is hired. | Lower initial cost; no professional help needed for plugging in. |
| Reversibility | More permanent; requires electrical work to disconnect. | Easily unplugged for repair, replacement, or moving. |
| Code Compliance | Meets or exceeds code requirements when installed correctly. | Meets code, but requires a dedicated circuit and accessible outlet. |
Before You Begin: Critical Pre-Installation Checklist
Proper preparation is the key to a safe and successful hardwiring project. Before you even think about touching a wire, it’s crucial to verify your appliance’s compatibility, understand your local electrical codes, and ensure your home’s wiring is up to the task. Rushing this stage can lead to dangerous mistakes and costly repairs.
First, confirm your microwave can be hardwired. Not all models are designed for this type of installation. Check the owner’s manual or the manufacturer’s website for specific instructions; some appliances will explicitly state if they are “hardwire-ready” or if doing so will void the warranty.
Next, familiarize yourself with the National Electrical Code (NEC) and any local amendments. These codes are in place to ensure safety. A core requirement for over-the-range microwaves is a dedicated 120-volt circuit, typically protected by a 20-amp breaker. Sharing a circuit with other appliances can lead to overloads and tripped breakers.
Assess Your Existing Electrical Circuit
The circuit is the electrical pathway from your breaker panel to the appliance. A microwave is a high-power device that demands a dedicated circuit to operate safely. If you’re replacing an old range hood, the existing wiring might be on a 15-amp lighting circuit, which is insufficient. You must verify that the circuit you intend to use is rated for 20 amps and uses the appropriate wire gauge (12-gauge wire for a 20-amp circuit). Understanding your home’s power systems is fundamental, whether you’re installing a microwave or considering a major upgrade like a 110V to 220V EV charger, as both rely on proper circuit capacity for safety and performance.
Finally, gather all the necessary tools and materials. This includes a non-contact voltage tester, wire strippers, wire nuts, a screwdriver, and an appropriate electrical box (junction box) and cable. Having everything on hand before you start prevents interruptions and ensures a smooth workflow.
Step-by-Step Guide to Hardwiring Your Microwave
With your preparation complete, you can move on to the installation. This process requires careful attention to detail and an unwavering focus on safety. Follow these steps methodically to ensure a secure and professional-quality result.
Step 1: SAFETY FIRST – Turn Off the Power. Before any electrical work, go to your breaker panel and shut off the power to the circuit you’ll be working on. Use a non-contact voltage tester at the installation site to confirm the wires are completely dead. Test all wires—black, white, and ground—to be absolutely certain.
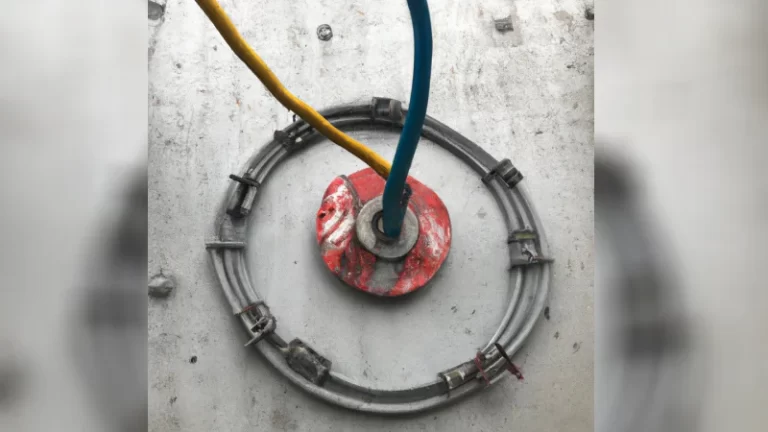
Step 2: Prepare the Microwave and Electrical Box. If your microwave came with a power cord, you’ll need to remove it. Access the appliance’s internal junction box, disconnect the cord’s wires, and remove the strain relief holding it in place. Then, install a new cable clamp in its place to secure the armored cable (BX or MC) or Romex wire you’ll be connecting.
Making the Connections
Step 3: Run and Secure the Electrical Cable. Route the electrical cable from the power source in your wall or ceiling into the cabinet where the microwave will be. Secure the cable to a junction box mounted inside the cabinet. Leave about 6-8 inches of wire extending from the box for easier connections.
Step 4: Connect the Wires. Strip about 3/4 inch of insulation from the ends of each wire from both the house wiring and the microwave’s wiring. Match the wires by color: connect the black (hot) wire from the house to the black wire from the microwave, the white (neutral) wire to the white wire, and the bare copper or green (ground) wire to the green wire. Secure each connection tightly with a wire nut, turning it clockwise until it’s snug. Gently tug on each wire to ensure it is secure.
Step 5: Mount the Microwave and Finalize. Carefully lift the microwave into place and mount it according to the manufacturer’s instructions. Tuck the wiring neatly into the junction box and secure the cover plate. Once everything is in place, you can return to the breaker panel, turn the power back on, and test your newly installed microwave.
Common Mistakes to Avoid (And How to Fix Them)
Hardwiring an appliance is a project where small mistakes can lead to big problems, including electrical shorts and fire hazards. Being aware of common pitfalls is the first step toward avoiding them. Overlooking these details can compromise the safety and functionality of your installation.
One of the most dangerous errors is connecting the microwave to the wrong circuit. Tapping into a general lighting or countertop receptacle circuit is a violation of most electrical codes and is unsafe. Always ensure the microwave is on its own dedicated 20-amp circuit. If one isn’t available, you must run a new line from the breaker panel, a task often best left to a professional.
Another critical mistake is using an incorrect wire gauge. A 20-amp circuit requires 12-gauge copper wire. Using thinner 14-gauge wire, which is standard for 15-amp circuits, can cause the wire to overheat under the microwave’s load, creating a serious fire risk. Always match the wire gauge to the circuit’s amperage.
The Importance of Secure Connections
Loose connections are a hidden danger. Wire nuts that are not tightened sufficiently can allow wires to come apart or create tiny gaps where electricity can arc between them. This arcing generates intense heat and is a leading cause of electrical fires. After twisting on a wire nut, always give each wire a gentle pull to confirm it’s securely held. All splices must be contained within an approved, accessible junction box; never leave them exposed in a wall or cabinet.
Finally, the single most critical safety step is to always verify the power is off. Never trust a breaker’s label alone. Use a non-contact voltage tester to check the wires right before you touch them. Skipping this step can have fatal consequences.
Beyond the Basics: Future-Proofing and Advanced Tips
A successful installation isn’t just about getting the appliance to work—it’s also about thoughtful planning for the future. Incorporating a few advanced techniques can make future maintenance easier and even add modern functionality to your kitchen setup. These are the details that elevate a standard installation to a professional one.
When installing your junction box, consider using a larger 4×4-inch box instead of a standard single-gang box. The extra space makes it much easier to arrange the wires without overcrowding, which can damage insulation. Also, leave a “service loop” by providing a few extra inches of cable inside the wall or cabinet. This slack can be invaluable if you ever need to replace the microwave or rework the connection in the future.
A truly forward-thinking approach involves considering smart home integration. A dedicated, hardwired circuit can be more easily equipped with a smart switch or relay. This allows you to control the microwave via voice commands or a smartphone app, monitor its energy consumption, or even set up automated safety shut-offs. It’s a modern touch that adds significant value and convenience.
An Expert Tip for Quieter Operation
Here’s a technique rarely discussed in standard DIY guides: acoustic and vibration dampening. Over-the-range microwaves, with their powerful fans and motors, can generate noticeable vibrations and noise that transfer through your cabinetry. To mitigate this, place a thin cork or rubber mat on the bottom of the cabinet shelf before lifting the microwave into its final position. This simple addition acts as a buffer, absorbing vibrations and leading to a quieter kitchen environment.
This focus on the small details that improve the user experience is what sets a high-quality home improvement project apart. It’s about creating a space that is not only functional and beautiful but also comfortable to live in.
When to Call a Professional Electrician
While hardwiring a microwave can be a rewarding DIY project, it’s crucial to recognize its limitations and prioritize safety above all else. Electrical work carries inherent risks, and there are specific situations where calling a licensed professional is not just recommended, but essential. Knowing when to step back is a sign of a smart homeowner.
If you are even slightly unsure about any step of the process, it’s time to call an electrician. Your safety and your home’s integrity are worth more than the savings from a DIY project gone wrong. A professional can complete the job quickly, safely, and in full compliance with all codes.
Clear Signs You Need an Expert
There are several red flags that indicate you should hire a professional. If you open the wall and discover old wiring, such as knob-and-tube or aluminum wiring, do not proceed. These systems require special handling to be connected safely to modern copper wiring. Similarly, if you’ve determined that you need a new dedicated circuit run from your main breaker panel, this is a job for a licensed electrician.
Furthermore, if your home’s electrical panel is already full or seems disorganized and poorly labeled, it’s best to have an expert assess the situation. They can determine if your system can handle the new load and perform any necessary upgrades. The cost of hiring an electrician is a small investment for the peace of mind that comes with knowing the job was done right.
Conclusion: A Project Worth the Effort
Hardwiring a microwave is more than just a simple upgrade; it’s a finishing touch that speaks to quality and attention to detail in your kitchen. By replacing a visible cord with a direct, hidden connection, you achieve a clean aesthetic, enhance electrical safety, and gain valuable cabinet space. The result is a seamless integration that elevates the entire room.
While the project requires careful planning and a healthy respect for electrical safety, it is an achievable goal for a homeowner with the right knowledge and tools. By following a methodical approach—verifying compatibility, adhering to electrical codes, and double-checking every connection—you can successfully and safely complete this rewarding task. For a truly professional and polished kitchen, hardwiring is a detail that makes all the difference.