Hanging a Door Without a Frame: The Ultimate Guide to a Flawless, Modern Finish
Traditional door frames, with their bulky trim and pronounced seams, have been a standard feature in homes for centuries. But in modern design, they can feel like a visual interruption—a bulky necessity that breaks the clean, seamless lines of a wall. This interruption is the core problem for anyone chasing a minimalist, high-end architectural look.
Achieving a “frameless” door, where the door panel appears to float flush with the wall, is the ultimate solution. However, the process seems daunting, reserved for expert installers and high-budget projects. This guide demystifies the process, providing an actionable roadmap to ditching the trim for good.
You'll Learn About
Why Ditch the Frame? The Allure of the Invisible Door
The primary driver behind frameless doors is aesthetics. By eliminating the casing, the door becomes an integrated part of the wall, creating a continuous, uninterrupted surface. This technique makes spaces feel larger, cleaner, and more intentional, elevating the architecture from standard to stunning.
This design choice is a hallmark of modern and minimalist interiors, where every line and detail is carefully considered. A frameless door isn’t just a functional object; it’s a design statement that communicates sophistication and an appreciation for detail. The seamless look allows wall treatments, paint colors, and textures to flow unbroken, creating a powerful and cohesive visual impact.
Understanding Frameless Doors: It’s Not Magic, It’s Mechanics
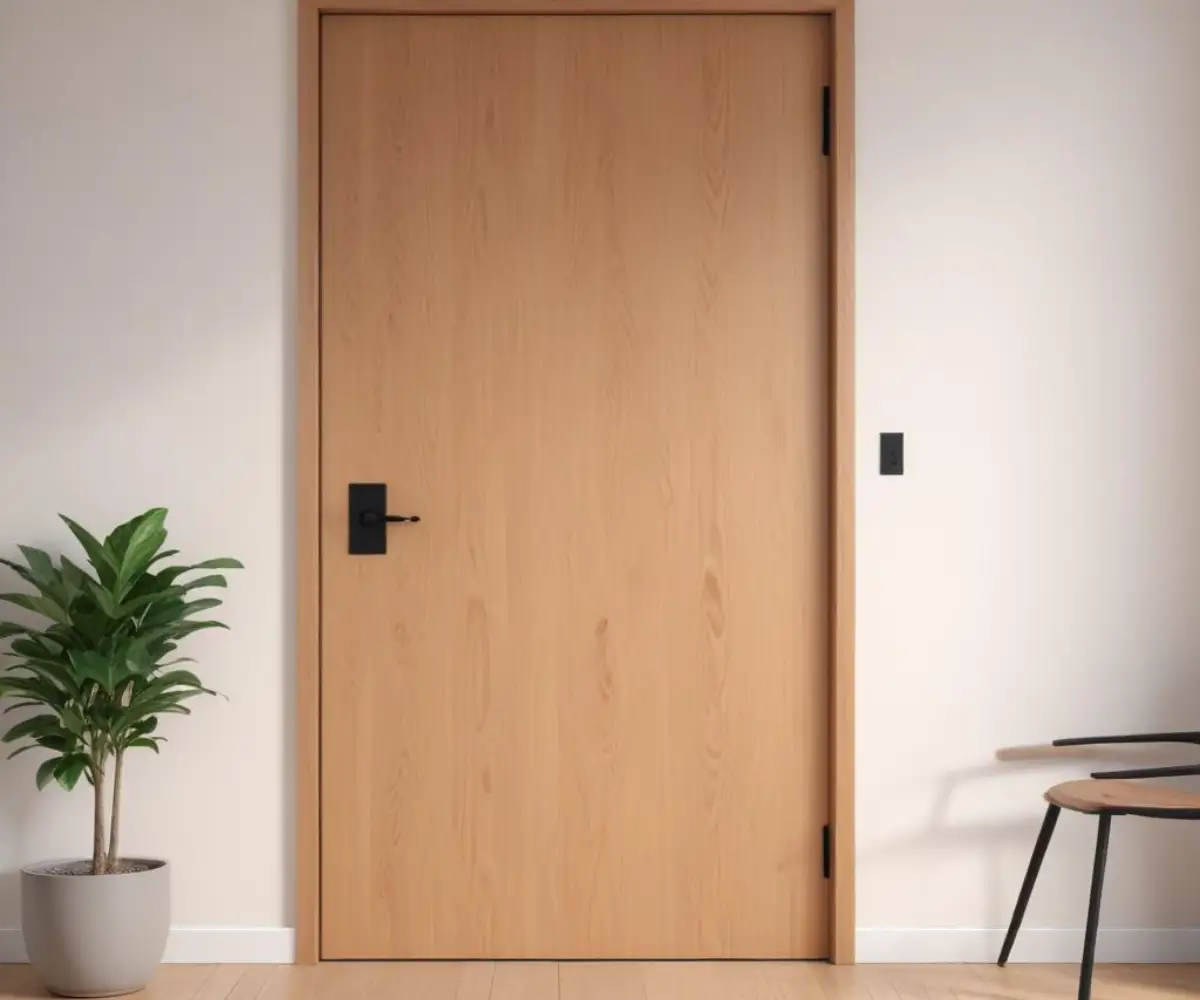
The term “hanging a door without a frame” is slightly misleading. The door still has a frame; the critical difference is that the frame is concealed within the wall, making it invisible once the wall is finished. This creates the illusion of a door suspended directly in the wall.
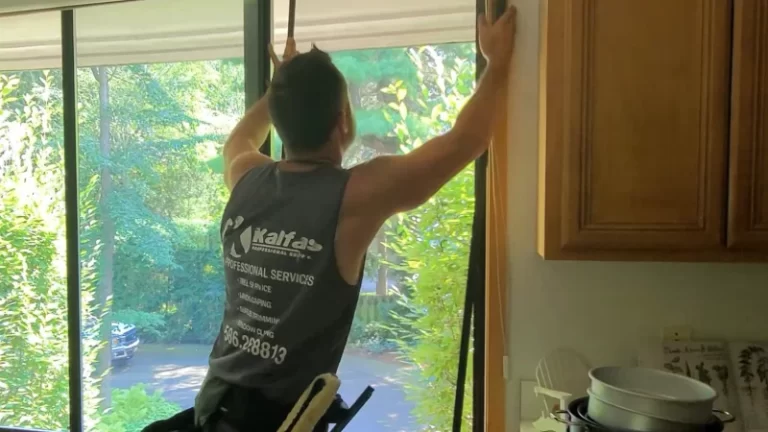
The most reliable and common method to achieve this is through a concealed door frame system. These are specialized kits, typically made from steel or aluminum, that are installed into the rough opening before the drywall. The drywall is then installed up to the edge of the metal frame, and the joint is finished with plaster or compound, completely hiding the frame from view. This integrated approach ensures stability, durability, and a perfect finish.
The Heart of the System: Specialized Hardware
A true frameless look relies on high-quality, specialized hardware. 3D adjustable concealed hinges are essential, as they are mortised into the door and the hidden frame, becoming completely invisible when the door is closed. These hinges allow for micro-adjustments in three directions (height, width, and depth), which is crucial for achieving the perfect, even gaps around the door that are the signature of a professional installation.
The Critical Prerequisite: Is Your Wall Ready for a Frameless Door?
Before you even consider a frameless door, you must evaluate the wall structure. This is not a project that tolerates imperfections. The single most important factor for success is a perfectly plumb, level, and square rough opening. Unlike traditional doors where trim can hide minor flaws, a frameless door exposes every imperfection.
Your wall must be structurally sound, with solid wood blocking where the concealed frame will be anchored. Any flex or instability in the wall will eventually lead to cracks in the plaster around the door. The wall surface itself must also be perfectly flat to allow the door to sit flush. Skim coating the entire wall is often necessary to achieve a truly seamless integration.
Step-by-Step Guide: Installing a Concealed Frame Door System
While specific instructions will vary by manufacturer, the general process for installing a concealed or “trimless” door frame system follows a clear sequence. Precision at every stage is non-negotiable.
Step 1: Prepare the Rough Opening
Verify that the rough opening meets the exact specifications required by the frameless kit manufacturer. Use a long level and a framing square to ensure the opening is perfectly plumb, level, and square. Correct any deficiencies before proceeding.
Step 2: Install the Concealed Frame
Assemble the metal frame according to the kit’s instructions. Position the frame in the rough opening, using shims to secure it in a perfectly plumb and level position. Anchor the frame securely to the wall studs and header.
Step 3: Integrate with Drywall and Finish
Install the drywall so it butts directly against the specialized edge of the metal frame. Apply mesh tape and a setting-type joint compound to the seam between the drywall and the frame. This step is more akin to professional plastering than simple taping, as the goal is to create an absolutely seamless, invisible transition.
Step 4: Hang and Adjust the Door
Once the wall is finished and painted, you can hang the door slab. Install the concealed hinges into the mortises on the door and the frame. Use the 3D adjustment features on the hinges to dial in the fit, ensuring a consistent and minimal gap (typically 1/8 inch) on all sides.
Essential Tools and Materials for a Flawless Finish
Achieving a professional-quality frameless door installation requires the right tools. Precision instruments are not optional; they are essential for the tight tolerances this project demands.
| Tool/Material | Purpose | Pro-Tip |
|---|---|---|
| Concealed Door Frame Kit | Provides the structural frame that is plastered into the wall. | Invest in a high-quality steel or aluminum kit from a reputable brand for better rigidity. |
| 4-Foot or 6-Foot Level | Ensuring the rough opening and concealed frame are perfectly plumb and level. | A shorter level is not accurate enough for this task. Don’t compromise. |
| 3D Adjustable Concealed Hinges | Allows for precise adjustment of the door’s position for perfect gaps. | Choose hinges rated for the weight of your door slab to prevent sagging. |
| Setting-Type Joint Compound | Finishing the seam between the frame and drywall for a crack-resistant finish. | Setting-type compound is chemically harder and more stable than pre-mixed compound. |
| Solid-Core Door Slab | Provides the weight, stability, and acoustic insulation needed. | Hollow-core doors are too prone to warping and will ruin the seamless look. |
Common Mistakes That Will Ruin Your Frameless Look
The unforgiving nature of a frameless installation means that small mistakes have big consequences. Avoiding these common pitfalls is critical for a successful outcome.
Mistake #1: Rushing the Wall Preparation
The most frequent cause of failure is an imperfect rough opening or an uneven wall. Do not proceed with the installation until the opening is perfect. Trying to “fix it later” with compound or shims will result in a flawed finish that cracks over time.
Mistake #2: Using the Wrong Finishing Compound
Using standard, pre-mixed drywall mud to finish the seam between the metal frame and the drywall is a recipe for disaster. This joint requires the strength of a setting-type compound (hot mud) and fiberglass mesh tape to prevent cracking from the minor vibrations of the door opening and closing.
Mistake #3: Skimping on the Door Slab
A frameless installation highlights the quality—or lack thereof—of the door itself. A cheap, hollow-core door is likely to warp, which will make maintaining even gaps impossible. Invest in a heavy, stable, solid-core door that will remain perfectly flat.
Frameless Doors vs. Other Door Styles: Making the Right Choice
How does a frameless door compare to other popular styles? The key differences lie in aesthetics, installation complexity, and function. While some homeowners are still debating if are sliding glass doors out of style, the trend toward minimalism gives frameless doors a distinct advantage.
Unlike barn doors, which make a bold, rustic statement, frameless doors aim to disappear. Unlike pocket doors, which require a much wider section of wall to slide into, frameless doors fit a standard rough opening. The desire for a clean, unbroken aesthetic is also seen in modern bathrooms, where a fully enclosed shower provides a similar seamless visual.
What About the Cost?
Be prepared for a significant investment. A complete concealed frame system with high-quality hinges can cost several times more than a standard pre-hung door. The meticulous labor required for the drywall and plaster finishing also adds to the overall expense, making this a premium design choice.
The Final Verdict: Is a Frameless Door Worth the Effort?
Hanging a door without a visible frame is a challenging project that demands precision, patience, and the right materials. It is not a beginner-friendly DIY task. However, for those committed to a truly modern and minimalist aesthetic, the result is unparalleled.
The flawless, trimless finish creates a sense of architectural purity that traditional doors simply cannot match. It’s a high-impact design feature that, when executed correctly, elevates an entire space from ordinary to extraordinary. For those willing to invest the time and resources, the effort is absolutely worth the stunning reward.