Grout Line Size for 4×12 Subway Tile: The #1 Mistake to Avoid
You have selected the perfect 4×12 subway tiles, envisioned the layout, and are ready to transform your space. However, a single, often underestimated detail can make the difference between a stunning, professional-looking installation and a visual disaster: the grout line size. Choosing the wrong width can highlight tile imperfections, lead to cracking, and ultimately undermine the entire aesthetic of your project.
This decision is far more than a simple matter of taste. The structural integrity and final appearance of your tiled surface—be it a kitchen backsplash or a shower wall—hinge on selecting the appropriate grout line. For 4×12 tiles, which are larger than traditional subway tiles, this choice becomes even more critical.
You'll Learn About
Why Your 4×12 Tile Grout Line is So Important
Grout is not just a filler; it’s a crucial structural component of your tile installation. It locks the tiles together, creating a durable, cohesive surface that accommodates for tiny movements in the substrate. A correctly sized grout line prevents tiles from chipping at the edges under pressure and provides a necessary buffer.
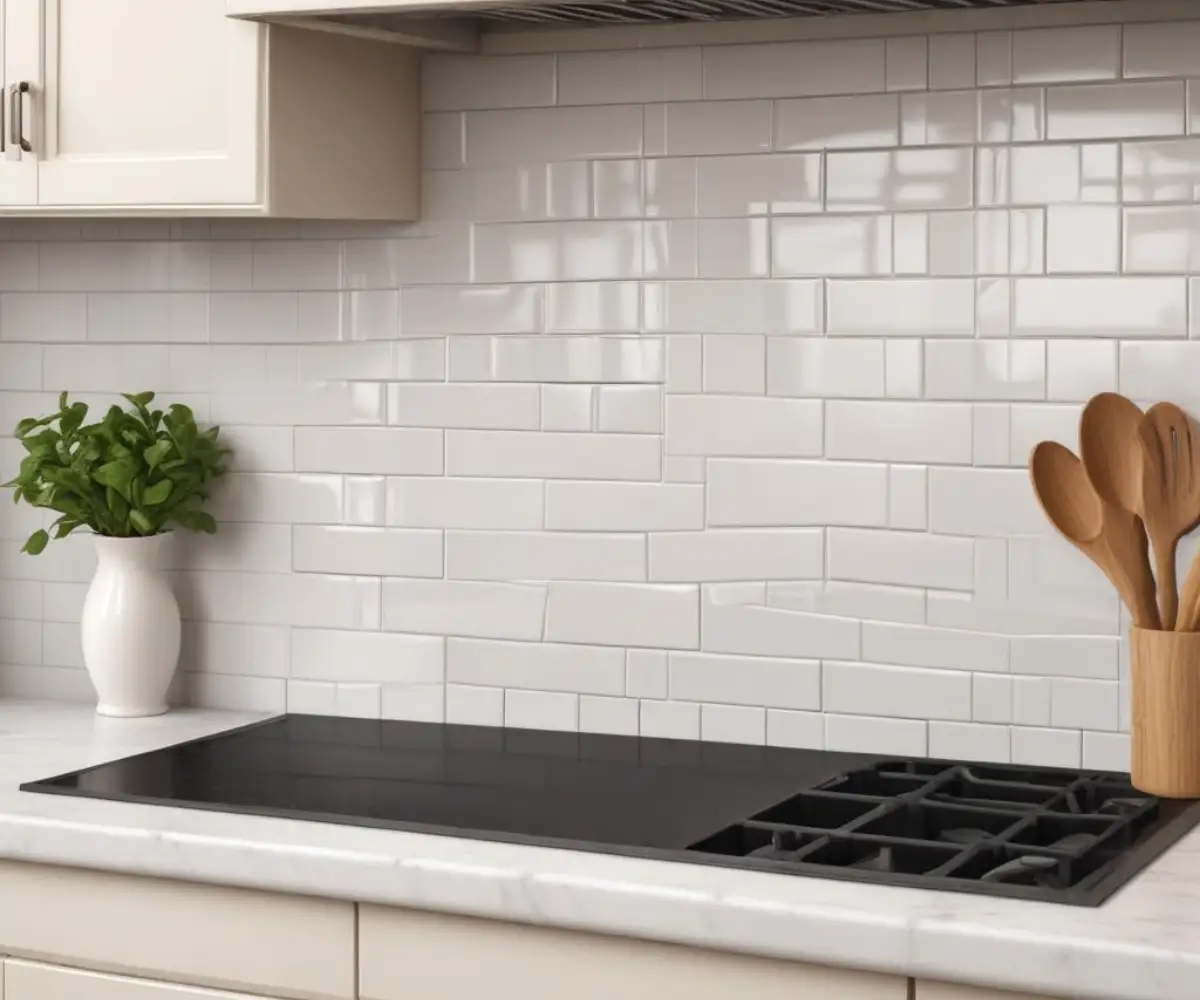
With 4×12 tiles, the stakes are higher. Their longer format makes them more susceptible to inherent manufacturing imperfections, such as slight warping or bowing. An incorrectly chosen grout line can accentuate these issues, leading to lippage—a condition where one tile edge is higher than its neighbor, creating an uneven and unprofessional finish.
The Great Debate: 1/16″ vs. 1/8″ for 4×12 Tiles
The most common dilemma homeowners and DIYers face is choosing between a 1/16-inch and a 1/8-inch grout line. While the difference seems minuscule, the visual and practical implications are significant. Each size has distinct advantages and demands specific conditions for a successful installation.
The Case for a 1/16″ Grout Line: Sleek and Modern
A 1/16-inch grout line offers a nearly seamless, monolithic appearance that is highly sought after in modern and minimalist designs. This narrow spacing allows the tiles themselves to be the main focus, creating a clean, uninterrupted surface. For many, this sleek look is the primary motivation for choosing a smaller grout joint.
However, this aesthetic comes with stringent requirements. A 1/16-inch line is extremely unforgiving. It demands tiles that are perfectly uniform in size and shape, a condition typically only met by rectified tiles. It also requires an almost perfectly flat installation surface and a high level of skill to execute flawlessly.
The Case for an 1/8″ Grout Line: The Versatile Standard
An 1/8-inch grout line is often considered the industry standard for a reason. It is far more forgiving than its narrower counterpart, making it a safer and more practical choice for most 4×12 subway tile installations. This width effectively hides minor variations in tile size and can better accommodate slight imperfections in the wall or subfloor.
While more noticeable, an 1/8-inch line can still provide a clean, classic look. It provides enough space for the grout to properly fill the joint, resulting in a stronger, more durable bond. For most DIY projects and installations using non-rectified tiles, 1/8-inch is the recommended minimum to ensure a professional and long-lasting result.
4 Factors That DICTATE Your Grout Line Size
Your personal preference for a thin or thick grout line is only part of the equation. Several technical factors will ultimately determine the minimum grout size you can safely use. Ignoring these can lead to installation failure and a costly redo.
1. Rectified vs. Non-Rectified Tiles: The Ultimate Deciding Factor
This is the most critical element influencing your grout line decision. Understanding the type of tile you have is non-negotiable. It dictates the minimum grout joint width required for a stable and aesthetically pleasing installation.
Rectified tiles are ceramic or porcelain tiles that have been mechanically ground and polished to precise, uniform dimensions. Their perfectly straight edges and exact corners allow for very tight grout lines, often as narrow as 1/16-inch. If you desire that razor-thin grout look, you must use rectified tiles.
Non-rectified tiles, also known as pressed tiles, have slightly rounded, natural edges from the manufacturing process. These tiles have inherent size variations from piece to piece. Attempting to install non-rectified tiles with a 1/16-inch grout line will result in an uneven, unprofessional appearance, as the size differences will be impossible to hide. For these tiles, a minimum grout joint of 1/8-inch, or even 3/16-inch, is necessary to absorb the variations and create straight lines.
2. The Warping Test: Uncovering Your Tile’s Hidden Bow
Longer tiles like the 4×12 format are prone to a slight bowing or “warpage” in the center, a natural result of the firing process in the kiln. While often imperceptible to the naked eye, this curvature can cause significant lippage, especially with running bond patterns and tight grout joints.
You can perform a simple test to check for warpage. Take two tiles and place them face-to-face. If they rock back and forth when you press on the ends, there is a bow. The Tile Council of North America (TCNA) recommends that for tiles with any edge longer than 15 inches, the grout joint should be wide enough to accommodate this warpage, and the offset pattern should be no more than 33% to minimize lippage.
3. Substrate Flatness: What Lies Beneath Matters
No wall is perfectly flat. The TCNA sets strict standards for substrate flatness, especially for large format tiles. For tiles with edges over 15 inches, the surface should not have a variation of more than 1/8-inch over 10 feet.
A wider grout line is more forgiving of minor humps and dips in the wall. It allows the installer to make subtle adjustments to keep the tile surfaces flush. With a 1/16-inch grout line, even the smallest imperfection in the substrate will translate into noticeable lippage on the finished surface.
4. Sanded vs. Unsanded Grout: A Choice Dictated by Width
The size of your grout line directly determines the type of grout you must use. This is not an aesthetic choice but a structural requirement. Using the wrong type of grout will lead to cracking and failure.
Unsanded grout has a smooth, fine texture and is required for grout lines smaller than 1/8-inch. Its consistency allows it to pack tightly into these narrow spaces. Using sanded grout in a joint that is too small will prevent it from compacting properly, leading to a weak, powdery joint.
Sanded grout contains fine sand, which provides strength and prevents shrinkage in wider joints. It is required for any grout line that is 1/8-inch or wider. The sand acts as an aggregate, creating a strong, durable, and crack-resistant joint. Using unsanded grout in a wide joint will cause it to slump and crack as it cures.
A Quick Reference Guide to Grout Line Sizing
Navigating these factors can be complex. This table provides a clear, at-a-glance reference to help you make the right choice for your 4×12 subway tile project, ensuring a result that is both beautiful and durable.
| Tile Edge Type | Tile Condition | Recommended Minimum Grout Size | Required Grout Type |
|---|---|---|---|
| Rectified | Perfectly Flat (No Warpage) | 1/16″ | Unsanded |
| Rectified | Minor Warpage Detected | 1/8″ | Sanded |
| Non-Rectified (Pressed) | Any Condition | 1/8″ to 3/16″ | Sanded |
| Any Tile Type | Uneven Substrate | 1/8″ or Wider | Sanded |
Common Mistakes to Avoid With 4×12 Tile Grout Lines
Even with the right knowledge, common pitfalls can compromise your project. Avoiding these frequent mistakes is key to achieving a flawless finish that stands the test of time.
One of the biggest errors is forcing a 1/16-inch grout line with non-rectified tiles. This invariably highlights every small size variation, leading to a messy, unprofessional result. It’s also important not to overlook the manufacturer’s recommendation; always check the tile box for specific guidance on grout joint size.
Using tile leveling systems is also highly recommended, especially with larger format tiles like 4×12. These systems use clips and wedges to hold the tiles flush with each other while the mortar sets, drastically reducing the risk of lippage. Finally, always perform a dry layout. Arrange a section of your tiles on the floor with your chosen spacers to visualize the final look before you commit with mortar. This simple step can prevent major aesthetic regrets.
Final Recommendations for a Flawless Finish
Choosing the correct grout line size for your 4×12 subway tile is a critical decision that balances aesthetic desire with technical necessity. While the sleek look of a 1/16-inch line is appealing, it is only suitable for perfect conditions: rectified tiles, a completely flat surface, and expert installation. For the vast majority of projects, especially those undertaken by DIY enthusiasts, an 1/8-inch grout line is the superior choice.
An 1/8-inch joint provides the necessary forgiveness to handle the inherent imperfections of non-rectified tiles and minor substrate variations, ensuring a clean, even, and professional-looking result. It allows for the use of stronger, sanded grout, contributing to a more durable and long-lasting installation. By carefully considering your tile type, checking for warpage, and assessing your substrate, you can select the perfect grout line size with confidence and ensure your new tile installation is a stunning success.