Weedeater Spitting Gas from the Exhaust? Here’s the Fix!
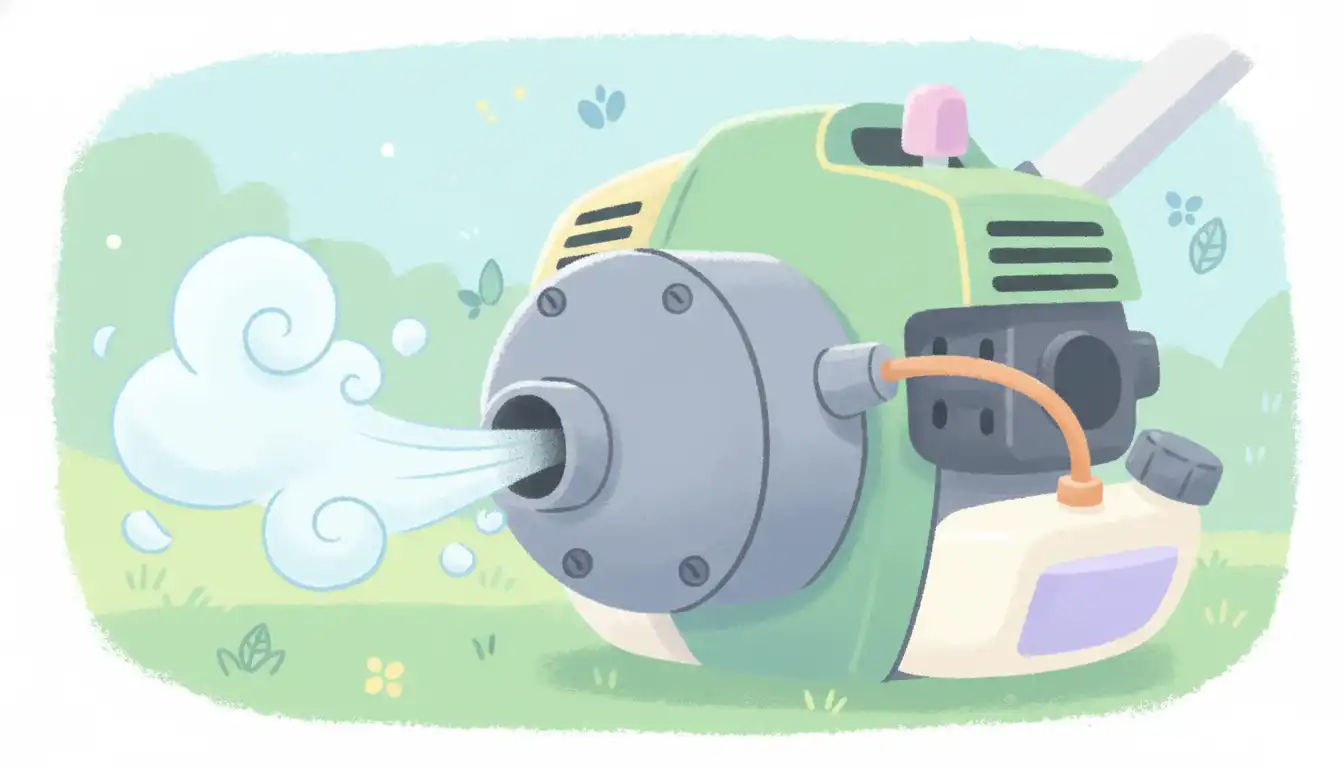
There are few things more frustrating than gearing up for a day of yard work only to have your equipment fail. You pull the starter cord on your weedeater, it sputters to life, but something is wrong. You see a messy, oily substance—unburned gas—leaking from the exhaust, and the engine is running rough, maybe even producing black smoke.
This is a surprisingly common issue for homeowners and gardeners, and it’s a clear signal that your weedeater’s engine isn’t happy. Not only is it messy and wasteful, but it’s also a sign of an underlying problem that can cause serious engine damage if left unaddressed. Fortunately, you’ve come to the right place. This comprehensive guide will walk you through diagnosing and fixing the root causes of why gas is coming out of your weedeater’s exhaust.
You'll Learn About
Why Is Gas Coming Out of My Weedeater’s Exhaust? The Root Causes
When a two-stroke engine, like the one in your weedeater, starts spitting fuel from the muffler, it means one thing: the fuel and air mixture is incorrect, and combustion is incomplete. The unburned fuel has nowhere else to go but out through the exhaust port. Several issues can lead to this messy symptom.
Understanding these potential causes is the first step toward a successful repair. Most of the time, the fix is straightforward and can be done at home with basic tools.
The Most Common Culprit: A Rich Fuel Mixture
The number one reason for gas coming out of the exhaust is a “rich” fuel mixture. This simply means there is too much fuel and not enough air entering the engine’s combustion chamber. Two-stroke engines are sensitive, and this delicate balance is critical for them to run efficiently.
An incorrect fuel-to-oil ratio is a primary driver of this problem. If you add too much two-stroke oil to your gasoline, the mixture becomes thick and difficult to burn completely. Always check your user manual for the correct ratio, which is commonly 40:1 or 50:1 (meaning 40 parts gas to 1 part oil, or 50 parts gas to 1 part oil).
Carburetor Chaos: Clogs and Incorrect Adjustments
The carburetor is the heart of your weedeater’s fuel system. Its job is to precisely mix air and fuel before sending it to the engine. If the carburetor is dirty or out of adjustment, it can easily lead to a rich condition.
Tiny jets inside the carburetor can become clogged with varnish and deposits from old fuel. A stuck needle valve can also allow too much fuel to flood the engine. Furthermore, most carburetors have ‘High’ (H) and ‘Low’ (L) adjustment screws that control the fuel mixture at different speeds. If these are set incorrectly, they can wreak havoc on engine performance.
A Flooded Engine: Too Much of a Good Thing
Sometimes, the problem is as simple as a flooded engine. This happens when you pump the primer bulb too many times or use the choke incorrectly during the starting procedure. The engine becomes overwhelmed with fuel that it can’t possibly ignite.
When this happens, repeated pulling of the starter cord will simply force the excess, unburned fuel and oil mixture straight into the exhaust system and out of the muffler. You’ll often smell a strong odor of gasoline when this is the case.
Dirty or Clogged Air Filter
Never underestimate the importance of a clean air filter. The engine needs a steady supply of clean air to mix with the fuel. If the air filter is clogged with dirt, grass, and dust, it suffocates the engine.
This restriction of airflow creates a vacuum effect that pulls extra fuel from the carburetor, leading directly to a rich mixture. An engine that can’t breathe properly can’t run properly, and this is one of the easiest and most common problems to fix.
Exhaust Port and Spark Arrestor Blockage
Just as important as getting air in is getting exhaust out. Over time, the exhaust port and the spark arrestor screen inside the muffler can become clogged with carbon and oily residue. This buildup creates back pressure in the engine.
This back pressure prevents the engine from expelling exhaust gases efficiently, causing poor performance, overheating, and forcing unburned fuel out in liquid form. This is a frequently overlooked cause that mimics the symptoms of a bad carburetor.
Step-by-Step Guide to Fixing a Weedeater Spitting Gas
Now that you understand the potential causes, it’s time to roll up your sleeves and get to work. Follow these steps methodically, starting with the simplest and most common solutions first. You’ll likely solve the problem without having to perform complex repairs.
Before you begin any work, it’s crucial to prepare your workspace and take the necessary safety precautions. A little preparation goes a long way in ensuring a smooth and safe repair process.
Step 1: Safety First! Prepare Your Workspace
Your safety is the top priority. Before you start disassembling any part of your weedeater, you must disconnect the spark plug wire. This prevents any chance of the engine accidentally starting while you are working on it.
Work in a well-ventilated area, like an open garage or a shady spot outdoors, to avoid inhaling gasoline fumes. Have some rags or paper towels on hand to clean up any spilled fuel. A sturdy workbench is also helpful for keeping parts organized; a well-built bench ensures your equipment is secure while you work.
Step 2: Check and Correct Your Fuel Mixture
The first and easiest thing to check is your fuel. If the gas has been sitting in the weedeater or your gas can for more than a month, it may have gone stale. Old fuel loses its combustibility and can cause all sorts of problems.
Safely drain all the old fuel from the tank into an approved container. Mix a fresh batch of fuel using high-quality gasoline (89 octane or higher) and the correct two-stroke oil, following the manufacturer’s recommended ratio precisely. Using pre-mixed, ethanol-free fuel is an excellent option to ensure quality and prolong engine life.
Step 3: Clean or Replace the Air Filter
Locate the air filter cover on your weedeater’s engine; it’s usually held in place by a single screw, a knob, or clips. Remove the cover and take out the air filter. A dirty, clogged filter is a very common culprit.
If you have a foam filter, you can often wash it in warm, soapy water, rinse it thoroughly, and let it dry completely before reinstalling. If it’s a paper or fabric filter, tap it gently to remove loose debris. If it’s heavily soiled or oily, it’s best to replace it—they are inexpensive and a worthwhile investment in your engine’s health.
| Symptom | Likely Cause | Difficulty of Fix | Recommended Solution |
|---|---|---|---|
| Oily gas from exhaust, black smoke | Rich Fuel Mixture | Easy | Drain old fuel, mix fresh fuel at the correct ratio (e.g., 40:1 or 50:1). |
| Engine bogs down, gas leak at air filter | Clogged Air Filter | Easy | Clean foam filter with soap and water, or replace paper filter. |
| Strong gas smell, won’t start after priming | Flooded Engine | Easy | Turn off choke, hold throttle open, pull starter cord 5-10 times to clear fuel. |
| Loss of power, engine seems to choke itself out | Clogged Spark Arrestor | Medium | Remove muffler cover, take out the screen, and clean with a wire brush or torch. |
| Erratic idle, poor acceleration, persistent rich condition | Carburetor Adjustment/Clog | Advanced | Clean carburetor jets with spray cleaner; perform fine-tuning of H/L screws if comfortable. |
Step 4: Address a Flooded Engine
If you suspect you’ve flooded the engine, the fix is simple. First, move the choke lever to the “OFF” or “RUN” position. This opens the choke plate and allows maximum airflow into the engine.
Next, hold the throttle trigger wide open. While holding the throttle, pull the starter cord 5 to 10 times. This procedure will pump the excess fuel out of the combustion chamber and through the exhaust, clearing the engine. After clearing it, try starting it again with the normal procedure.
Step 5: Inspect and Clean the Spark Arrestor Screen
The spark arrestor is a small mesh screen located inside the muffler. To access it, you’ll typically need to remove a small cover or a single screw from the muffler housing. Once removed, carefully pull the screen out with pliers.
Often, this screen will be completely clogged with black, oily carbon. You can clean it with a wire brush and some carburetor cleaner. For stubborn buildup, carefully heating the screen with a propane torch until the carbon turns to ash is a very effective method (be sure to do this in a safe, outdoor area). A clean screen is critical for engine performance.
Step 6: Adjusting the Carburetor (For the Advanced DIYer)
This step should be approached with caution. Incorrect carburetor adjustments can make the problem worse or damage the engine. If you’re not comfortable with this, it’s best to consult a professional. The carburetor typically has two small adjustment screws, often labeled ‘L’ for low speed and ‘H’ for high speed.
A common starting point for adjustment is to gently turn both screws clockwise until they are lightly seated (do not overtighten), and then turn them both counter-clockwise about 1.5 to 2 full turns. From there, you can start the engine and make very small, incremental adjustments to each screw until the engine idles smoothly and accelerates without bogging down. Listen to the engine; it will tell you when it’s running right.
Proactive Maintenance: How to Prevent Gas Leaks in the Future
The best way to fix problems is to prevent them from happening in the first place. A little proactive maintenance goes a long way in keeping your weedeater running reliably for years to come.
These simple habits will save you time, money, and the frustration of dealing with a malfunctioning tool when you have a lawn to manicure.
Always Use Fresh, Properly Mixed Fuel
This is the golden rule of two-stroke engine care. Never use gasoline that is more than 30 days old, especially if it contains ethanol. Use a fuel stabilizer if you plan to store fuel for longer periods.
Double-check the fuel-to-oil ratio required by your manufacturer and mix it accurately every time. Using a dedicated, clearly labeled can for your weedeater mix prevents accidental mix-ups.
Regular Cleaning is Non-Negotiable
Make a habit of cleaning your equipment. After every few uses, take a minute to check and clean the air filter. It’s also a good idea to inspect the spark arrestor screen at least once per season.
Keeping the cooling fins on the engine free of grass and debris will also help it run cooler and more efficiently, which contributes to better combustion and a longer engine life.
Proper Starting and Storage Procedures
Learn the correct starting procedure for your specific model to avoid flooding the engine. Most manuals recommend priming the bulb until fuel is visible, setting the choke, pulling the cord until the engine “coughs,” then moving the choke to the half or run position to start it.
For long-term storage (more than a month), it’s wise to either run the engine dry or drain the fuel tank and carburetor completely. This prevents fuel from turning to varnish and clogging up the system.
Beyond the Basics: Understanding Two-Stroke Engine Quirks
To truly master the maintenance of your weedeater, it helps to understand a few deeper concepts that affect its performance. These are details that many guides overlook but can be the key to solving stubborn problems.
These insights can help you diagnose issues like a professional and keep your equipment in peak condition, no matter the circumstances.
The Impact of Altitude and Temperature
Air density is not constant; it changes with altitude and ambient temperature. An engine tuned to run perfectly at sea level on a cool day might run rich at a higher altitude or on a very hot day because the air is less dense.
If you live in a mountainous area or notice your weedeater runs differently in the heat of summer versus the cool of spring, a minor carburetor adjustment may be necessary to compensate for these environmental changes.
Reading the Spark Plug: A Window Into Your Engine’s Health
The condition of your spark plug is an excellent diagnostic tool. After running the engine, carefully remove the spark plug and examine the tip. It tells a story about what’s happening inside the combustion chamber.
A healthy engine will have a plug that is light brown or tan. If the plug is black, sooty, and oily, it’s a definitive confirmation that your engine is running too rich. This tells you that your troubleshooting efforts on the fuel system, air filter, and exhaust are on the right track.
Ethanol in Fuel: The Silent Engine Killer
Modern gasoline often contains up to 10% ethanol (E10). While fine for cars, ethanol can be harmful to small engines over time. It attracts water, which can cause corrosion, and it can degrade rubber and plastic components in the fuel lines and carburetor.
For this reason, using pre-mixed, ethanol-free canned fuel is one of the best things you can do for your weedeater. While it costs more upfront, it can prevent costly repairs down the line by protecting the entire fuel system from the damaging effects of ethanol.
Putting It All Together for a Smooth-Running Machine
Dealing with gas spitting from your weedeater’s exhaust can be a messy affair, but it’s almost always a solvable problem. By systematically checking the most likely culprits—the fuel mixture, the air filter, a flooded condition, and the spark arrestor—you can diagnose and fix the issue with confidence.
Remember that a rich fuel mixture is the core problem, and each step in the troubleshooting process is aimed at restoring the proper balance of fuel and air. With a little patience and the right knowledge, you can get your weedeater back in top form and your garden looking pristine in no time.