Garage Door Reversing? Here’s Why It Thinks Something’s in the Way
You press the button, expecting the familiar rumble of your garage door closing. Instead, it travels a few feet down, hesitates, and then retreats to the open position as if it hit something. You check, but there’s nothing there. This frustrating and common problem indicates your garage door’s safety mechanism is being triggered, making it think something is in the way.
Understanding why this happens is the first step toward a solution. Modern garage doors are equipped with multiple safety features designed to prevent accidents. When these systems malfunction, they default to “safe mode,” which means reversing the door to avoid potential injury or damage. This guide will walk you through the primary causes of this issue and provide clear, step-by-step instructions to fix it.
You'll Learn About
Decoding the Problem: Why Your Garage Door Reverses
When your garage door won’t stay closed, it’s almost always a problem with one of three systems: the safety sensors, the travel and force settings, or the physical components of the door itself. Identifying the specific culprit is a process of elimination. Before diving into complex adjustments, it’s essential to understand what each system does and how it can fail.
Often, the solution is simple and requires only a few minutes of your time. From dirty sensor lenses to settings that have drifted due to weather changes, the causes can be surprisingly minor. Let’s explore the most frequent reasons your garage door is acting like it has a mind of its own.
The #1 Culprit: Misaligned or Obstructed Safety Sensors
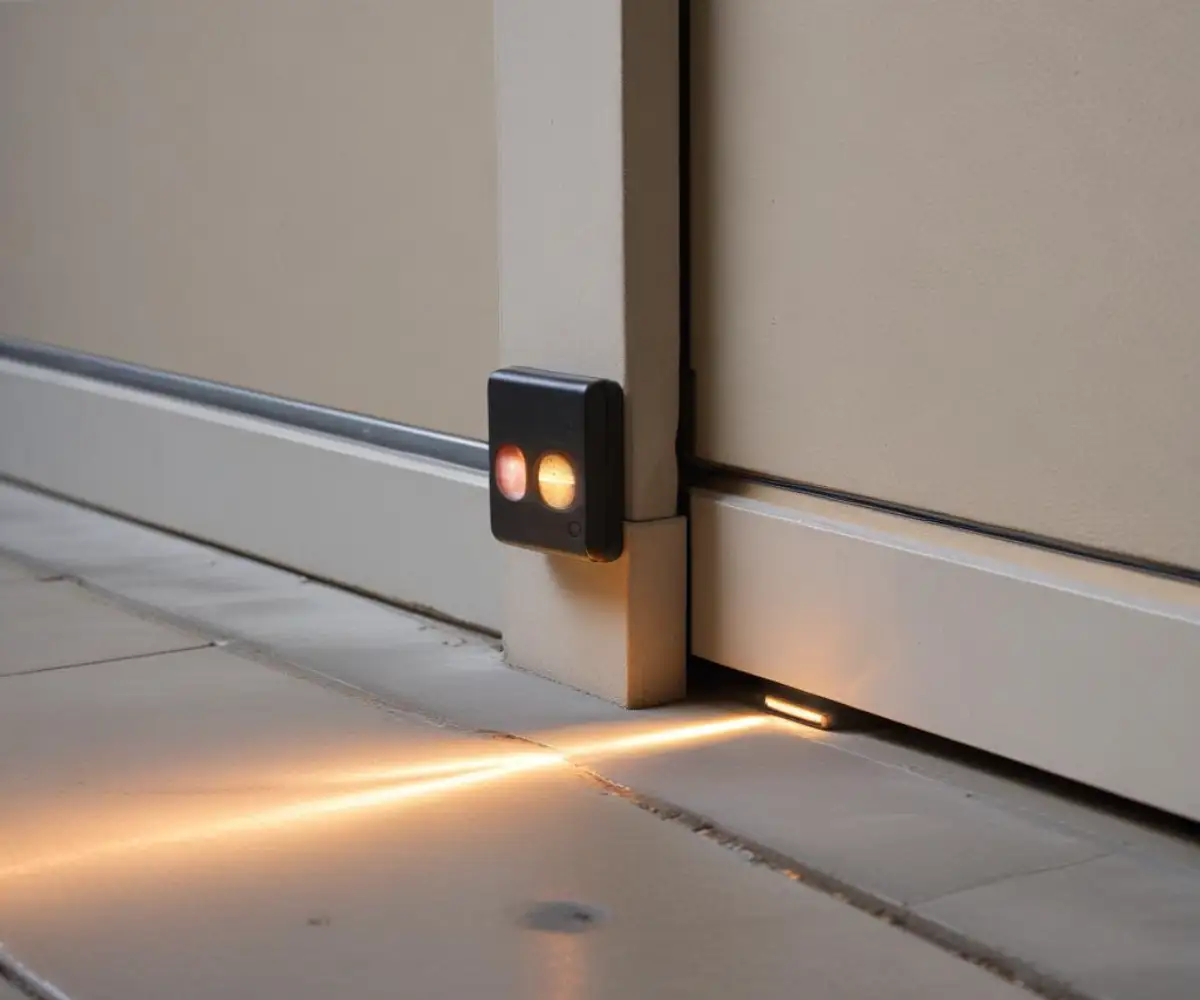
At the bottom of your garage door tracks, on either side, are two small “photo-eye” sensors. One sends an invisible infrared beam to the other. If anything breaks this beam while the door is closing, the opener instantly reverses the door. This is the most common reason for a garage door that refuses to close.
The issue arises when these sensors are knocked out of alignment, or their lenses become dirty. Even small obstructions like a stray leaf, a spiderweb, or accumulated dust can block the beam and trigger the reversal. Ensuring these sensors have a clear, direct line of sight to each other is critical for proper operation.
Sunlight Interference: The Invisible Obstruction
A less obvious but frequent issue is direct sunlight shining into one of the sensor lenses. The strong infrared light from the sun can overpower the sensor’s receiver, tricking it into thinking the beam is broken. If you notice your garage door only has problems closing at certain times of the day, especially when the sun is low in the sky, this is a likely cause.
This “blinding” effect is temporary but highly frustrating. Simply shielding the sensor from direct sunlight is often enough to resolve the problem. Special sensor hoods or even a strategically placed piece of cardboard can serve as an effective, immediate fix.
Incorrect Travel and Force Settings
Your garage door opener is programmed with specific settings that tell it how far to close (travel limit) and how much pressure to apply (close force). If the travel limit is set too far, the door will hit the floor and interpret the resistance as an obstruction, causing it to reverse. Similarly, if the close force is set too low, the door may reverse from minor resistance, like moving over a slightly uneven section of the floor.
These settings can drift over time due to weather changes, which cause the door and frame to expand and contract. Added weight, such as new insulation, can also impact these settings. Checking if your garage has the right insulation is wise, but remember that the added weight might mean your opener needs a tune-up. Properly calibrated travel and force settings are essential for smooth and safe operation.
Physical Obstructions and Track Issues
Sometimes, the problem is not with the electronics but with the door’s physical path. Dents in the tracks, worn-out rollers, or loose hardware can create friction or cause the door to bind as it closes. The opener’s safety mechanism will detect this increased resistance and reverse the door to prevent damage to the motor or the door itself.
A thorough visual inspection of the tracks, rollers, and hinges can reveal these issues. Even a small stone or debris in the track can be enough to halt the door’s progress. Ensuring the path is clear and the components are in good working order is a crucial troubleshooting step.
A Step-by-Step Guide to Fixing Your Reversing Garage Door
Now that you understand the potential causes, it’s time to troubleshoot. Follow these steps in order, as they start with the simplest and most common fixes. Most of the time, you can solve this problem yourself without needing to call a professional.
You will need a few basic tools: a soft cloth, a level, and possibly a stepladder and a screwdriver. Always prioritize safety by disconnecting power to the garage door opener before making any significant adjustments to mechanical parts.
Step 1: Clean and Inspect the Safety Sensors
Start with the easiest fix. Take a clean, soft cloth and gently wipe the lenses of both safety sensors. Remove any dirt, dust, cobwebs, or other debris that could be obstructing the beam. While you are down there, check for any small objects on the ground that might be in the beam’s path.
After cleaning, observe the small LED lights on each sensor. Both lights should be glowing steadily. If one is blinking or off, it indicates a power or alignment issue.
Step 2: Align the Safety Sensors
If a sensor light is blinking, the sensors are likely misaligned. The brackets holding them can easily be bumped by cars, trash cans, or lawn equipment. To realign them, loosen the wing nut or screw on the blinking sensor’s bracket.
Gently adjust the sensor’s position, aiming it directly at the other sensor across the garage opening. You may need to move it up, down, or side-to-side until the LED light turns solid. Once the light is steady, tighten the bracket securely. Test the door to see if the issue is resolved.
Step 3: Adjust the Door’s Travel and Force Settings
If the sensors are aligned and clean, the next step is to check the opener’s settings. Look on your garage door opener motor unit for two adjustment dials or buttons. They are typically labeled “Up Travel” and “Down Travel” (or “Limit”) and “Up Force” and “Down Force.”
If the door reverses after hitting the floor, slightly decrease the “Down Travel.” Turn the adjustment screw a quarter-turn at a time in the indicated direction (usually counter-clockwise). If the door reverses mid-travel without hitting anything, you may need to slightly increase the “Down Force.” Turn the adjustment screw a tiny amount clockwise. Always test the door after each small adjustment. A door that is too heavy may require more force, but excessive force can create a safety hazard.
| Problem Symptom | Likely Cause | Setting to Adjust | Adjustment Direction |
|---|---|---|---|
| Door hits floor, then reverses | Travel limit set too far | Down Travel / Limit | Decrease (Turn screw counter-clockwise slightly) |
| Door reverses mid-air for no reason | Close force set too low | Down Force | Increase (Turn screw clockwise slightly) |
| Door doesn’t close all the way | Travel limit set too short | Down Travel / Limit | Increase (Turn screw clockwise slightly) |
| Door stops while opening | Open force set too low | Up Force | Increase (Turn screw clockwise slightly) |
Step 4: Inspect the Tracks and Rollers
If settings adjustments don’t work, perform a thorough inspection of the door’s hardware. With the garage door closed, look down the entire length of the vertical and horizontal tracks on both sides. Check for dents, flat spots, or any signs of damage. Also, look for loose bolts or brackets securing the tracks to the wall.
Examine the rollers to see if any are cracked, worn, or seized. Disconnect the opener using the emergency release cord and try to lift the door by hand. It should move smoothly without significant resistance or grinding noises. If it sticks or feels excessively heavy, you may have a track or roller problem that needs addressing.
When to Call a Professional
While many causes of a reversing garage door are simple DIY fixes, some issues require professional expertise. If you have performed all the troubleshooting steps above and the problem persists, it’s time to call a qualified garage door technician.
Electrical issues with the opener’s logic board, broken torsion springs, or severely damaged tracks are problems best left to a professional. Attempting to repair these components without the proper tools and knowledge can be dangerous. For instance, a poor garage door arm angle might indicate a deeper installation issue.
Proactive Maintenance for a Reliable Door
The best way to deal with garage door problems is to prevent them. Regular maintenance can save you from the frustration of a malfunctioning door. Once a month, take a few minutes to wipe down the safety sensors and visually inspect the tracks and rollers.
Every six months, check the door’s balance and lubricate all moving parts with a silicone-based spray. These simple steps will ensure your garage door operates reliably and safely for years to come, giving you peace of mind that it will close every time you press the button.