Garage Door Arm Angle Wrong? Fix It Now to Avoid Disaster
You press the button, and your garage door begins its daily dance. But lately, the movement is less of a smooth glide and more of a jerky, groaning struggle. You might blame the motor or the tracks, but the real culprit could be a simple, yet critical, geometric flaw: the angle of your garage door arm.
This single adjustment is one of the most overlooked aspects of garage door maintenance. Get it wrong, and you’re not just dealing with annoying noises; you’re on a fast track to a buckled door panel, a strained opener motor, and a repair bill that will make your jaw drop. Understanding this angle is the key to a safe, quiet, and long-lasting garage door system.
You'll Learn About
Why the Arm’s Angle is the Secret to a Healthy Garage Door
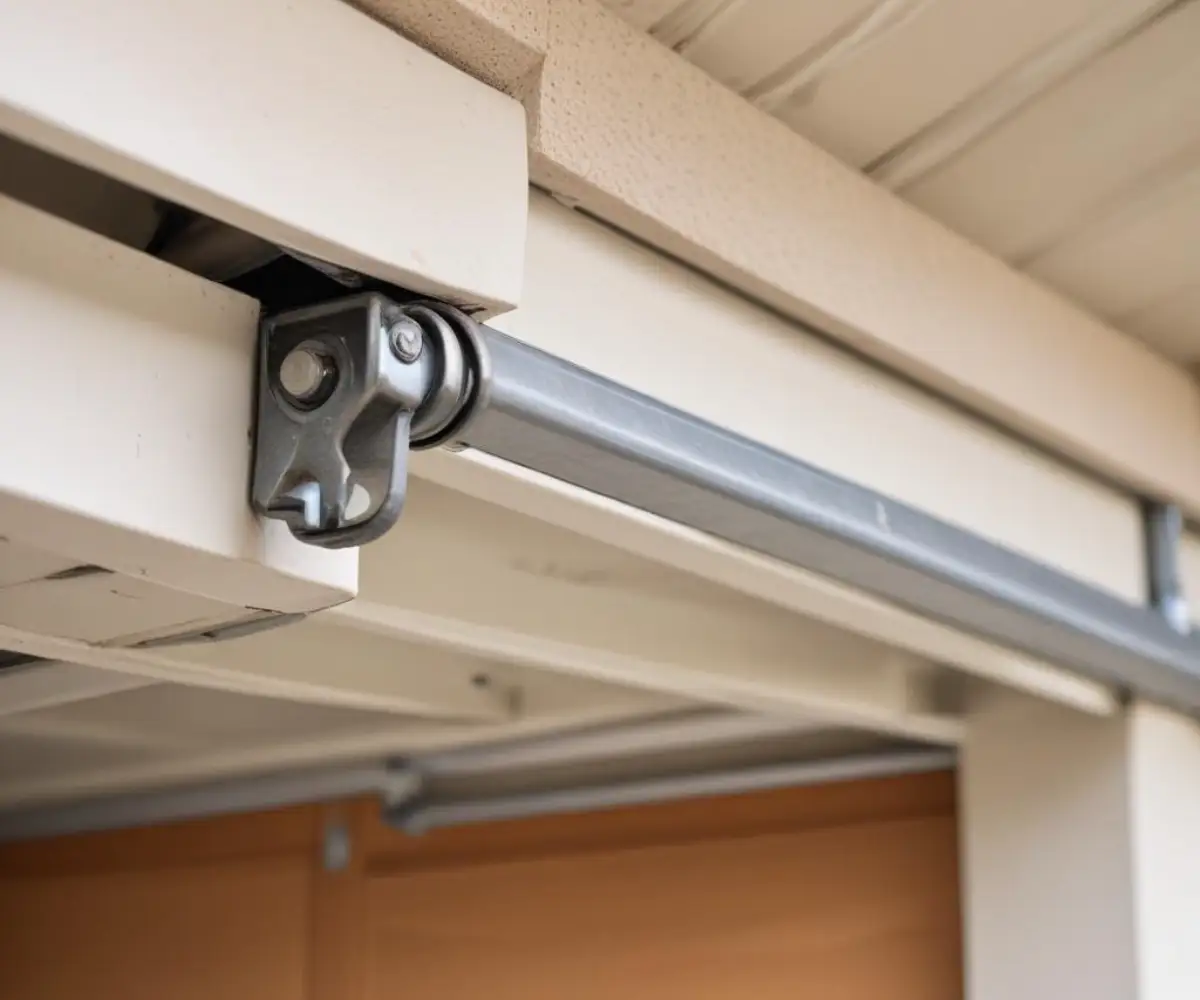
The garage door arm, often called the J-arm or drawbar, is the metal limb connecting the motorized trolley on the overhead rail to the garage door itself. Its sole job is to translate the horizontal pulling force of the motor into the vertical lifting motion of the door. The angle at which it does this is everything.
When the angle is incorrect, the force is not applied efficiently or safely. This creates immense stress on the entire system, leading to predictable and destructive outcomes. The physics of the operation dictates that the arm must be positioned to pull the door both upwards and backwards simultaneously, especially as it navigates the curved portion of the track.
The Danger of a Steep Angle
When the door is closed, if the arm is too steep (too vertical), it creates a dangerous downward pressure. As the opener starts to pull, instead of smoothly guiding the door up, the arm pushes down on the top of the door before it starts to lift. This action can, over time, buckle, crease, or even completely destroy the top door panel.
This is especially true for non-reinforced steel doors. The opener is literally trying to fold your door in half before it lifts it. This immense strain also puts a heavy load on the opener’s motor and gears, significantly shortening their lifespan.
The Problem with a Shallow Angle
Conversely, if the angle is too shallow (too horizontal), the opener’s force is not transferred effectively. The motor has to work much harder to initiate the movement, leading to a jerky start and inefficient operation. This can cause the opener to misinterpret the resistance as an obstruction, triggering the safety reverse feature and preventing the door from closing properly.
An overly horizontal arm can also create binding issues at the top of the door’s travel cycle. It can prevent the door from opening fully or cause it to slam shut with excessive force when closing. Both scenarios put unnecessary wear and tear on the door’s hardware and the opener itself.
Is Your Garage Door Arm Angle Wrong? Watch for These Symptoms
Your garage door will almost always give you warning signs that the arm geometry is off. Ignoring these symptoms is a gamble that rarely pays off. Be on the lookout for these clear indicators of a problem.
- A Loud Banging Noise: A loud bang or pop at the beginning of the opening cycle is a classic sign that the arm is forcing a bent panel to straighten out.
- Jerky, Unstable Movement: The door should not shudder or shake as it moves. If it does, the arm is likely binding and releasing as it fights against poor geometry.
- Visible Bending of the Top Panel: Look at the top section of your garage door from the inside as it opens. If you see it flexing or bowing inward, stop using the door immediately and inspect the arm angle.
- The Opener Motor Sounds Strained: You know what your opener sounds like. If it starts to sound like it’s struggling, groaning, or working harder than usual, inefficient force transfer from a bad arm angle is a likely cause.
- The Door Reverses Spontaneously: If the door starts to close and then suddenly reverses, the opener’s safety mechanism might be interpreting the binding caused by a poor arm angle as a physical obstruction.
How to Check Your Garage Door Arm Angle: A 3-Step Inspection
Before you make any adjustments, you need to perform a safe and accurate diagnosis. This is a simple visual inspection that anyone can do. For safety, you must begin by disconnecting the power to your garage door opener.
Your next step is to pull the red emergency release cord. This disengages the trolley from the opener chain or belt, allowing you to move the door by hand. Be aware, if your garage door feels too heavy to lift easily with one hand, you may have a separate, more serious problem with your springs that needs professional attention.
Step 1: The Fully Closed Position Test
With the door all the way down, look at the drawbar. The arm should angle slightly up from the door bracket to the trolley. It should never be perfectly straight or pointing downwards. A good rule of thumb is that the trolley should be a few inches further away from the garage door opening than the point where the arm attaches to the door.
Step 2: The Peak Radius Point
This is the most critical checkpoint. Manually lift the door until the top edge of the door is about level with the bottom of the curved part of the track. At this moment, the trolley on the rail should be positioned several inches *past* the drawbar’s connection point on the door. This ensures the opener is always pulling the door smoothly through the curve, not pushing against it.
Step 3: The Fully Open Position Test
Push the door all the way open. The drawbar should still have a slight angle and should not be pressed hard against the opener motor unit. The door should be resting on the “stop bolt” of the track, not held in place by tension from the opener arm.
How to Correct the Garage Door Arm Angle
If your inspection reveals a problem, adjusting the angle is usually straightforward. You will typically only need a basic set of wrenches or a socket set and a sturdy ladder. Always keep safety as your top priority.
Solution 1: Adjust the Arm’s Length
The drawbar is usually made of two pieces: a curved one that attaches to the door and a straight one that connects to the trolley. These pieces are bolted together through a series of holes that allow for length adjustment.
With the door closed and the opener disengaged, you can unbolt these two pieces. By selecting different holes, you can shorten or lengthen the entire arm assembly. Make small adjustments and re-check the angle in the closed, peak radius, and open positions until it’s correct.
Solution 2: Reposition the Door Bracket
The bracket that secures the curved arm to the garage door itself can also be moved. It should be mounted securely to the vertical stile of the door panel. If adjusting the arm length isn’t enough, you may need to move this bracket up or down.
Be extremely careful not to move it to a location that is not structurally reinforced. If you drill new holes, ensure they are in a solid part of the door. For added security and to prevent future damage, installing an Opener Reinforcement Bracket (ORB) is highly recommended. This is a wide steel plate that distributes the pulling force across the entire top panel, preventing the stress that leads to buckling.
Solution 3: Reset Opener Travel Limits and Force
After you have made any physical adjustments to the arm, you must reset your opener’s travel limits and force settings. Failure to do so can be dangerous. If the limits are not reset, the opener could try to force the door too far up or down, causing significant damage.
The process for this varies by manufacturer but usually involves pressing a sequence of buttons on the motor unit itself. Consult your garage door opener’s manual for specific instructions on recalibrating these critical safety and operational settings.
Common Mistakes and Critical Consequences
Adjusting the garage door arm seems simple, but small mistakes can lead to big problems. Being aware of these common pitfalls is essential for a successful and safe repair. This table outlines what can go wrong and how to prevent it.
| Common Mistake | Potential Consequence | Prevention Strategy |
|---|---|---|
| Ignoring Door Balance First | The opener motor is forced to lift the door’s full weight, causing rapid burnout and failure. | Always test the door balance with the opener disengaged. The door should stay in place when lifted halfway. If it falls or flies up, the springs need professional adjustment. |
| Mounting the Bracket Incorrectly | The bracket can rip out of the door panel, causing catastrophic damage and a potential safety hazard. | Always mount to a reinforced vertical stile. Use an Opener Reinforcement Bracket (ORB) to distribute the load. |
| Forgetting to Reset Travel Limits | The opener can crush the top of the door, damage the motor, or leave the door improperly sealed. | Make resetting the up/down limits and safety force the final step of any adjustment. Refer to your opener’s manual. |
| Over-Tightening Hardware | Stripping the bolts or nuts, or even crushing the thin metal of the door panel or arm. | Tighten all nuts and bolts until they are snug, then give them a final quarter-turn. Do not use excessive force. |
When You Absolutely Must Call a Professional
While adjusting the arm is a manageable DIY task for many, there are clear situations where you should put down the tools and call a qualified garage door technician. Your safety and the integrity of your property are not worth the risk.
Contact a professional if you notice any of the following: a door that is extremely heavy to lift manually, frayed or broken cables, signs of damage to the high-tension springs, or if you have already noticed significant creasing or damage to your door panels. Attempting to fix these issues without proper training and tools is extremely dangerous.
The Final Word on a Flawless Operation
The correct garage door arm angle is not a minor detail; it is fundamental to the entire system’s health and longevity. It is the difference between a door that operates smoothly and silently for decades and one that fails violently and expensively after just a few years.
By taking a few minutes to inspect and, if necessary, adjust this critical component, you are performing one of the most impactful pieces of preventative maintenance possible. You’ll not only save money but also ensure your garage door operates safely and reliably every time you press the button.