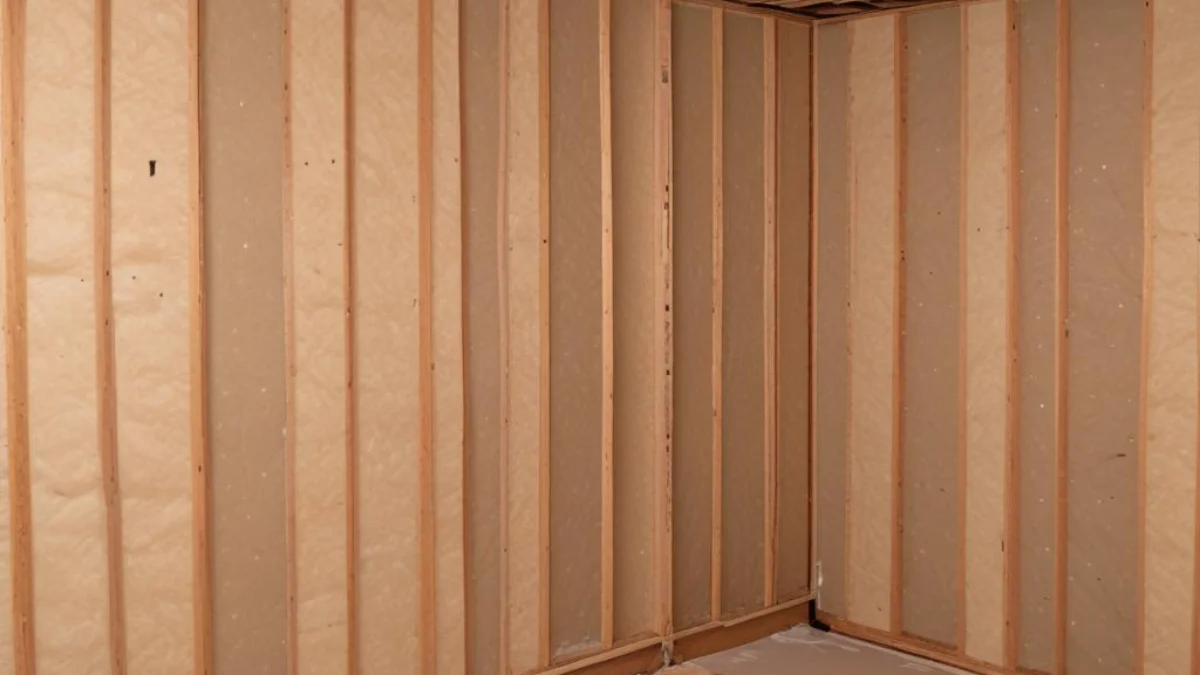
Framing Over Basement Blanket Insulation: Don’t Make These Mistakes!
Finishing a basement is a popular home improvement project. It adds valuable living space and can significantly increase your home’s value. Many basements already have blanket insulation installed by the builder.
This leads to a common question for homeowners. Can you frame a wall directly over this existing basement blanket insulation? The answer is yes, but it must be done correctly to avoid major problems.
Incorrectly framing over insulation can lead to moisture issues, mold growth, and reduced thermal performance. This guide will walk you through the right way to tackle this project, ensuring a comfortable and durable finished basement.
You'll Learn About
The Big Problem: Trapped Moisture and Compressed Insulation
The primary challenge with framing over existing blanket insulation is managing moisture. Basement walls are prone to moisture from the surrounding soil. A poorly installed frame can trap this moisture between the insulation and the new wall, creating a perfect environment for mold and mildew.
Another issue is insulation compression. When you press a wood frame against blanket insulation, you squeeze it. Compressed fiberglass or mineral wool loses its insulating ability, or R-value, because the trapped air pockets that provide thermal resistance are crushed.
This means your new, expensive finished basement could be less energy-efficient than before you started. Understanding these potential pitfalls is the first step toward a successful installation.
Why Proper Air Gaps Are Crucial
An air gap between the foundation wall and the new framed wall is non-negotiable. This space allows any moisture that permeates the concrete to dry out before it can saturate the insulation and framing. Without this gap, moisture gets trapped, leading to rot and mold.
The gap doesn’t need to be huge. A space of about one-half to one inch is typically sufficient to allow for air circulation and drying. This small detail makes a massive difference in the long-term health of your basement.
Understanding Vapor Barriers
Most basement blanket insulation comes with a paper or foil facing. This facing acts as a vapor barrier, which is designed to stop moisture vapor from passing through. The placement of this barrier is critical.
In a cold climate, the vapor barrier should always face the warm side of the wall—in this case, toward the living space. If your existing insulation was installed with the facing against the concrete, it needs to be corrected before you start framing. Trapping moisture between two vapor barriers (the foundation waterproofing and the insulation facing) is a recipe for disaster.
The Step-by-Step Solution for Flawless Framing
Now that you understand the challenges, let’s move on to the solution. Following these steps will ensure your new basement walls are sturdy, well-insulated, and protected from moisture damage. Proper preparation is key to a professional-quality result.
This process involves carefully building a non-load-bearing wall in front of the existing insulation. We will focus on creating the necessary air gap and ensuring the insulation can do its job effectively.
Step 1: Inspect and Prepare the Existing Insulation
Before you even buy your lumber, take a close look at the existing blanket insulation. Is it damp or showing signs of mold? If so, you must address the source of the moisture before proceeding. Check for foundation cracks or leaks and make necessary repairs.
Ensure the insulation’s vapor barrier is facing the correct way (towards you, not the concrete). If it’s backward, you may need to carefully remove and reinstall the insulation. Also, consider if you need to add more insulation. If you’re wondering can you double up insulation, it’s possible but requires careful attention to vapor barriers to avoid trapping moisture.
Step 2: Build Your Framing Wall on the Floor
It’s much easier to build the frame for your new wall on the basement floor and then lift it into place. This allows you to work more efficiently and ensure all your measurements are accurate. Assemble the top plate, bottom plate (also called the sole plate), and studs according to your local building codes.
Remember to account for the air gap. When you measure for the top and bottom plates, subtract the width of the plates and the desired air gap (e.g., one inch) from the total distance from the foundation wall. This will be the position for your new wall.
Step 3: Positioning and Securing the Wall
Once your wall frame is built, carefully tilt it up into position. Place the bottom plate on your chalk line, ensuring the required air gap is maintained between the studs and the face of the insulation. Use a level to make sure the wall is perfectly plumb (vertically straight).
Secure the top plate to the ceiling joists and the bottom plate to the concrete floor. Use powder-actuated fasteners or concrete screws for the bottom plate. This creates a sturdy structure that doesn’t compress the blanket insulation behind it.
| Framing Technique | Pros | Cons | Best For |
|---|---|---|---|
| Floating Wall (Built in Place) | Allows for slight air gap adjustment; good for uneven walls. | More time-consuming to build; can be trickier to keep plumb. | Basements with wavy or uneven foundation walls. |
| Pre-Assembled Wall (Tilt-Up) | Faster and easier to build square and plumb on the floor. | Requires precise measurements; can be heavy to lift. | Most standard basements with relatively straight walls. |
| Advanced Wall Framing (24″ on Center) | Uses less lumber; allows for more continuous insulation. | Requires careful planning for drywall and electrical boxes. | Energy-efficient construction where maximizing insulation is key. |
Choosing the Right Materials
The materials you choose are just as important as the technique you use. For basement framing, always use pressure-treated lumber for the bottom plate that will be in direct contact with the concrete floor. This protects the wood from moisture wicking up from the slab.
For the rest of the framing, standard kiln-dried studs are sufficient. When it comes to insulation, if you decide to upgrade, you have several options beyond blankets. Exploring different materials, like those discussed in our guide on insulation between brick and drywall, can provide insights into what might work best against a masonry wall.
Handling Electrical and Plumbing
Once the walls are framed, you’ll need to run electrical wiring and any plumbing. Plan your layout carefully. The space between the studs is where all your utilities will go.
Drill holes through the center of the studs to run wires. Be mindful not to drill too close to the edge of the stud, as this can compromise its strength and create a risk of screws or nails piercing the wire later. Always follow local electrical codes and hire a licensed electrician if you are not experienced.
Foam vs Fiberglass vs Cellulose: Which Insulation is Best for Your Home?
When it comes to choosing the best insulation for your home, particularly for your attic, there are three primary options: foam, fiberglass, and cellulose. Each has unique properties and benefits, depending on your home’s needs, climate, and budget. Let’s break down the advantages and considerations of each type.
Foam Insulation (Spray Foam)
Spray foam insulation, especially open-cell spray foam, is a highly effective option for insulating both attics and walls. It expands when applied, filling gaps and cracks that may be difficult to reach with other materials. This helps create an airtight seal, which significantly reduces heat loss and air infiltration. Open-cell foam is also soundproof, making it a great choice for reducing noise between rooms or from the outside.
Advantages:
-
Excellent air sealing properties, preventing drafts
-
Highly energy-efficient, reducing heating and cooling costs
-
Resistant to mold and moisture
-
Long-lasting performance
However, spray foam tends to be more expensive than other options and requires professional installation, which can increase labor costs. It may also not be the best option for homeowners on a tight budget.
Fiberglass Insulation
Fiberglass insulation is one of the most common and affordable choices for attics and walls. It is made of fine glass fibers and comes in batts, rolls, or loose-fill form. Fiberglass is effective at reducing heat transfer and comes with a relatively low upfront cost.
Advantages:
-
Affordable compared to other insulation options
-
Widely available and easy to install (DIY-friendly for some types)
-
Good thermal resistance (R-value)
-
Non-combustible and fire-resistant
The downsides include its potential for air leaks if not properly installed, and it is less effective at sealing gaps compared to spray foam. It can also settle over time, reducing its effectiveness.
Cellulose Insulation
Cellulose insulation is an eco-friendly option made from recycled paper, typically newsprint or denim, that has been treated with a fire retardant. It is most commonly available as blown-in insulation, making it ideal for attic spaces.
Advantages:
-
Environmentally friendly (made from recycled materials)
-
Good at filling gaps and cavities, improving overall air sealing
-
More affordable than spray foam, yet often more effective than fiberglass in certain applications
-
Helps with noise reduction
On the downside, cellulose can absorb moisture, potentially leading to mold growth or a decrease in its insulating performance. It also requires professional installation to ensure it is applied correctly and uniformly.
Final Touches: Drywall and Finishing
With the framing, insulation, and utilities in place, you are ready for drywall. Use moisture-resistant drywall (often called green board or purple board) for basement applications, especially for the first few feet up from the floor. This provides an extra layer of protection against potential moisture issues.
After hanging the drywall, you can proceed with taping, mudding, and painting to complete your new living space. Proper framing over your existing blanket insulation sets the stage for a successful finish. For those considering other areas, understanding R-values is key, such as asking is R11 insulation good for a garage, which highlights how insulation needs vary by location.
By taking the time to create an air gap and manage the vapor barrier correctly, you ensure your basement will be a comfortable, dry, and energy-efficient part of your home for years to come.