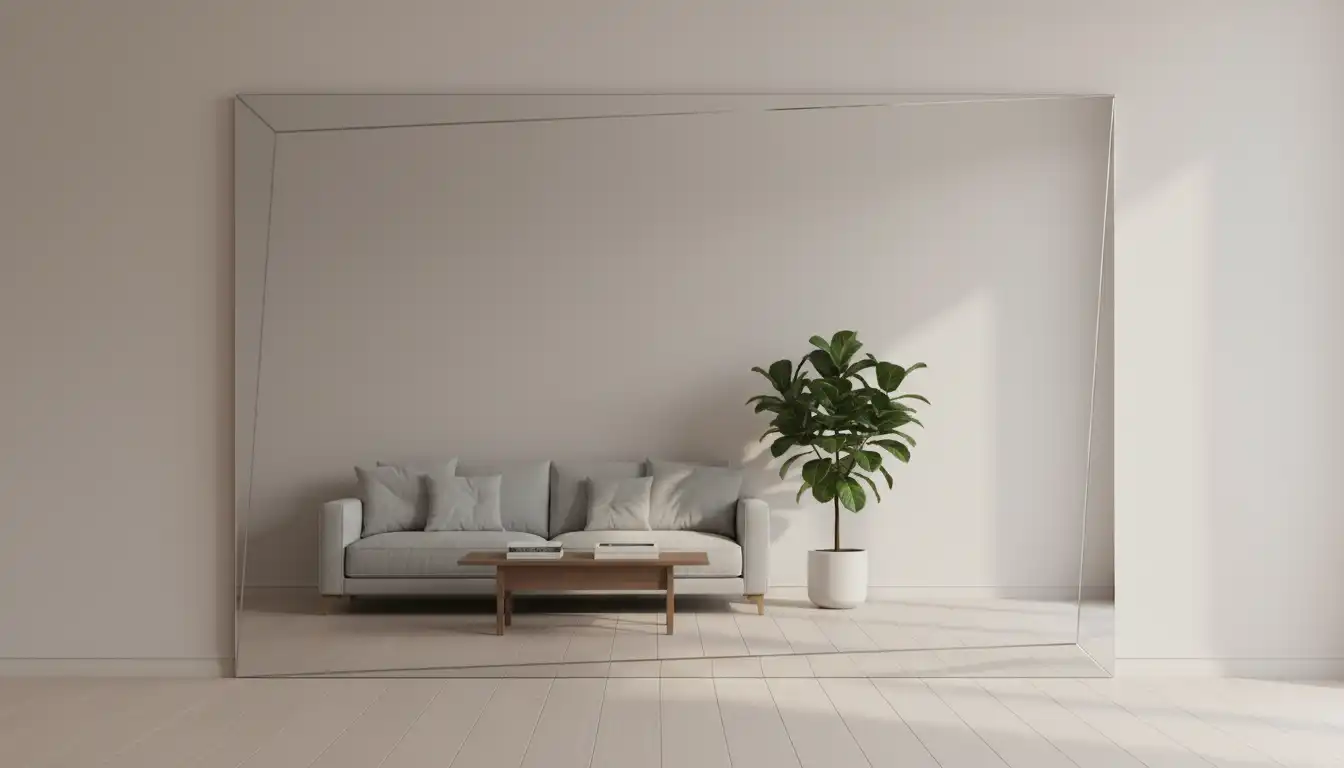
Floor to Ceiling Mirror Installation: Avoid This #1 Catastrophic Mistake
A floor-to-ceiling mirror promises to revolutionize a room. It can double the sense of space, amplify light, and add a touch of undeniable luxury. Yet, this transformative design element carries a significant risk that most homeowners overlook, leading to disastrous results. The allure of a grand, seamless reflection often blinds people to the most critical factor: the wall itself.
The problem isn’t just about hanging a heavy object; it’s about ensuring the surface is perfectly prepared for something that will reflect every single imperfection with unforgiving clarity. A small oversight can lead to a warped, funhouse-like reflection, or worse, catastrophic failure where the entire sheet of glass shatters. This guide will walk you through the hidden dangers and provide a clear path to a flawless, show-stopping installation.
You'll Learn About
Why a Flawless Wall is Non-Negotiable
The single most catastrophic mistake in a floor-to-ceiling mirror installation is assuming your wall is perfectly flat. It almost never is. Standard drywall and plaster walls have subtle bows, waves, and imperfections that are invisible to the naked eye but become glaringly obvious when a large mirror is mounted directly onto them.
Glass, while rigid, has a degree of flexibility. When pressed against an uneven surface with adhesive, the mirror will bend to conform to the wall’s contours. This slight bend is all it takes to create a distorted, carnival-mirror reflection that can make an entire room feel unsettling and cheap. More dangerously, this tension creates stress points in the glass, making it significantly more prone to cracking or shattering over time.
The Unseen Dangers Lurking in Your Walls
Beyond flatness, several other factors make wall preparation the most crucial step. You must have a clear understanding of your wall’s structure before proceeding. Using a stud finder is essential to locate the vertical framing members that will provide the necessary support for any mechanical fasteners.
Never rely on drywall anchors alone for a mirror of this size and weight. Furthermore, check for hidden electrical wiring or plumbing before drilling any holes. In bathrooms, moisture is a primary concern. The wall must be properly sealed, and you should use a mirror adhesive specifically formulated for high-humidity environments to prevent the silver backing from degrading.
DIY vs. Professional Installation: An Honest Comparison
Tackling a floor-to-ceiling mirror installation yourself can be tempting, especially when considering the potential cost savings. However, this is one of the highest-stakes DIY projects you can undertake. The risks include severe injury from broken glass, costly damage to your home, and an unsatisfactory final result. Professionals, or glaziers, have specialized tools like heavy-duty suction cups for safe handling and experience in assessing wall conditions that the average homeowner lacks.
While the upfront cost of professional installation may seem high, it often includes a guarantee of a perfect, distortion-free result and insurance to cover any mishaps. A seemingly straightforward task like this has many variables, and the financial risk of a broken custom-cut mirror can easily exceed the cost of professional labor. Before you decide, consider a detailed breakdown of what each path entails.
Weighing Your Options
The decision to hire a pro or do it yourself comes down to your budget, skill level, and tolerance for risk. Even experienced DIYers can be challenged by the sheer weight and fragility of a large mirror panel. Professional installers not only handle the heavy lifting but also take precise measurements and ensure the mirror is ordered to the exact specifications, accounting for uneven floors or ceilings.
Many homeowners find that the peace of mind that comes with a professional installation is well worth the investment. Comparing the cost of other professional home installations can provide perspective on the value of expert labor for such a critical project.
| Factor | DIY Installation | Professional Installation |
|---|---|---|
| Average Cost | $200 – $500+ (mirror and materials) | $500 – $1,500+ (includes mirror, labor, and insurance) |
| Risk Level | High (personal injury, broken mirror, wall damage) | Low (installers are insured and experienced) |
| Required Tools | Heavy-duty suction cups, level, stud finder, caulk gun, shims | Professionals come fully equipped with specialized tools |
| Time Commitment | Full day to a weekend, depending on wall prep | 2-4 hours for a standard installation |
| Outcome Guarantee | None; reliant on personal skill | Guaranteed professional, distortion-free result |
Your Step-by-Step Installation Guide
If you decide to proceed with a DIY installation, meticulous planning and execution are paramount. This is not a project to be rushed. Enlist at least one strong helper, as handling a large sheet of glass alone is extremely dangerous.
Success hinges on getting every detail right, from the initial measurements to the final securing of the panel. The following steps provide a comprehensive roadmap, but always defer to the specific instructions provided by the mirror and adhesive manufacturers.
Step 1: Precision Measurement and Mirror Selection
Measure the height of your wall in at least three places: left, center, and right. Use the shortest measurement to ensure the mirror will fit. Do the same for the width. When ordering your mirror, request a 1/4-inch thickness for rigidity and a high-quality reflection. Always opt for a safety backing, which is a film applied to the back that holds the glass fragments together if it shatters.
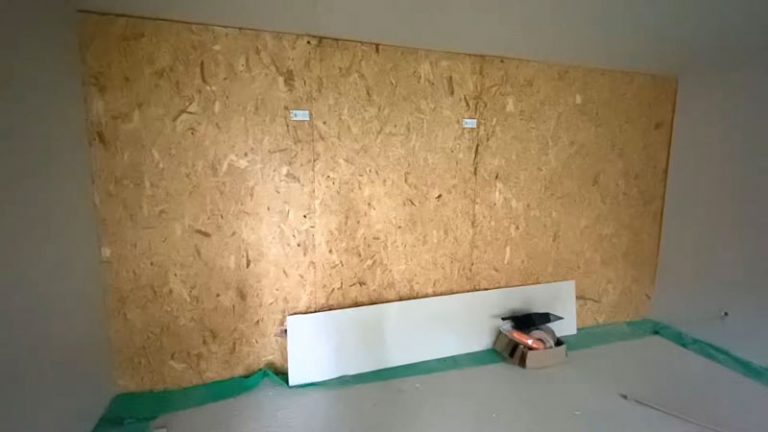
Step 2: The Critical Wall Preparation
This is where you’ll avoid the number one mistake. Use a long, straight edge or a 6-foot level to check the entire wall surface for dips and bows. Mark any high or low spots. Fill low spots with drywall compound, let it dry completely, and sand it smooth. Sand down any high spots. The goal is a surface that is as close to perfectly flat as possible. Prime the entire wall surface after any repairs to ensure the adhesive bonds correctly.
Step 3: Installing the Support System
A floor-to-ceiling mirror must have mechanical support at the bottom. A J-channel or L-bar is the standard method. This metal track will bear the full weight of the mirror. Find the studs in the wall and securely screw the channel into them. Use a level to ensure it is perfectly horizontal; an uneven base will cause the mirror to sit crooked and create stress.
Step 4: Applying the Adhesive
Choose a high-quality mirror mastic or adhesive that is specifically formulated to not damage the silver backing. Do not use generic construction adhesives. Apply the adhesive to the back of the mirror in vertical beads, roughly 4-6 inches apart. Applying it vertically allows for air circulation and lets any potential moisture drain, preventing mold growth and adhesive failure. Never apply adhesive in horizontal lines or enclosed circles.
Step 5: Setting the Mirror
With your helper, use heavy-duty glass suction cups to lift the mirror. Carefully guide the bottom edge into the J-channel. Once it is resting securely in the channel, tilt the mirror up and press it firmly against the wall. Walk your hands over the entire surface, applying even pressure to ensure the adhesive makes solid contact with the wall. For particularly large mirrors, temporary bracing may be needed to hold it in place while the adhesive cures.
The Secret to a Truly High-End Look
Beyond the technical installation, the design choices you make will determine whether your mirror looks like a luxurious architectural feature or a relic from a 1980s gym. The secret lies in what the mirror reflects. Before you commit to a wall, stand in the main viewpoints of the room and consider what you will see in the reflection. A mirror that reflects a cluttered corner or a boring hallway will only amplify those negative aspects.
Ideally, position your mirror to reflect a window with a beautiful view, a stunning piece of art, or an elegant light fixture. This creates a dynamic and expansive feel, truly maximizing the mirror’s potential. This design principle is just as crucial as the technical installation, turning a simple reflective surface into a powerful design tool that elevates the entire space. Pairing a large mirror with interesting textures, such as dark wood paneling on an adjacent wall, can also create a sophisticated and layered aesthetic.
Frequently Asked Questions
Even with a detailed guide, specific questions often arise during a project of this scale. Addressing these common concerns can help build confidence and prevent costly errors. Here are answers to some of the most frequent queries about floor-to-ceiling mirror installation.
What is the average cost for a professional installation?
The cost can vary widely based on your location and the size of the mirror. On average, you can expect to pay between $500 and $1,500 for a standard floor-to-ceiling mirror, including the mirror itself, materials, and labor. Custom cuts, beveled edges, or difficult access can increase the price.
Can a mirror be installed on an uneven wall without fixing it?
It is strongly discouraged. While a professional might be able to use shims behind the mirror to create a flatter plane, this is a complex solution that can leave gaps. The best and most reliable method is to flatten the wall itself before installation to prevent distortion and stress on the glass.
How do you clean and maintain a large mirror wall?
Use a clean, soft, lint-free microfiber cloth. For cleaning solution, a simple mixture of distilled water and white vinegar in a spray bottle works best. Spray the solution onto the cloth, not directly onto the mirror, to prevent liquid from seeping behind the edges and damaging the backing. Wipe in a zig-zag pattern from top to bottom.
What is the process for removing a glued-on mirror?
Removing a large, glued-on mirror is a difficult and dangerous task that is best left to professionals. It often involves carefully using a long piano wire to saw through the adhesive behind the mirror. The process almost always results in significant damage to the drywall underneath, which will need to be repaired or replaced.
Final Words
Ultimately, a successful floor-to-ceiling mirror installation is less about the mirror and more about the wall it adheres to. By focusing on creating a perfectly flat, stable, and prepared surface, you eliminate the single greatest risk of failure and distortion. Whether you choose to hire a professional or tackle the project yourself, this foundational principle remains the key to achieving that stunning, space-transforming reflection you envision. For other challenging installations, understanding the nuances, much like in this guide on hanging a heavy designer mirror, can make all the difference.