Fish Tape Stuck in Wall? Your Ultimate Guide to a Stress-Free Rescue
It’s a scenario that plays out in countless DIY projects and professional jobs alike. You are carefully feeding an electrical fish tape through a wall cavity, pulling a new wire, and everything feels like it’s going smoothly. Then, suddenly, it stops. You give it a gentle pull, but it’s completely, stubbornly stuck.
The immediate feeling is frustration, followed by the dread of a simple task turning into a major repair job. A fish tape stuck in the wall is a common problem, but brute force is rarely the answer and can often lead to damaged wires, broken plaster, or a snapped fish tape. This guide will walk you through why this happens and provide a systematic approach to safely freeing your tool.
You'll Learn About
Why Is My Fish Tape Stuck? Understanding the Common Culprits
Before you can solve the problem, you need to understand the cause. A fish tape can get snagged on a surprising number of unseen obstacles lurking within your walls. Knowing the likely culprit can help you choose the right extraction method.
The most common obstacles include insulation, existing wires, and sharp corners. Wall cavities, especially in older homes, are rarely empty and straightforward paths.
Hidden Obstructions Inside the Wall
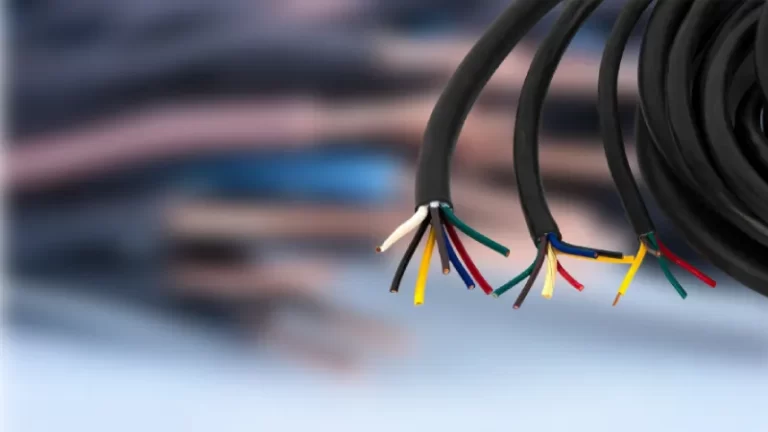
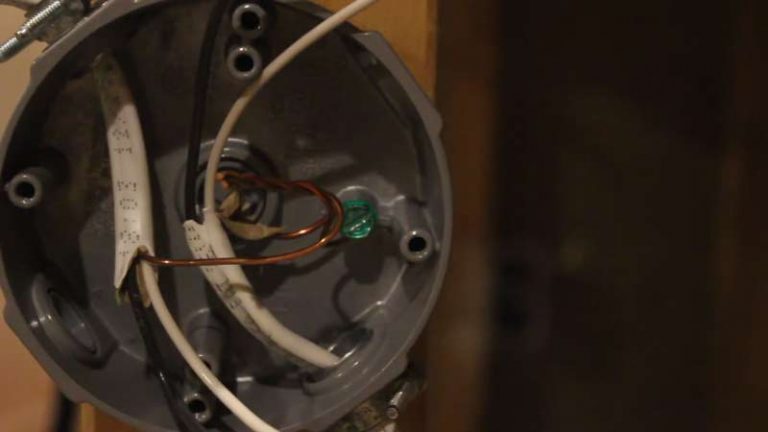
Wall cavities are often crowded with more than just air. Your fish tape could be caught on a variety of materials. Common culprits include fire blocks (horizontal wood blocks between studs), plumbing pipes, screws or nails protruding from the drywall or studs, and existing electrical or low-voltage wiring.
The hooked end of the fish tape is notorious for catching on these items. Sometimes, the tape itself can double back and create a kink that wedges itself firmly against the internal wall structure.
The Insulation Nightmare
Insulation is one of the biggest enemies of a smooth fish tape run. Fiberglass batt insulation is particularly problematic. The fibers can easily snag the end of the tape, and the more you pull, the more tangled it becomes, creating a large, immovable bunch.
Spray foam insulation presents another challenge. If it wasn’t applied evenly, it can create narrow, rough passages that grip the fish tape tightly.
Kinks, Bends, and Coils
Sometimes the problem is the fish tape itself. Forcing the tape through a tight bend can cause it to kink. Once kinked, that sharp angle can easily get lodged against a stud or other obstruction.
Steel fish tapes, in particular, have a memory and a tendency to coil. If you feed too much tape into a large, open cavity without meeting the other side, it can coil up on itself, creating a tangled mess that is nearly impossible to pull back. It’s important to estimate the distance you need to cross and mark your tape so you know if you’ve fed too much in.
Before You Yank: Initial Steps for a Gentle Rescue
When you first realize your fish tape is stuck, your instinct might be to pull harder. Resist this urge at all costs. Yanking can wedge the tape in even tighter, damage existing wiring, or break the fish tape, leaving it permanently entombed in your wall. The first steps should always be gentle and methodical.
The key is to use finesse rather than force. Often, a simple change in direction or a bit of lubrication is all that’s needed to free the tape.
Stop and Assess
The moment you feel significant resistance, stop. Don’t pull. Try to gently push the tape back in a few inches. This can sometimes be enough to disengage the hook or leader from whatever it’s caught on.
After pushing it in slightly, try to pull it out again with a gentle, steady pressure. Pay attention to the feel. Does it feel like it’s scraping, or is it a hard stop? This can give you clues about the nature of the obstruction.
The Push-Pull-Twist Technique
One of the most effective initial methods is a combination of movements. While maintaining light tension on the tape, try twisting or rotating it. This can often maneuver the tip around the obstacle.
Combine this twisting motion with small push-and-pull actions. This gentle wiggling can dislodge the tape from insulation fibers or a wood splinter. If you have a helper, one person can feed and twist from one end while the other applies steady, gentle pulling pressure from the other.
The Unstucking Toolkit: Gear Up for the Extraction
If the gentle approach doesn’t work, you’ll need to escalate your efforts. Having a few key tools on hand can make the process much easier and increase your chances of success without resorting to cutting open the wall.
Most of these items are common in a DIYer’s toolbox. The goal is to add lubrication to reduce friction and gain a better grip on the tape for more controlled force.
Essential Tools for the Job
Gather your supplies before you begin the more advanced techniques. You may not need everything, but it’s good to have them ready. Consider getting a pair of sturdy work gloves, locking pliers for a secure grip, a flashlight or headlamp to see into the wall cavity, and a suitable lubricant.
For lubricant, specialized wire-pulling lubricant is best as it’s designed not to harm wire insulation. However, in a pinch, a small amount of dish soap mixed with water can also work effectively. Avoid petroleum-based lubricants, as they can damage the plastic sheath on electrical wires over time.

The Two-Person “Push-and-Twist” Technique
This is an enhanced version of the solo method and is often highly effective. One person should be at each end of the run. The person at the feeding end pushes the tape in slightly while rotating it continuously in one direction.
Simultaneously, the person at the other end should pull with firm, steady pressure, not yanking. The combination of pushing, twisting, and pulling can “unscrew” the tape from the obstruction. Communicate clearly to coordinate your efforts.
Lubrication is Your Best Friend
Friction is a major factor when a fish tape gets stuck. Applying a wire-pulling lubricant can make a significant difference. If you can, try to squirt the lubricant into the opening where the tape enters the wall, aiming it along the tape itself.
If the run is inside a conduit, you may be able to pour a small amount of lubricant down the pipe. This allows it to flow down to the point where the tape is stuck, making it much easier to dislodge.
Advanced Extraction Methods When Gentle Tricks Fail
Sometimes, finesse isn’t enough. When your fish tape is truly jammed, you may need to apply more creative or forceful methods. These techniques come with a higher risk of damaging the tape or the wall, so proceed with caution and patience.
These methods range from using another tool to rescue the first one to the last resort of cutting into the drywall for direct access.
The “Second Tape” Rescue
This clever trick involves using a second fish tape to free the first. Feed another fish tape in from the opposite end of the wall cavity. The goal is to have the second tape’s hook snag the hook of the stuck tape.
Once you feel the two tapes connect, you can try to manipulate the stuck tape by pushing and pulling the rescue tape. Sometimes this is enough to change the angle and free it. In other cases, you might be able to pull the stuck tape through with the second one.
Creating an Access Point: Cutting the Drywall
This should always be a last resort. If you have exhausted all other options, you may need to cut a small, strategic hole in the drywall to access the stuck tape directly. Use a stud finder to locate the studs and any potential wiring or pipes before you cut.
Cut a small, clean rectangular hole that you can easily patch later. This will allow you to reach inside, identify the obstruction, and manually free the fish tape. Understanding your home’s structure is key; things like the spacing of support columns in a basement can inform you about the general framing layout. If you need to understand framing principles, you could learn about how far apart lally columns should be to get a sense of structural basics.
| Extraction Method | Difficulty | Required Tools | Potential Risk |
|---|---|---|---|
| Push-Pull-Twist | Easy | Hands, Gloves | Low: Minimal risk of further damage. |
| Lubrication | Easy | Wire-pulling lubricant or dish soap | Low: Ensure lubricant is safe for wires. |
| Two-Person Technique | Moderate | A helper | Low: Requires good communication. |
| Second Tape Rescue | Moderate | A second fish tape | Moderate: Can potentially get a second tape stuck. |
| Cutting Drywall | High | Drywall saw, stud finder, patching kit | High: Requires wall repair, risk of cutting wires/pipes. |
Prevention is Key: How to Avoid Getting Your Fish Tape Stuck Again
Once you’ve successfully retrieved your fish tape, the last thing you want is a repeat performance. A few preventative measures and best practices can dramatically reduce the chances of getting stuck on future projects.
Choosing the right tool for the job and properly preparing the end of your tape are crucial first steps. Technique is just as important; patience is more effective than speed.
Choose the Right Fish Tape and Leader
Not all fish tapes are created equal. Steel tapes are rigid and good for long, straight runs, but can kink easily. Fiberglass or nylon tapes are more flexible and less likely to get hung up in insulated walls or around bends. They are a safer choice when working in older homes with unpredictable obstructions, where you might even be dealing with outdated systems requiring something like a 2-prong air conditioner adapter.
The tip, or leader, is also critical. A flexible spring leader is much better at navigating bends than the simple hook found on many basic tapes. Tightly wrapping the hook and the attached wire with electrical tape creates a smooth, cone-like shape that is far less likely to snag.
Proper Feeding Technique
Never force the fish tape. Feed it into the wall slowly and steadily. If you feel resistance, pull back slightly, twist the tape, and try again from a slightly different angle. This helps the leader find the path of least resistance.
Working with a partner makes the job much easier. One person can feed the tape while the other looks or listens at the destination box to provide guidance and confirm when the tape has arrived.
When to Throw in the Towel: Calling a Professional Electrician
There’s no shame in admitting defeat. If you’ve tried multiple methods and the fish tape won’t budge, or if you’re worried about damaging critical components within the wall, it might be time to call a professional.
Electricians have specialized tools and a wealth of experience dealing with these exact situations. What might be a stressful, wall-damaging ordeal for a DIYer is often a quick fix for a pro. This is especially true if you suspect your tape is tangled with existing electrical wiring or plumbing; the risk of causing a much more dangerous and expensive problem is high. Protecting utilities is paramount, just as you might use a gas pipe cover for outside to shield exterior lines from damage.
Ultimately, getting a fish tape stuck is a frustrating but solvable problem. By staying calm, diagnosing the likely cause, and using methodical, gentle techniques first, you can often free your tool without any damage. And if all else fails, a professional can get the job done safely, ensuring your project can move forward.