Fireplace Gas Valve Cover Plate Removal: Your Ultimate Guide
That old, tarnished, or paint-caked fireplace gas valve cover plate can be a major eyesore. It disrupts the entire aesthetic of your hearth, but the thought of removing it can be intimidating. Many homeowners find themselves stuck with a cover plate that seems fused to the wall or floor.
You may be facing screws that are stripped, decades of paint sealing it shut, or rust that has bonded it in place. This guide provides the expert solutions you need to tackle this frustrating project with confidence.
You'll Learn About
Why That Small Cover Plate Is Such a Huge Problem
Removing a fireplace gas valve cover plate seems simple, but several common issues can turn it into a difficult task. Understanding these potential roadblocks is the first step toward a successful removal. You are not alone in this struggle; it’s a very common homeowner challenge.
The Painted-Shut Predicament
One of the most frequent issues is paint. Over the years, layers of paint from wall or floor updates can create a powerful seal around the edges of the plate. This effectively glues the cover to the surface, making it impossible to pry off without first breaking that seal.
Stripped Screws and Rusted Fasteners
The screws holding the plate in place are often old and made of soft metals like brass. They can easily become stripped if you use the wrong size screwdriver or apply too much force. Using the correct tool is critical to avoid this frustrating setback.
Furthermore, moisture from cleaning or humidity can cause the screws and the plate itself to rust or corrode. This corrosion can fuse the screws to the plate and the plate to the wall, requiring special techniques to break them free.
Safety First: The Critical Pre-Removal Step
Before you even think about touching a screwdriver, you must prioritize safety. You are working with a component related to a gas line. Always turn off the gas supply to the fireplace before beginning any work.
Locate the main gas shut-off valve for the fireplace, which is often in the wall or on the floor near the fireplace itself. Use a wrench to turn the valve to the “Off” position, which is typically a quarter turn so the handle is perpendicular to the pipe. If you are unsure, turn off the gas at the main meter for your home and consult a professional.
Your Essential Toolkit for a Successful Removal
Having the right tools on hand will make the job significantly easier and prevent damage to your wall, floor, and the gas valve itself. Gathering these items before you start will ensure a smooth process. A well-prepared workspace is a safe workspace.
Below is a comprehensive list of tools and materials you may need. Not every tool will be necessary for every situation, but it is wise to be prepared for the most common challenges you might face.
| Tool | Primary Purpose | Expert Tip |
|---|---|---|
| Multi-Bit Screwdriver | Removing the mounting screws. | Use a bit that fits the screw head perfectly to prevent stripping. Test multiple sizes. |
| Utility Knife or Razor Blade | Scoring the paint seal around the plate’s edge. | Use a fresh, sharp blade for a clean cut. Be careful not to cut into the wall or floor material. |
| Penetrating Oil (e.g., WD-40) | Loosening rusted screws and plates. | Apply a small amount and let it sit for at least 15-20 minutes before attempting removal. |
| Screw Extractor Kit | Removing screws that have been stripped. | This is a “last resort” tool but is invaluable when a screw head is too damaged for a screwdriver. |
| Heat Gun or Hair Dryer | Softening old, thick paint for easier removal. | Use on a low setting and keep it moving to avoid scorching the surface or creating fumes. |
| Thin Putty Knife or Pry Bar | Gently prying the plate away from the surface. | Work slowly and carefully around the edges to avoid damaging the surrounding area. |
| Protective Eyewear and Gloves | Ensuring your personal safety during the project. | Always wear safety glasses to protect from debris or slipping tools. |
A Step-by-Step Guide to Flawless Fireplace Gas Valve Cover Plate Removal
With your gas supply safely turned off and your tools at the ready, you can now begin the removal process. Follow these steps methodically for the best results. Patience is key to avoiding damage.
Step 1: Prepare the Workspace
Clear the area around the fireplace of any flammable materials, rugs, or decorations. Ensure you have good lighting to see the condition of the screws and the plate’s edges clearly. A clean workspace prevents accidents.
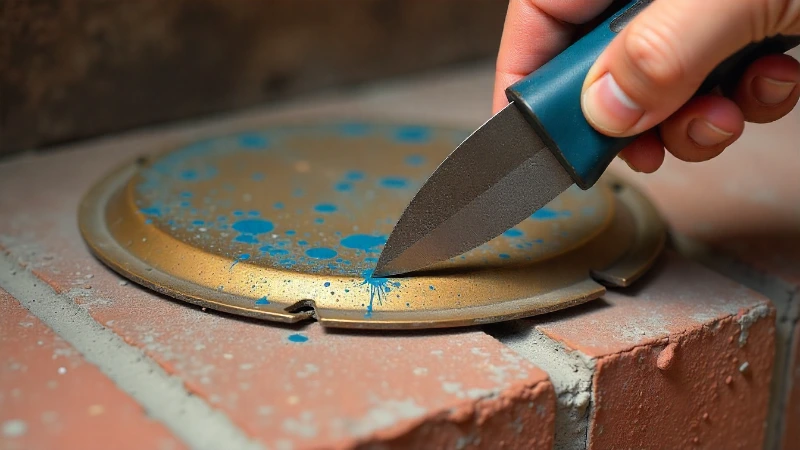
Step 2: Score the Paint Seal
If the plate has been painted over, this is your first and most important move. Take your sharp utility knife and carefully run the blade around the entire perimeter of the cover plate. You want to cut through all the layers of paint, breaking the bond between the plate and the wall or floor.
Make several passes if needed, applying gentle but firm pressure. A clean cut here is essential for preventing paint from peeling off the wall when you pry the plate away.
Step 3: Attempt to Remove the Screws
Select a screwdriver bit that fits the screw heads snugly. Press firmly into the screw and try to turn it counter-clockwise. If the screw turns, even with resistance, continue until it is fully removed. If it doesn’t budge or if the screwdriver slips, stop immediately to avoid stripping it and proceed to the troubleshooting section below.
Step 4: Gently Pry the Cover Plate
Once the screws are out, the plate may still be stuck due to grime or corrosion. Slide a thin putty knife under one edge of the plate. Gently wiggle it and work your way around the perimeter, slowly prying it up.
Do not use excessive force in one spot, as this can bend the plate or damage the surface underneath. The goal is to lift it evenly until it comes free from the opening.
Troubleshooting Common Removal Nightmares
Sometimes, even with careful preparation, things go wrong. Here’s how to handle the most common and frustrating problems that arise during fireplace gas valve cover plate removal.
What to Do with a Stripped Screw
A stripped screw is a major roadblock. Your first option is to try a rubber band: place it over the screw head and then insert the screwdriver. The rubber can provide extra grip.
If that fails, it’s time for a screw extractor. This tool drills into the damaged screw head and then uses a reverse-threaded bit to bite into the screw and twist it out. Follow the kit’s instructions carefully.
Breaking Through Stubborn Rust and Corrosion
If rust is the issue, penetrating oil is your best friend. Liberally spray the oil around the screws and the edge of the plate. Let it soak in for a significant amount of time—even overnight for severe cases.
After letting it sit, tap the plate gently with the handle of your screwdriver to help vibrate the oil into the threads. Then, try removing the screws and prying the plate again. This simple chemical action can save a lot of physical effort.
Managing a Cover Plate That Cracks or Breaks
Older plates, especially those made of cast metal or plastic, can become brittle. If a piece breaks off during removal, don’t panic. Continue working carefully to remove the remaining pieces.
Use pliers to grip any exposed edges and wiggle them free. The good news is that you are replacing the plate anyway, so a broken one is not a catastrophic failure. Just be sure to clean up any small, sharp fragments.
Understanding Your Fireplace’s Gas System
This small project is a good opportunity to learn a little about how your fireplace functions. The gas valve is a critical component for safety and operation. For instance, issues with the pilot light and ignition are sometimes related to the thermocouple, which can lead to a situation of detecting a flame sense without the gas valve being on.
Proper maintenance of your home’s systems is always important. Problems in one area can sometimes signal issues in another, such as when a receiver drier is freezing up during recovery in an HVAC system, indicating potential moisture or refrigerant issues that require professional attention.
Thinking about home comfort and fuel sources can also be beneficial. While many fireplaces use natural gas, other appliances offer powerful alternatives, such as the convenience found in many modern propane snowblowers, which rely on the same fuel type for robust outdoor power.
What Comes Next: Installation and Finishing Touches
With the old plate successfully removed, your job is nearly done. Take a moment to clean the area around the gas valve stem. A wire brush can help remove any remaining rust or debris.
When you purchase a new cover plate, ensure it is the correct size for your opening and that it comes with new screws. Installation is straightforward: simply place the new plate over the valve stem and secure it with the new screws. Do not overtighten the screws, as this can damage the new plate or the threads.
A Clean Finish: Final Thoughts
Removing a stubborn fireplace gas valve cover plate is a project that requires more patience than power. By understanding the common problems like paint seals and stripped screws, you can prepare with the right tools and techniques.
Always remember to shut off the gas supply before you begin. A methodical approach will protect your property from damage and lead to a clean, professional-looking result that instantly upgrades the appearance of your hearth.