That Wall Hole Is Hiding a Bigger Problem. Here’s the Fiber Tough Patch Fix.
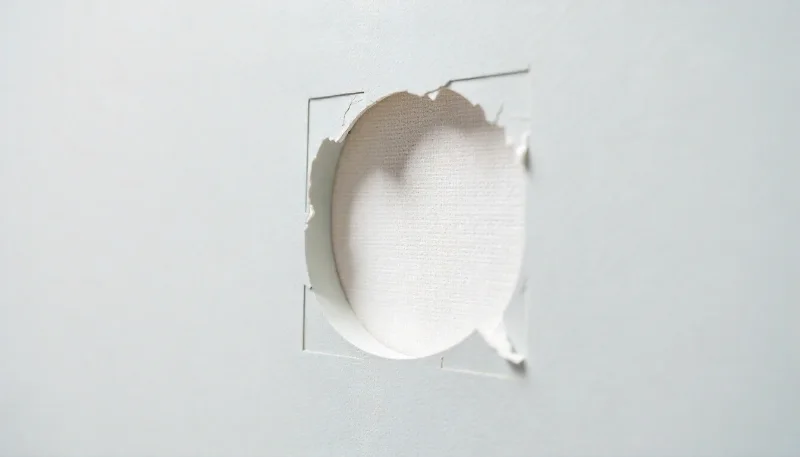
You hear a sudden crash from the other room. Your heart sinks. You rush in to find the culprit: a doorknob, a stray toy, or an accidental stumble has left a gaping, ugly hole in your otherwise perfect drywall. It’s a frustrating eyesore that screams “major project.”
For years, fixing anything larger than a nail hole meant a complicated, multi-step process involving cutting drywall, fitting wood backings, and layers of messy joint compound. But what if there was a stronger, faster, and more durable way? Enter the fiber tough patch, a modern solution engineered to make drywall repair simpler and more resilient than ever before.
You'll Learn About
What Exactly Is a Fiber Tough Patch (And Why Is It So Strong)?
A fiber tough patch isn’t your average repair solution. It’s a composite of high-strength materials designed for maximum durability. Typically, it consists of a self-adhesive backing, a rigid metal plate (like aluminum), and a top layer of strong fiberglass mesh.
This multi-layer construction is what sets it apart. The adhesive holds it firmly in place, the metal plate provides a solid, inflexible bridge over the hole, and the fiberglass mesh grips the joint compound, preventing future cracks. This technology creates a permanent bond that integrates into the wall itself, offering a repair that is often stronger than the original drywall.
When You Should (And Shouldn’t) Reach for a Fiber Patch
A fiber tough patch is an incredibly versatile tool, but it’s not the right solution for every situation. Knowing when to use it is key to a successful repair. These patches are ideal for holes ranging from the size of a golf ball up to about 5-6 inches in diameter—perfect for the common doorknob hole or other moderate impacts.
However, for very large holes, you may still need to cut and install a new piece of drywall. Additionally, a patch won’t solve underlying structural problems. If you find your drywall moves when pushed, a patch is just a temporary fix for a much bigger issue that needs investigation. Similarly, these patches are designed for standard drywall and may not be the best choice for older, crumbling plaster walls which might require more specialized repair techniques.
Step-by-Step Guide: An Invisible Repair with a Fiber Patch
Achieving a professional-quality, invisible repair is all about technique. Rushing the process or skipping steps will leave you with a noticeable bulge on your wall. Follow these steps carefully for a flawless finish.
Step 1: Prepare the Damaged Area
This is the most critical step. A clean surface ensures the patch will adhere properly. Start by removing any loose pieces of drywall paper or gypsum from around the edges of the hole with a utility knife.
Next, lightly sand the area immediately surrounding the hole with medium-grit sandpaper. This scuffs up the paint and creates a better surface for both the patch’s adhesive and the joint compound to stick to. Wipe away all dust with a clean, damp cloth and let it dry completely.
Step 2: Apply the Fiber Tough Patch
Peel the protective backing off the patch. Center it carefully over the hole, ensuring the metal portion completely covers the opening with some overlap. Press down firmly, starting from the center and working your way out to the edges.
Run your fingers or a putty knife over the entire surface of the patch to ensure it is completely flat against the wall with no air bubbles. A secure, flat application is essential for the next steps.
Step 3: Apply the First Coat of Joint Compound
Using a 6-inch drywall knife, scoop a moderate amount of joint compound. The secret to a smooth finish is applying thin, even coats. Start by forcing the compound through the fiberglass mesh of the patch, ensuring a good bond.
Then, spread the compound over the entire patch, extending about 2 inches beyond its edges. Use firm, even pressure to “feather” the edges—this means applying more pressure on the outer edge of the knife so the compound becomes thinner and thinner, blending into the surrounding wall.
Step 4: Sand and Apply the Second Coat
Allow the first coat to dry completely, which can take up to 24 hours depending on the compound and humidity. Once dry, lightly sand the entire area with fine-grit sandpaper to knock down any high spots or ridges. Your goal is to smooth it out, not to remove the compound.
Wipe away the dust. For the second coat, use a wider drywall knife (10 or 12 inches). Apply another thin layer of compound, this time extending it 2-3 inches beyond the edge of the first coat. This wider feathering is crucial for making the repair invisible by blending the slight thickness of the patch over a much larger area.
Step 5: Final Sanding, Priming, and Painting
Let the second coat dry completely. Perform a final, very light sanding with 220-grit sandpaper to ensure a perfectly smooth surface. Feel the area with your hand; it should be completely smooth and level with the rest of the wall.
Wipe away all dust. Do not skip this step: you must prime the patch. If you paint directly over the joint compound, the paint will absorb differently, creating a dull spot known as “flashing.” A single coat of quality primer will seal the repair and ensure your top coat of paint has a uniform sheen and color.
Common Mistakes That Will Ruin Your Repair
Even with a great product, simple mistakes can lead to a sloppy-looking job. Here are the most common pitfalls to avoid:
- Applying compound too thickly: This is the number one cause of a noticeable hump. Multiple thin coats are always better than one thick one.
- Not feathering the edges: Failing to blend the compound far beyond the patch will create a visible edge.
- Sanding too aggressively: You can accidentally sand down to the mesh or metal, forcing you to re-apply compound.
- Skipping the primer: This guarantees the patched area will look different from the rest of your wall once painted.
- Ignoring bigger issues: If you’re patching a hole from a previous project, like when you need to figure out the cost to remove dog door in wall, ensure the structure is sound before just covering it up.
Fiber Patch vs. Other Repair Methods
How does a fiber tough patch stack up against traditional methods? Here’s a quick comparison to help you choose the right technique for your project.
| Repair Method | Best For | Difficulty | Strength |
|---|---|---|---|
| Fiber Tough Patch | Small to medium holes (1-6 inches) | Easy | Excellent |
| Spackle Only | Tiny holes (nail holes, dings) | Very Easy | Poor |
| California Patch | Small to medium holes (1-4 inches) | Moderate | Good |
| Drywall Section Replacement | Large holes (over 6 inches) | Difficult | Excellent |
Pro Tips for a Truly Invisible Finish
Ready to take your repair skills to the next level? Here are some professional tips for a flawless finish:
- Use the Right Tools: A flexible, high-quality drywall knife makes spreading and feathering compound much easier.
- Mimic the Texture: If your walls have a texture (like orange peel or knockdown), you’ll need to replicate it on the patch. You can buy aerosol texture sprays that make this easy for DIYers.
- Check Your Work with Light: Hold a flashlight at a sharp angle to the wall. This will reveal any high or low spots, ridges, or imperfections that you can’t see with overhead lighting.
- Be Patient: The biggest key to great drywall work is allowing adequate drying time between coats. Rushing the process will compromise the quality of the repair. For more complex jobs, like learning how to rewire a house with plaster walls, patience is even more critical.
Frequently Asked Questions
Can I use a fiber patch on plaster?
While fiber patches are designed for drywall, they can sometimes be used on plaster for small, stable holes. However, because plaster can be brittle and prone to cracking, you must ensure the area is solid. For larger plaster repairs, traditional plaster and lath methods are often more reliable.
How big of a hole can a fiber patch really cover?
Most standard fiber tough patches are designed for holes up to about 6 inches. While larger patches exist, once a hole gets bigger than that, cutting a custom piece of drywall often provides a more stable and flatter repair.
Will the patch bubble or peel later?
If you prepare the surface correctly by cleaning and sanding it, the patch’s adhesive will form a permanent bond. Bubbling or peeling is almost always a sign of poor surface prep, where dust or debris prevented the patch from sticking properly.
The Final Word on a Flawless Wall
An unexpected hole in your drywall doesn’t have to be a source of stress. With a fiber tough patch and the right technique, you can achieve a repair that is not only invisible but also incredibly strong and durable. By focusing on careful preparation, applying thin coats of compound, and patiently feathering the edges, you can restore your wall to its original, flawless condition.