Exposed Shower Plumbing on Glass Wall: Is It Worth the Risk?
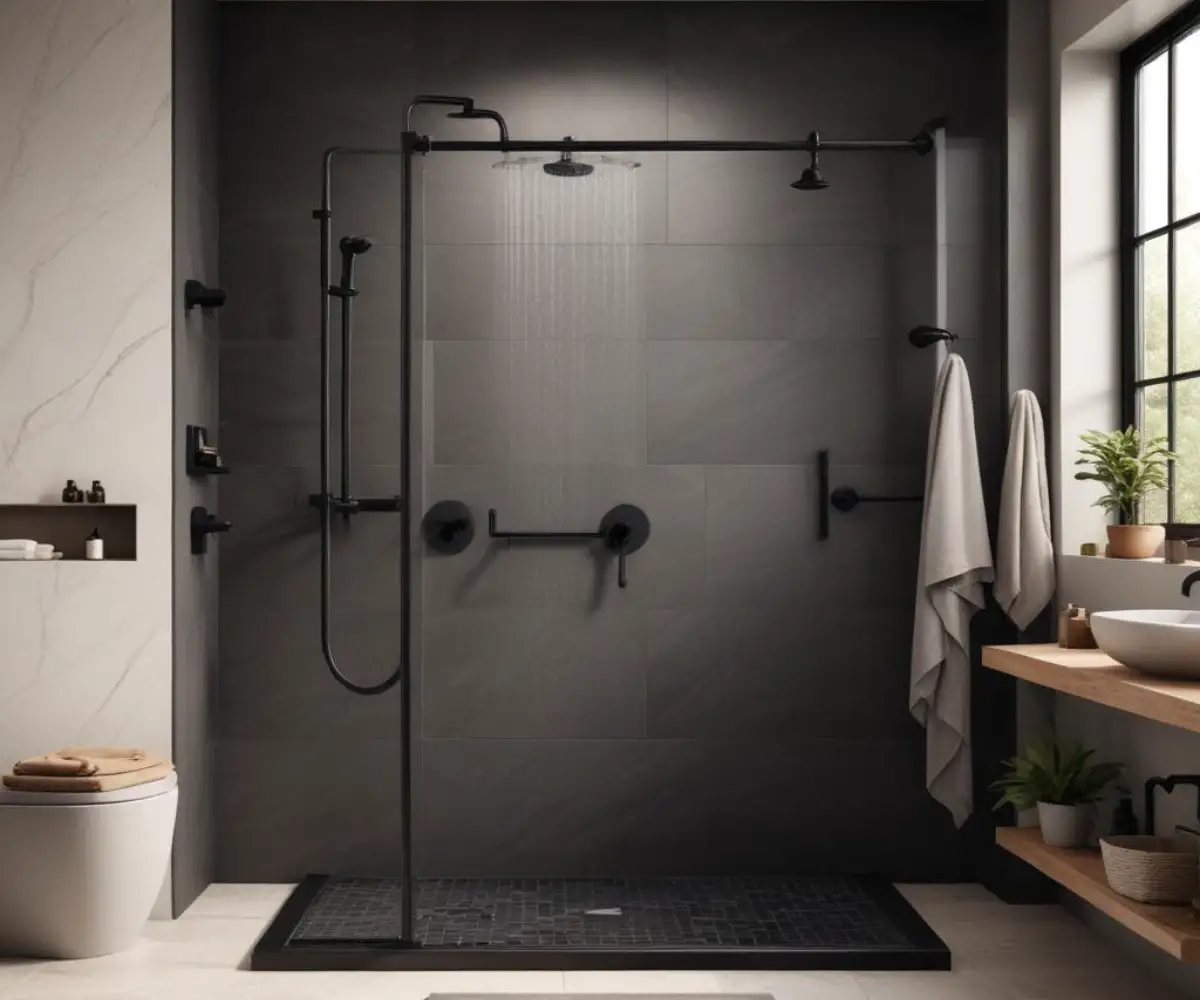
You have seen the images in design magazines and blogs: a stunning, minimalist shower where gleaming chrome or matte black pipes seem to float in mid-air, mounted directly onto a seamless pane of glass. It is a breathtaking look that screams luxury and modern design. But then, reality sinks in. How is it possible to safely mount heavy, water-filled fixtures to a fragile sheet of glass?
The core problem is the immense technical challenge of achieving this “floating” aesthetic. Homeowners and designers alike are often stumped by the structural, plumbing, and safety requirements. This article will demystify the process, breaking down the critical engineering and planning needed to make exposed shower plumbing on a glass wall a stunning and safe reality in your home.
You'll Learn About
Why This Bold Design is Taking Over Bathrooms
The trend towards exposed shower systems on glass isn’t just about looks; it’s a strategic design choice with tangible benefits. By eliminating the visual bulk of a tiled shower wall, this design makes the entire bathroom feel larger and more open. It maximizes the flow of natural light and creates an unparalleled sense of modern sophistication.
This design is particularly effective in walk-in showers, where a single glass panel serves as both the enclosure and the fixture mount. It embodies a commitment to minimalism, stripping away unnecessary elements to showcase the raw beauty of the plumbing itself. For those seeking a unique, high-impact feature, this is a design that delivers.
The Secret Strength: It’s Not Just About the Glass
The idea of drilling into and hanging heavy fixtures from a glass panel can seem daunting, but the success of this design lies in meticulous engineering that happens long before the shower is ever used. It’s a system where every component is designed to work in concert, from hidden supports to the specific type of glass used. The stability doesn’t come from the glass alone, but from a robust, integrated structure.
This approach moves beyond typical construction, requiring a level of precision and coordination typically reserved for commercial projects. However, with the right knowledge and professional team, it is entirely achievable in a residential setting. The key is understanding that the glass is part of a larger, carefully planned assembly.
The Unseen Engineering: How It Actually Works
Successfully mounting exposed shower plumbing on a glass wall hinges on two things: specialized hardware and structural reinforcement. It’s an illusion of simplicity that is backed by serious engineering. Without these hidden elements, the project is destined for failure.
Forget standard off-the-shelf solutions. This type of installation requires components specifically designed to distribute weight and stress safely across the glass panel and transfer it to the home’s structural framing. This is where professional expertise becomes non-negotiable.
The Critical Role of Bracing and Support
The glass panel itself cannot bear the load of the plumbing fixtures and the force of daily use on its own. Wall-to-glass and ceiling-to-glass support bars are essential. These metal arms connect the glass panel to the solid framing of your bathroom, providing the rigidity needed to prevent flexing or movement.
Furthermore, the wall where the plumbing originates and where the support arms anchor must be properly blocked. This means adding solid wood blocking (typically 2x6s or double 2x4s) between the wall studs during the framing stage. This provides a secure anchor point for both the water supply lines and the support hardware, ensuring nothing will pull loose over time.
Specialized Hardware is Non-Negotiable
The fixtures and mounting hardware used in this application are highly specialized. The shower valve and riser pipes are secured through precisely drilled holes in the glass, using mounting kits with robust back-to-back clamps and protective gaskets. These gaskets are crucial, as they prevent any metal-on-glass contact, which could create stress points and lead to fractures.
These mounting systems are engineered to clamp onto the glass, distributing the load over a wider surface area. Think of it like a sandwich, with the hardware clamping the glass from both sides. This ensures a secure fit that can withstand the torque of turning handles and the weight of the showerhead.
Glass Type and Fabrication: The Foundation of Safety
Not just any glass will do. The panel must be made from tempered safety glass, typically 3/8-inch or 1/2-inch thick. Tempered glass is heat-treated to be four to five times stronger than standard glass. Importantly, if it does break, it shatters into small, dull-edged pieces rather than sharp shards.
Crucially, all holes for the plumbing and mounting hardware must be drilled by the glass fabricator before the glass is tempered. Once glass has been tempered, it cannot be cut or drilled. This underscores the importance of finalizing your plumbing fixture selection and layout very early in the design process.
Choosing the Right Exposed Shower System
With the structural requirements understood, the focus shifts to aesthetics and functionality. Exposed pipe shower systems come in a wide range of styles, from vintage-inspired designs with cross handles to sleek, modern setups with minimalist levers. When making your selection, consider both the look and the user experience.
The finish of your fixtures will play a major role in the final design. Matte black offers a bold, contemporary statement, while polished chrome provides a timeless shine. Brushed brass and nickel can introduce warmth and a touch of industrial chic. Ensure the finish you choose is durable and designed for wet environments to prevent tarnishing or corrosion.
Thermostatic vs. Pressure-Balanced Valves
Beyond looks, the type of valve is a key consideration. A pressure-balanced valve is a single-handle unit that maintains water temperature by balancing the pressure of the hot and cold water. It’s a reliable and common choice.
A thermostatic valve offers a higher level of control. It allows you to pre-set the water temperature, and the valve will automatically mix the hot and cold water to maintain that exact temperature, even if there are pressure fluctuations elsewhere in the house. While more expensive, thermostatic systems provide a superior and safer showering experience, preventing scalding.
Planning Your Installation: 5 Steps You Can’t Skip
A flawless execution of this design requires impeccable planning. The process is far less forgiving than a standard shower installation, and mistakes can be incredibly costly. Success depends on coordinating multiple tradespeople and making critical decisions in the right order.
During a major renovation like this, you may need to arrange for alternative bathing solutions. Setting up a temporary shower during renovation can be a lifesaver, allowing the project to proceed without disrupting your daily life.
Step 1: Coordinate with Your Glass Fabricator and Plumber Early
This is the most critical step. Your plumber and glass fabricator must be in communication before anything is ordered or installed. You must provide the exact specifications of your chosen shower system to the glass company so they can create a precise template for drilling the holes. Any miscalculation can render a very expensive piece of tempered glass useless.
Finalize the height of the showerhead, the placement of the valve, and the location of any support arms. These measurements must be exact. Only after these details are confirmed and signed off on can the glass be sent for fabrication.
Step 2: Ensure Proper Wall Blocking and Support
Work with your contractor to ensure the walls that will support the glass panel and plumbing are properly reinforced. This involves opening the wall to install solid wood blocking between the studs at all anchor points. This includes the area where the water pipes emerge and anywhere a support bar will be mounted.
Step 3: Flawless Waterproofing and Drainage
Because this design is common in open, curb-less showers, waterproofing and drainage are paramount. The shower floor must have an adequate slope to guide water directly to the drain, preventing it from pooling or escaping into the main bathroom area. A poorly sloped floor can lead to significant water damage over time, a problem that requires a comprehensive shower curb slope fix.
Step 4: Hire an Experienced Professional Team
This is not a DIY project. You need a team that includes a licensed plumber with experience in custom showers, a reputable glass installation company, and a skilled contractor. Verify their experience with this specific type of installation and ask to see examples of their previous work. The precision required leaves no room for error.
Step 5: Consider the Overall Bathroom Layout
An open, glass-enclosed shower has a major impact on the flow and functionality of the entire bathroom. Consider how it interacts with other elements. For instance, in a large primary bathroom, this type of shower can be a stunning centerpiece, especially in a bathroom with two doors that serves as a pass-through space.
Exposed Shower Plumbing on Glass: The Pros and Cons
Like any high-end design feature, mounting shower plumbing on a glass wall comes with a unique set of advantages and disadvantages. It’s essential to weigh these factors carefully to determine if this ambitious design is the right fit for your home, lifestyle, and budget.
The visual appeal is undeniable, but practical considerations like cleaning, cost, and complexity must be part of the decision-making process. The following table provides a clear, balanced overview to help you make an informed choice.
| Pros (The Advantages) | Cons (The Challenges) |
|---|---|
| Stunning Aesthetics: Creates a sleek, modern, and high-end “floating” look that makes a bathroom feel larger and brighter. | High Cost: Significantly more expensive due to specialized hardware, custom glass fabrication, and expert labor requirements. |
| Easier to Clean: With no grout lines on the main wall, cleaning is simplified to just wiping down the glass and metal fixtures. | Complex Installation: Requires precise coordination between plumbers, glass fabricators, and contractors. Not a DIY-friendly project. |
| Improved Accessibility: Often used in open, curb-less designs that are easier to access for individuals with mobility challenges. | Less Forgiving: Mistakes in measurement or installation are difficult and costly to correct once the tempered glass is fabricated. |
| Showcases Tilework: Allows beautiful tilework on the adjacent walls to be fully visible, turning it into a design feature. | Potential for Leaks: While safe when installed correctly, the penetrations in the glass for plumbing must be perfectly sealed to prevent leaks. |
| Easier Maintenance Access: Unlike concealed plumbing, all components are accessible, simplifying future repairs or replacements. | More Cleaning Surfaces: While there are no grout lines, the exposed pipes and hardware require regular polishing to prevent water spots. |
What Does It Really Cost? A Realistic Budget Breakdown
The cost of installing an exposed shower system on a glass wall is one of the biggest deterrents for many homeowners. It is a premium feature with a premium price tag. The total cost can vary widely based on location, fixture quality, and the complexity of the installation, but you should expect it to be substantially higher than a conventional shower.
The budget can be broken down into three main categories: the shower system itself, the custom glass panel, and the specialized labor required to put it all together. Cutting corners in any of these areas is not recommended and can lead to catastrophic failure.
Hardware and Fixtures
An exposed thermostatic shower system from a reputable brand can range from $800 to over $3,000. This cost depends on the brand, finish, and features. Specialized mounting hardware and support bars will add another $200 to $600 to the total.
Custom Glass and Fabrication
A custom-fabricated panel of 3/8-inch or 1/2-inch thick tempered glass is a significant expense. The cost is influenced by the size of the panel and the number of precision-drilled holes required. Expect to pay between $1,000 and $2,500 for the glass panel alone.
Professional Labor
Labor is a major component of the overall cost. You are hiring for expertise and precision. The combined labor costs for the plumber, glass installer, and contractor to prepare the site and complete the installation can range from $1,500 to $4,000 or more, depending on regional labor rates and project complexity.
Is This Ambitious Design Right for Your Home?
An exposed shower system on a glass wall is more than just a bathroom fixture; it’s a statement piece. It represents a commitment to high-end design and a willingness to invest in specialized craftsmanship. The result can be truly spectacular, creating a shower experience that feels both luxurious and liberating.
However, this design is not for the faint of heart or those on a tight budget. It demands meticulous planning, a significant financial investment, and the expertise of a skilled professional team. If you are prepared for the complexity and cost, the reward is a breathtaking bathroom feature that is as functional as it is beautiful.