Ethernet Conduit: Your Ultimate Guide to Protecting Network Cables
You have the perfect spot for a new security camera, a detached office, or a gaming setup, but there’s a problem. The ethernet cable needs to be run outdoors, through an unfinished basement, or buried underground. Simply tacking an exposed cable to the wall feels wrong, and for good reason. It leaves your network’s physical backbone vulnerable to a host of issues that can cripple your internet speeds and lead to costly repairs.
Exposed ethernet cables are susceptible to everything from pinching and abrasions to moisture and UV degradation from the sun. This physical damage can compromise the delicate twisted pairs of copper wire inside, leading to signal loss, intermittent connectivity, and outright network failure. The professional solution, and the key to a reliable, long-lasting installation, is to use ethernet conduit.
You'll Learn About
Why Your Ethernet Cable is More Vulnerable Than You Think
Modern ethernet cables are marvels of engineering, capable of transmitting massive amounts of data at incredible speeds. However, they are not invincible. The very design that makes them great for data transmission also makes them susceptible to physical and environmental harm.
Common hazards include accidental damage from lawnmowers or weed whackers for outdoor runs, chewing by rodents in crawlspaces, and constant exposure to sunlight, which can make the cable’s plastic jacket brittle and cracked. Furthermore, running data cables too close to electrical wiring can introduce electromagnetic interference (EMI), which corrupts the data signal and degrades network performance.
What is Ethernet Conduit and Do You Really Need It?
An ethernet conduit is simply a protective tube or raceway through which you run your network cables. Think of it as armor for your data lines. Its primary purpose is to shield cables from physical damage, moisture, and other environmental threats, ensuring the integrity and longevity of your network infrastructure.
Do you absolutely need it? For any installation that isn’t a simple, short run inside a finished, climate-controlled wall, the answer is a resounding yes. Using conduit is considered best practice for any outdoor, underground, or in-wall installation in unfinished spaces. It not only protects the cable you install today but also provides an easy pathway for future upgrades, a concept known as future-proofing.
Choosing the Right Type of Conduit for Your Project
Not all conduit is created equal. The material and type you choose will depend heavily on where and how you plan to run your cable. Making the right choice is critical for the success and durability of your project.
PVC (Polyvinyl Chloride): The Versatile Workhorse
PVC conduit is a lightweight, affordable, and easy-to-work-with plastic tubing. It’s highly resistant to corrosion and moisture, making it a popular choice for both indoor and outdoor applications, including direct burial underground. It typically comes in two common thicknesses: Schedule 40 (standard) and Schedule 80 (thicker wall, for more demanding applications).
The main advantages of PVC are its cost-effectiveness and ease of installation, as it can be cut with a simple handsaw and joined with solvent cement. However, standard PVC can become brittle in extreme cold and can be degraded by long-term UV exposure unless it is specifically rated for outdoor use (typically gray in color).
EMT (Electrical Metallic Tubing): The Indoor Protector
EMT is a thin-walled, unthreaded metal conduit, usually made of galvanized steel. It provides excellent protection against physical impact and crushing, making it a great choice for exposed runs in basements, garages, and workshops. It also offers a degree of shielding against electromagnetic interference.
While strong, EMT is not rated for use in wet conditions or for direct burial, as it can corrode over time. It requires a special tool to bend and uses compression or set-screw fittings to join sections, making it slightly more complex to install than PVC.
ENT (Electrical Non-Metallic Tubing): The Flexible “Smurf Tube”
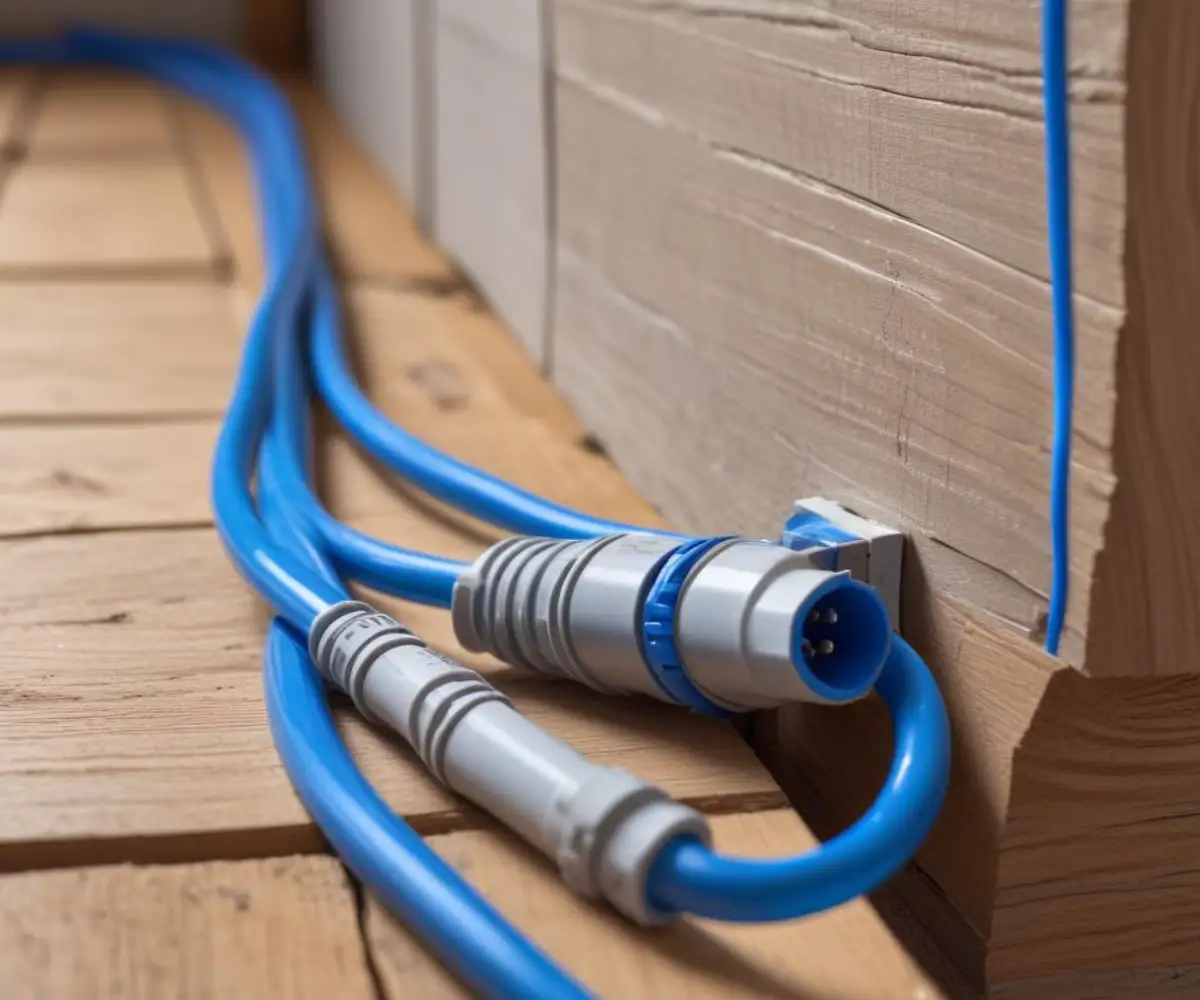
Often called “smurf tube” due to its characteristic blue color, ENT is a flexible, corrugated plastic tubing. Its primary advantage is its incredible flexibility, allowing it to be easily snaked through walls and around obstacles without the need for numerous joints and bends.
ENT is ideal for complex in-wall installations where you have to navigate around studs, pipes, and other obstructions. However, it offers less physical protection than rigid conduit and is not intended for exposed locations or outdoor use.
| Conduit Type | Best Use Case | Material | Flexibility | Cost |
|---|---|---|---|---|
| PVC (Schedule 40/80) | Outdoor, Underground, Wet Locations | Plastic | Rigid | Low |
| EMT | Exposed Indoor (Garages, Basements) | Metal | Rigid (Bends with tool) | Moderate |
| ENT (“Smurf Tube”) | In-Wall, Complex Routes | Plastic | High | Low-Moderate |
The Golden Rule: Never Mix Power and Data Cables
This is the most critical rule in any wiring project and cannot be overstated. Never run low-voltage data cables, like ethernet, in the same conduit as high-voltage electrical wiring. This practice is not only a violation of the National Electrical Code (NEC) in most jurisdictions but is also terrible for your network’s performance.
Power cables generate a significant electromagnetic field that induces “noise” in adjacent data cables. This interference corrupts the data signal, leading to packet loss, reduced speeds, and an unstable connection. Always maintain separation between power and data conduits to ensure both safety and signal integrity.
Sizing Your Conduit: Plan for Today and Tomorrow
One of the most common mistakes in conduit installation is choosing a size that is too small. While a 1/2-inch conduit might fit a single Cat6 cable, it leaves no room for future expansion and makes the cable pull much more difficult. A professional approach always involves planning for the future.
A good rule of thumb is to follow the “40% fill rule,” which means your initial cables should not take up more than 40% of the conduit’s interior space. This prevents friction and potential cable damage during the pull and, crucially, leaves room to add more cables later. As technology evolves, you may find yourself replacing telephone wire with Cat6 or even upgrading to fiber optics, and having that extra space will save you from redoing the entire installation.

For most residential projects, a 3/4-inch conduit is the recommended minimum size, even for a single cable run. It provides ample space, makes pulling the cable significantly easier, and accommodates future needs. For runs where you anticipate multiple cables, a 1-inch or 1.25-inch conduit is a wise investment.
Step-by-Step Guide to Installing Ethernet Conduit
With the right planning and materials, installing ethernet conduit is a straightforward process. Following these steps will ensure a professional and durable result.
Step 1: Plan Your Route
Carefully map out the path for your conduit from start to finish. Measure the total length required and plan your bends. To make pulling the cable easier, use gentle, sweeping bends instead of sharp 90-degree elbows whenever possible. Every bend adds friction, and a run should not have more than 360 degrees of total bends between pull points.
Step 2: Cut and Assemble the Conduit
Cut your conduit sections to the required lengths using a PVC cutter for plastic or a hacksaw for metal. It’s crucial to deburr the inside edges of each cut with a file or deburring tool. Sharp edges can easily slice into the cable’s jacket during the pull.
Assemble the sections on the ground first if possible. For PVC, apply PVC primer and then cement to both the pipe end and the fitting for a secure, waterproof bond. For EMT, connect sections using the appropriate screw-down or compression fittings.
Step 3: Secure the Conduit
Mount the assembled conduit run using straps or clamps appropriate for the material. Secure the conduit firmly to walls, joists, or other structural elements to prevent sagging. Proper spacing of supports is important; a good guideline is to place a strap within 3 feet of each junction box or termination point and every 8-10 feet along straight runs.
Step 4: Pulling the Cable
This is where your planning pays off. For shorter, straight runs, you may be able to push the cable through. For most runs, however, you will need a fish tape or a pull string. Feed the fish tape through the entire conduit, attach a sturdy pull string to the end, and pull it back through.
Securely attach your ethernet cable(s) to the pull string with electrical tape, staggering the heads if pulling multiple cables to create a tapered bundle. Applying a specialized cable-pulling lubricant to the cables as they enter the conduit will dramatically reduce friction and make the pull smoother and safer for the cables.
Advanced Tips for a Professional Installation
Going the extra mile with a few additional steps can elevate your installation from good to great, ensuring maximum protection and longevity.
Outdoor and Underground Runs
For any conduit buried underground, use at least Schedule 40 PVC (Schedule 80 offers even more protection). It is also essential to use an outdoor-rated, direct-burial ethernet cable. These cables often have a gel filling or water-blocking tape to protect the conductors from any moisture that might find its way into the conduit over time.
Just as some projects require specialized access, like figuring out how to reach a 20-foot ceiling, outdoor wiring requires specialized materials for a safe and lasting result.
Using Pull Boxes
For very long runs (over 100 feet) or those with the maximum 360 degrees of bends, installing a pull box or junction body is highly recommended. These boxes provide an intermediate access point, allowing you to pull the cable in two or more manageable segments rather than one long, difficult pull.
Sealing Conduit Ends
This is a simple but often-overlooked final step. After your cable is installed, seal the ends of the conduit with duct seal putty or foam. This prevents moisture-laden air from condensing inside the conduit and stops pests and insects from turning your raceway into a home.
Conclusion: A Small Investment for a Lifetime of Reliability
Running a new ethernet line is an investment in your home’s connectivity. Protecting that investment with conduit is one of the smartest decisions you can make. It transforms a vulnerable, exposed wire into a robust, protected, and permanent part of your home’s infrastructure.
The marginal extra cost and effort are insignificant compared to the peace of mind and performance you gain. Much like a complex task such as learning how to switch a French door from right-opening to left-opening, a proper wiring job requires planning and attention to detail, but the payoff is a flawless, professional result that will serve you reliably for years to come.


