Drop Ear Elbow Depth: The #1 Mistake Ruining Your Shower
In the world of plumbing, few components are as critical and as frequently installed incorrectly as the drop ear elbow. This small fitting is the unsung hero that ensures your shower head and tub spout are securely anchored. Yet, a single miscalculation in its placement can lead to wobbly fixtures, hidden leaks, and a completely unprofessional finish.
Getting the depth wrong is the most common failure point in what should be a straightforward installation. This single error can transform a dream bathroom renovation into a recurring nightmare of water damage and costly repairs. Understanding the precise mechanics of setting this fitting is not just best practice; it is essential for a leak-proof, durable, and visually perfect result.
You'll Learn About
What is a Drop Ear Elbow and Why Is It Essential?
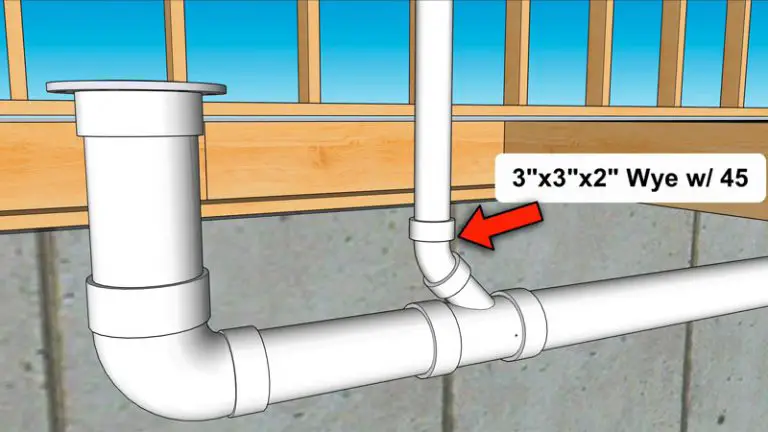
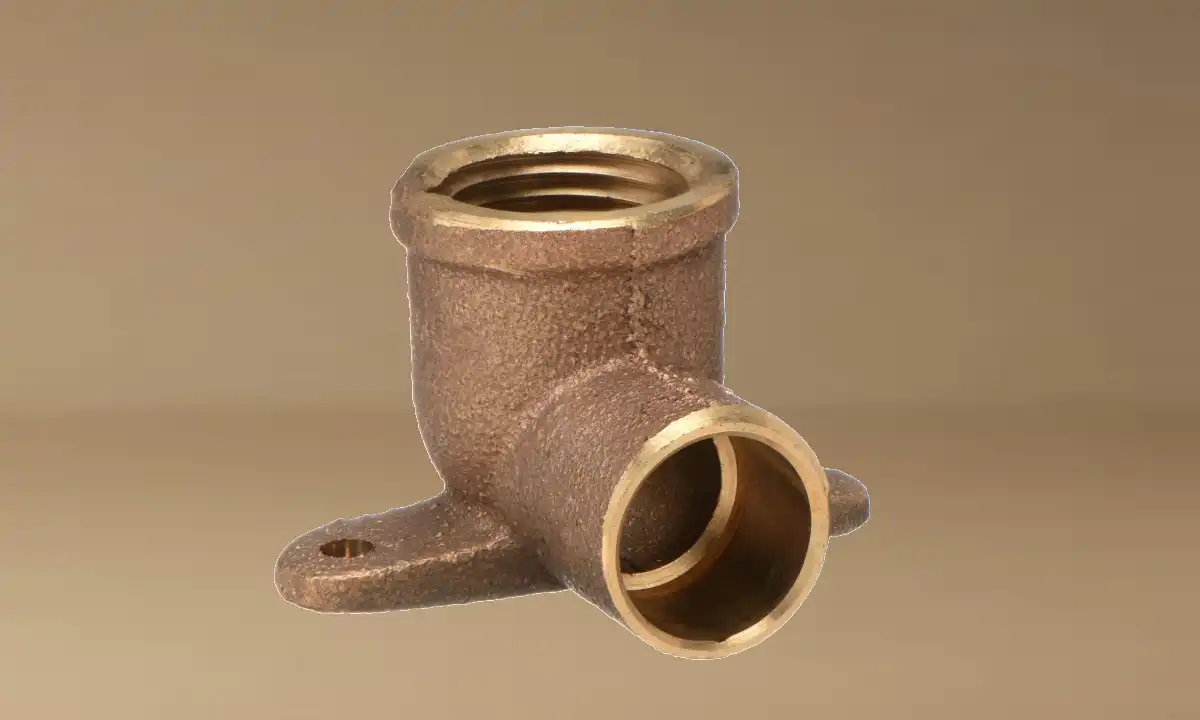
A drop ear elbow, sometimes called a wingback or winged elbow, is a 90-degree pipe fitting with two mounting “ears” or “wings”. These ears have screw holes that allow you to fasten the elbow directly to a solid piece of wood blocking inside the wall. This creates an incredibly stable and immovable anchor point for threaded pipes like shower arms and tub spouts.
Without this secure mounting, the fixture would rely solely on the pipe itself for support, leading to sagging, spinning, and eventual leaks at the connection point. The drop ear elbow’s primary job is to transfer the load and stress from the fixture to the building’s frame, protecting the integrity of the entire plumbing system. Its robust design is fundamental to a lasting and professional installation.
The Critical Factor: Understanding Drop Ear Elbow Depth
The single most important measurement in this process is the “depth”—the distance from the front face of the mounting block (the wood stud or blocking) to the front face of the elbow’s female threads. The golden rule is simple: the face of the drop ear elbow’s threads must be perfectly flush with the finished wall surface. This means it must align with the face of your tile, acrylic surround, or other wall material.
When the depth is correct, the shower arm or tub spout threads in perfectly, creating a watertight seal. It also allows the decorative trim plate, known as an escutcheon, to sit flat against the wall with no unsightly gaps. Achieving this precision requires careful planning before the walls are closed up.
Common Mistakes and Their Disastrous Consequences
Even a slight miscalculation in depth can lead to significant problems. These errors typically fall into two categories, each with its own set of frustrating and potentially damaging outcomes.
Problem 1: Setting It Too Deep (Recessed)
This is the most frequent mistake. It happens when a plumber or DIYer underestimates the total thickness of the finished wall. They might account for the backer board but forget to add the thickness of the thin-set mortar and the tile itself. The result is an elbow that sits too far back inside the wall cavity.
When the elbow is recessed, the shower arm cannot thread in deeply enough to create a secure, stable connection. This leads to a wobbly shower head and, more dangerously, a high potential for a slow, hidden leak behind the wall. Often, the only quick fix is a brass nipple extender, which adds another potential failure point to the system.
Problem 2: Setting It Too Shallow (Proud)
The opposite problem occurs when the elbow sticks out past the finished wall surface. This happens from underestimating wall thickness or using improperly sized blocking. A proud elbow prevents the shower arm or tub spout from tightening sufficiently before it bottoms out inside the fitting.
Visually, this is a dead giveaway of an amateur installation. The escutcheon plate will not sit flush against the wall, leaving a noticeable and ugly gap. This gap is not just a cosmetic issue; it also creates a pathway for water to get behind the trim and into the wall cavity, leading to mold and rot over time.
The Pre-Installation Checklist: Planning for Perfection
Avoiding these common pitfalls begins with meticulous planning. Before you even think about securing the elbow, you must have a clear and accurate understanding of your wall’s final composition. A few minutes of preparation here will save you hours of frustration later.
Step 1: Know Your Wall Materials
You must know the exact thickness of every layer that will make up your finished wall. This includes the wallboard (like cement backer board or drywall), any waterproofing membrane, the layer of thin-set mortar, and the tile itself. Create a simple calculation by adding these layers together to get your total finished wall thickness.
To help with this crucial step, here is a table of common material combinations and their approximate total thicknesses. Always measure your specific materials for the most accurate calculation.
| Wallboard Material (Thickness) | Tile & Adhesive (Approx. Thickness) | Total Estimated Finished Wall Thickness |
|---|---|---|
| 1/2″ Cement Backer Board | 1/4″ Tile + 1/8″ Thin-set | ~ 7/8 inch |
| 1/2″ Cement Backer Board | 3/8″ Tile + 1/8″ Thin-set | ~ 1 inch |
| 5/8″ Drywall (Green Board) | 1/4″ Tile + 1/8″ Thin-set | ~ 1 inch |
| 1/4″ Acrylic or Fiberglass Surround | N/A (Adhesive only) | ~ 1/4 inch |
Step 2: Choose and Install the Right Blocking
A drop ear elbow cannot be mounted directly to flimsy drywall or even backer board. It requires a solid piece of wood blocking, typically a 2×4 or 2×6, installed horizontally between the wall studs. This blocking should be positioned at the precise height for your shower head (typically 80 inches from the floor) or tub spout (typically 4 inches above the tub lip).
Secure the blocking firmly with long screws driven through the studs. Ensure it is level and does not move at all. This solid foundation is what guarantees your fixtures will remain rigid for years to come.
Step-by-Step Installation: Getting the Depth Right Every Time
With your planning complete, the installation itself is a matter of precision. The goal is to mount the drop ear elbow so its face will be perfectly flush with your future wall surface. This is where a simple but highly effective professional trick comes into play.
The “Scrap Trick”: Your Secret Weapon for Accuracy
Instead of relying on measurements alone, create a physical depth gauge. Take a small scrap of your backer board and a spare tile. Using a dab of thin-set or even construction adhesive, glue them together just as they will be on the wall. This simple gauge physically represents your finished wall thickness and removes any chance of mathematical error.
Now, when you mount the drop ear elbow to the blocking, you can hold your scrap gauge against the front of the studs. Adjust the elbow’s position until the face of its threads is perfectly flush with the face of the tile on your gauge. This foolproof method ensures absolute accuracy every single time.
Securing the Fitting
Once you’ve used your gauge to find the perfect depth, secure the drop ear elbow to the blocking with corrosion-resistant screws (stainless steel is an excellent choice). Ensure the elbow’s outlet is pointing perfectly plumb (straight down for a tub spout, straight up or out for a shower head). A crooked elbow will result in a crooked fixture that is impossible to correct later.
After the elbow is securely fastened, you can connect your water supply line, whether it’s copper, PEX, or another material. While some modern fittings are convenient, ensuring a stable connection is paramount. For those interested in the nuances of plumbing fittings, learning how to stop SharkBite from spinning highlights the importance of creating rigid and reliable plumbing points.
Troubleshooting: How to Fix Incorrect Drop Ear Elbow Depth
If you’ve discovered an improperly set elbow after the wall is finished, don’t panic. While the best solution is always to open the wall and reset it correctly, there are a few workarounds that can salvage the situation.
Fixing a Recessed Elbow (Too Deep)
This is the more common problem. The solution is to use a solid brass nipple extender. This is a short, threaded pipe with male threads on one end and female threads on the other. It effectively brings the connection point forward to the correct depth. Crucially, you must use both thread sealant tape and pipe dope on all connections to ensure a permanent, leak-proof seal.
Fixing a Proud Elbow (Too Shallow)
This is more challenging to fix without opening the wall. The best non-destructive option is to find a deeper escutcheon plate. Some plumbing manufacturers offer “remodel” or deep trim plates designed to cover larger openings and accommodate shallow fittings. This is a cosmetic fix, but it can effectively hide the gap and provide a clean look.
Frequently Asked Questions (FAQ)
What is the standard height for a shower head drop ear elbow?
While there is no strict code, the standard rough-in height for a shower head outlet is 80 inches above the finished floor. However, this can be adjusted based on the height of the users and the specific shower head being installed. Always confirm the ideal height before setting your blocking.
Can I use a plastic drop ear elbow?
Brass drop ear elbows are strongly recommended over plastic (PVC or CPVC) versions, especially for shower arms. The repeated stress of adjusting a shower head can cause plastic threads to wear out or crack over time. Brass provides a much more durable and reliable connection. The choice of material is always critical in plumbing; understanding when certain plastics are inappropriate, similar to knowing if you can use flexible PVC for a shower drain, is key to avoiding future failures.
Do I need a drop ear elbow for a tub spout?
Absolutely. A tub spout requires a very rigid connection. Any wobble or movement in the pipe can break the seal between the spout and the wall, allowing water to run down and behind the tub. A securely mounted drop ear elbow is the only professional way to ensure a stable, leak-proof tub spout installation.
A Foundation for a Flawless Finish
Mastering the drop ear elbow depth is a testament to quality craftsmanship. It is a detail hidden behind a wall, yet it is the foundation for a flawless and functional shower and tub. By taking the time to calculate your wall thickness, install solid blocking, and use the “scrap trick” for perfect placement, you ensure a professional result.
This attention to detail prevents the most common plumbing failures—wobbly fixtures and hidden leaks—that plague so many bathroom projects. Properly installed plumbing is the first line of defense against water issues inside your home, just as maintaining your exterior systems helps remove sprinkler stains from a fence and protects your property outside. It’s a small step that guarantees long-term durability and peace of mind.