Floating Shelves Before or After Backsplash? The Definitive Guide
You’re standing in your kitchen, envisioning sleek, stylish floating shelves displaying your favorite ceramics and glassware. But then a critical question stops you in your tracks: do I install floating shelves before or after the backsplash? This single decision can drastically impact the final look, structural integrity, and difficulty of your project.
This isn’t just a matter of preference; it’s a pivotal construction choice with distinct advantages and disadvantages for each method. Get it wrong, and you could end up with a weaker installation, a less-than-professional finish, or even a cracked tile nightmare. This guide will walk you through the pros and cons of each approach, helping you make the most informed decision for a flawless result.
You'll Learn About
The Core Dilemma: Order of Operations Matters
The central conflict boils down to two distinct paths. You can either install the beautiful, seamless tile backsplash first and then mount your shelves on top of it. Or, you can secure the shelf brackets directly to the wall studs first and then painstakingly tile around them.
Each method presents its own set of challenges and rewards. The right choice for you will depend on the type of shelves you’re installing, the backsplash material you’ve chosen, your DIY skill level, and the final aesthetic you wish to achieve.
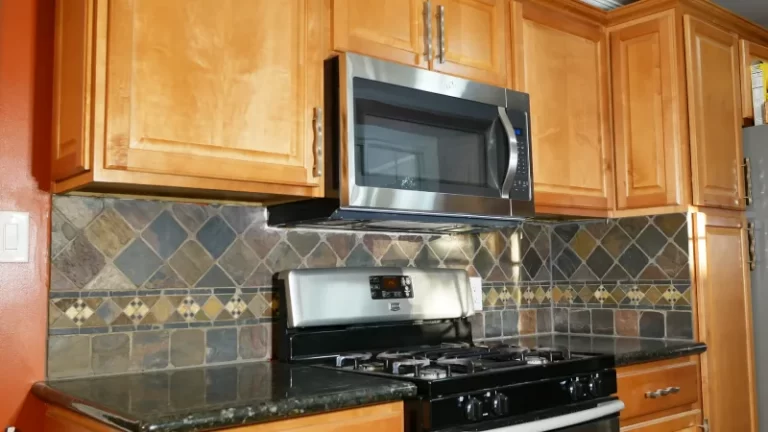
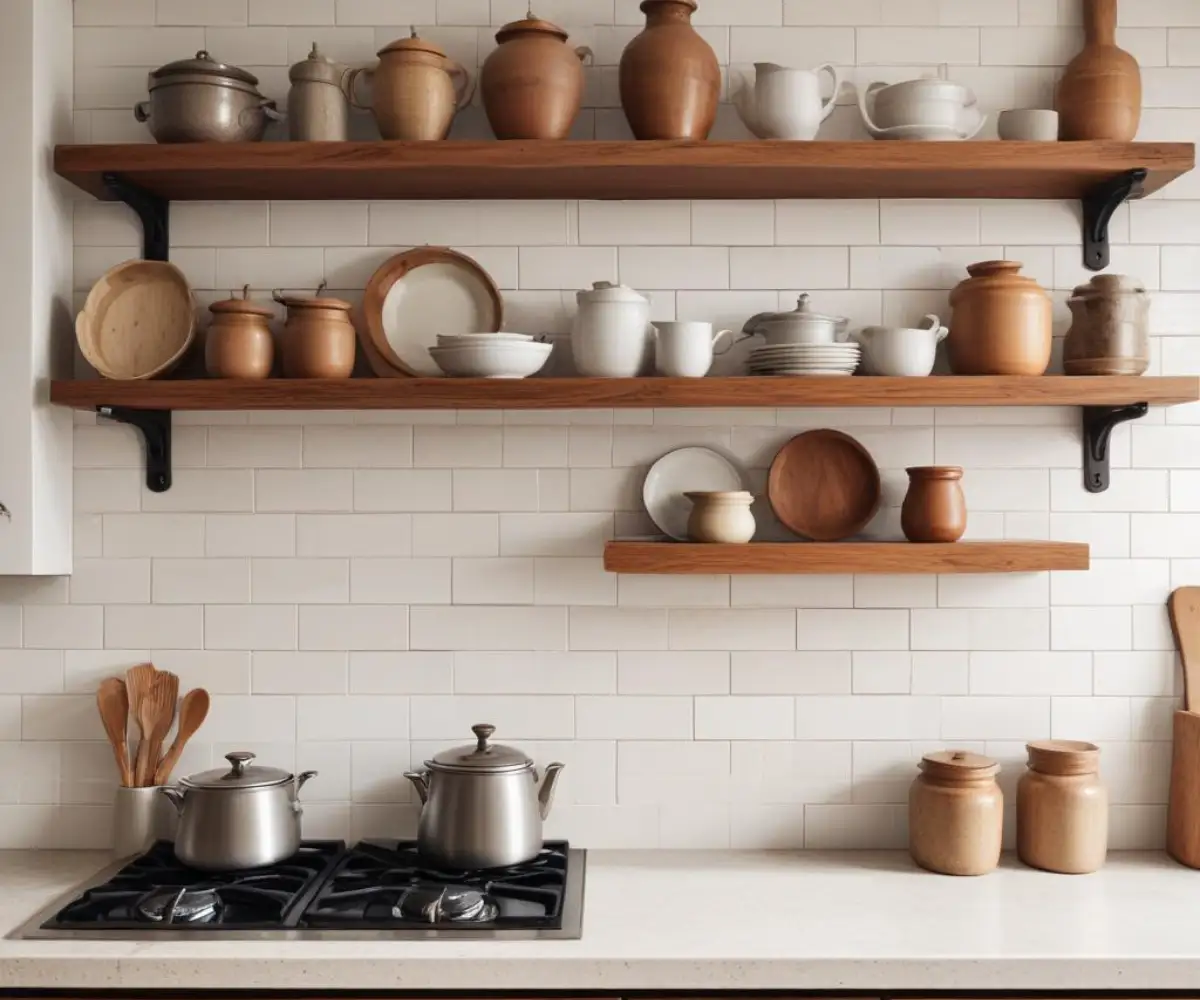
The Professional’s Choice: Installing Your Backsplash First
For the cleanest, most integrated, and flexible final product, the widely recommended method is to install the backsplash first. This approach involves tiling the entire wall surface where the shelves will go, creating a continuous, uninterrupted finish. Only after the tile is set and grouted do you drill through it to mount the shelf brackets.
This sequence is favored by many professionals because it results in a superior aesthetic and offers more long-term flexibility. If you ever decide to change the shelving, you are left with a complete, finished wall, rather than one with awkward gaps in the tile.
Pros of Installing the Backsplash First:
- Flawless Aesthetics: It delivers a seamless, high-end look. The backsplash runs cleanly behind the shelves, making the installation appear more intentional and professionally executed.
- Simplified Tiling: Tiling a flat, open wall is significantly easier and faster than cutting intricate notches in tiles to fit around shelf brackets. This reduces the chance of measurement errors and wasted material.
- Future Flexibility: Your design choices aren’t permanent. If you decide to remove, reposition, or change the style of your shelves down the line, you can do so with minimal fuss, only needing to patch a few screw holes.
- Superior Protection: A continuous backsplash provides better protection for the wall against moisture and grease, as there are no breaks in the grout or tile where contaminants can seep in.
Cons of Installing the Backsplash First:
- Risk of Damaging Tile: The biggest drawback is the need to drill through your newly installed tile. This carries the risk of cracking or chipping the tile, especially with materials like marble or glass.
- Requires Special Tools: You cannot use a standard drill bit. Drilling through hard materials like porcelain or ceramic tile requires a specialized diamond-tipped drill bit and careful technique.
- Challenging to Locate Studs: Once the wall is covered with tile, locating the wall studs becomes more difficult. It often requires marking stud locations beforehand or using a high-quality, deep-scanning stud finder.
The Strength-First Approach: Installing Floating Shelves First
The alternative method is to mount your floating shelf brackets directly onto the drywall and into the wall studs before any tile is laid. This approach prioritizes structural integrity above all else, ensuring the strongest possible foundation for your shelves. Once the brackets are securely in place, you then tile the backsplash around them.
This method is often chosen by those who plan to store very heavy items, such as stacks of plates and bowls, and want absolute certainty that the shelves can handle the load. The weight is transferred directly from the bracket to the stud, with no intervening layer of tile.
Pros of Installing Shelves First:
- Maximum Structural Integrity: Attaching brackets directly to wall studs provides the highest possible weight capacity. This is crucial for shelves intended to hold heavy kitchenware.
- No Risk to Tile: You completely eliminate the risk of cracking expensive backsplash tiles during the shelf installation process.
- Easier Stud Access: Finding and securing brackets to studs is straightforward on an exposed wall, ensuring a robust and reliable installation.
Cons of Installing Shelves First:
- Complex Tile Work: Tiling around brackets requires precise, difficult cuts. This is time-consuming and can be frustrating, especially for novice tilers.
- Less Professional Finish: It can be challenging to achieve a perfectly clean look. Gaps between the tile and the brackets are common and must be filled with grout or caulk, which can look less seamless.
– Permanent Placement: The shelf location is locked in. If you ever decide to remove the shelves, you will be left with a large, un-tiled patch on your wall that is difficult to fix without re-tiling the entire area.
Key Factors to Guide Your Decision
Still unsure which path to take? Your decision should be guided by a few critical factors specific to your project. Being honest about your skills and priorities will lead you to the right choice.
First, consider the weight of the items you plan to display. For lightweight decor, mounting over tile is perfectly sufficient. For heavy stacks of dishes, you might lean towards the shelves-first method. Next, evaluate your DIY comfort level. Are you more comfortable drilling through delicate tile or making complex, precise cuts in that same tile? Finally, think about the backsplash material itself. Drilling through a soft ceramic is much easier than drilling through hard porcelain or brittle glass tile.
Decision Matrix: Shelves vs. Backsplash First
To simplify the choice, here is a direct comparison of the two installation methods across the most important criteria.
| Factor | Method 1: Backsplash First, Then Shelves | Method 2: Shelves First, Then Backsplash |
|---|---|---|
| Final Appearance | Cleaner, more professional, and seamless. | Can look bulkier; requires careful caulking around brackets. |
| Structural Integrity | Very strong when properly anchored into studs through the tile. | Maximum strength as brackets are mounted directly to studs. |
| Installation Complexity | Tiling is easy; drilling through tile is difficult and requires special bits. | Bracket installation is easy; tiling around brackets is very difficult. |
| Future Flexibility | Excellent. Shelves can be moved or removed easily. | Poor. Shelf placement is permanent without major tile repair. |
| Risk Factor | High risk of cracking tile during drilling. | High risk of making incorrect tile cuts, leading to wasted material. |
How to Install Floating Shelves OVER a Backsplash (Recommended Method)
For most applications, installing the backsplash first yields a superior result. Follow these steps carefully to ensure a secure installation without damaging your tile.
Tools and Materials Needed:
- Floating shelf kit with brackets
- High-quality stud finder
- Drill/driver
- Diamond-tipped drill bits (sized for your screws/anchors)
- Level
- Painter’s tape
- Measuring tape and pencil
- Small spray bottle with water
Step-by-Step Installation:
1. Locate and Mark Studs: Before you even begin tiling, use a stud finder to locate and mark the wall studs. Take a picture or make a detailed diagram. If the tile is already up, use a high-quality stud finder to locate the studs through the tile and mark their positions with painter’s tape.
2. Position the Brackets: Hold your shelf bracket against the wall at the desired height, ensuring it is level. Mark the drill hole locations directly onto the painter’s tape. It is absolutely crucial that your mounting screws align with the studs for adequate support.
3. Prepare for Drilling: The painter’s tape serves a dual purpose: it gives your drill bit a surface to grip so it doesn’t wander, and it helps reduce the chance of chipping the tile surface.
4. Drill the Pilot Holes: Start drilling on a very slow speed with firm, steady pressure. Do not use the hammer function on your drill. Periodically spritz the drill bit and hole with water to keep it cool and reduce dust. Let the diamond bit do the work of grinding through the tile.
5. Secure the Brackets: Once you are through the tile and drywall, switch to a standard wood bit if needed to drill a pilot hole into the stud. Then, drive the mounting screws through the bracket and tile, securing them firmly into the wall studs.
6. Mount the Shelves: With the brackets securely mounted, slide your floating shelves onto the support rods and secure them according to the manufacturer’s instructions. If you’re creating a long run of shelving, you might need to know how to join two shelves together for a seamless look.
Common Mistakes to Avoid at All Costs
Whether you’re a seasoned DIYer or a weekend warrior, a few common pitfalls can derail your project. Avoiding these mistakes is just as important as following the correct steps.
The most critical error is not anchoring into studs. Drywall anchors alone are not sufficient to support the leveraging force of a floating shelf, especially when loaded with items. Another frequent mistake is using the wrong type of drill bit; a standard bit will not penetrate porcelain or ceramic and will likely crack the tile. Finally, don’t forget to plan your layout in relation to outlets, switches, and grout lines for a truly professional and functional design.
What About Other Backsplash Materials?
While this guide focuses on tile, the same principles apply to other materials. For a stone slab backsplash (like quartz or granite), you should always install the backsplash first and have a professional stone fabricator drill the mounting holes. For softer materials like beadboard or shiplap, the backsplash-first method is still preferred for a cleaner look, and drilling through the wood is much easier than tile.
Conclusion: The Verdict on Your Installation Order
So, should you install floating shelves before or after the backsplash? After weighing all the factors, the verdict is clear: for the vast majority of projects, you should install the backsplash first.
This method provides a more professional, seamless finish and offers invaluable future flexibility. While it requires the courage to drill through your new tile, the aesthetic and practical rewards are well worth the effort. The shelves-first method has its place for extremely heavy-duty applications where structural integrity is the absolute top priority and aesthetics are secondary.
By carefully planning your layout, using the right tools, and following the steps outlined in this guide, you can confidently tackle this project and achieve a stunning, sturdy, and stylish floating shelf installation that will elevate your kitchen or bathroom for years to come.