DIY Register Booster Fan: The Secret to a Perfectly Tempered Room
Is there a room in your house that stubbornly remains too hot in the summer and frigid in the winter, no matter how you adjust the thermostat? This common frustration often points to a single culprit: poor airflow. When your HVAC system can’t push enough conditioned air to a specific area, you’re left with uncomfortable and uneven temperatures.
Many homeowners face this issue, especially in rooms located far from the central unit or those at the end of a long, complex duct run. While commercial register booster fans exist, they can be costly and may not offer the custom fit or quiet operation you desire. Fortunately, a highly effective and budget-friendly solution is within reach: a DIY register booster fan.
You'll Learn About
Why Your Room’s Temperature Is Never Right: Understanding Poor Airflow
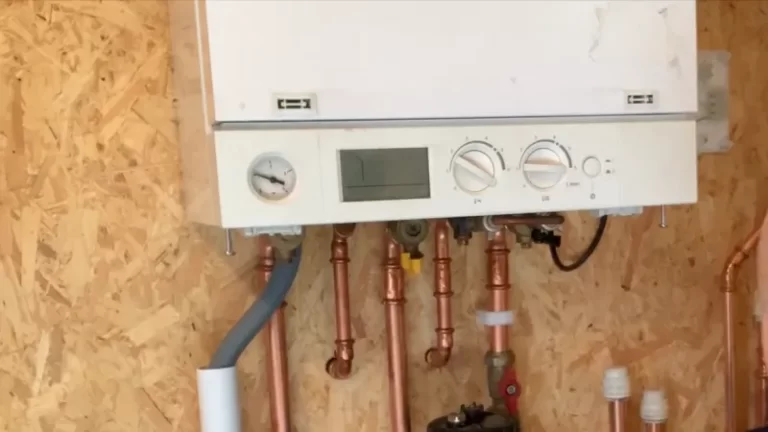
Before diving into the solution, it’s crucial to understand the problem. Your HVAC system relies on a delicate balance of pressure to distribute air evenly throughout your home. Long or winding ductwork increases resistance, known as static pressure, which slows down the air before it reaches the intended vent.
Over time, issues like minor duct leaks or blockages can worsen the problem. This weak airflow not only affects your comfort but can also impact indoor air quality. If you’ve ever wondered why is there a white haze in my house, poor air circulation that fails to properly filter and move air could be a contributing factor.
The Solution: How a DIY Register Booster Fan Works
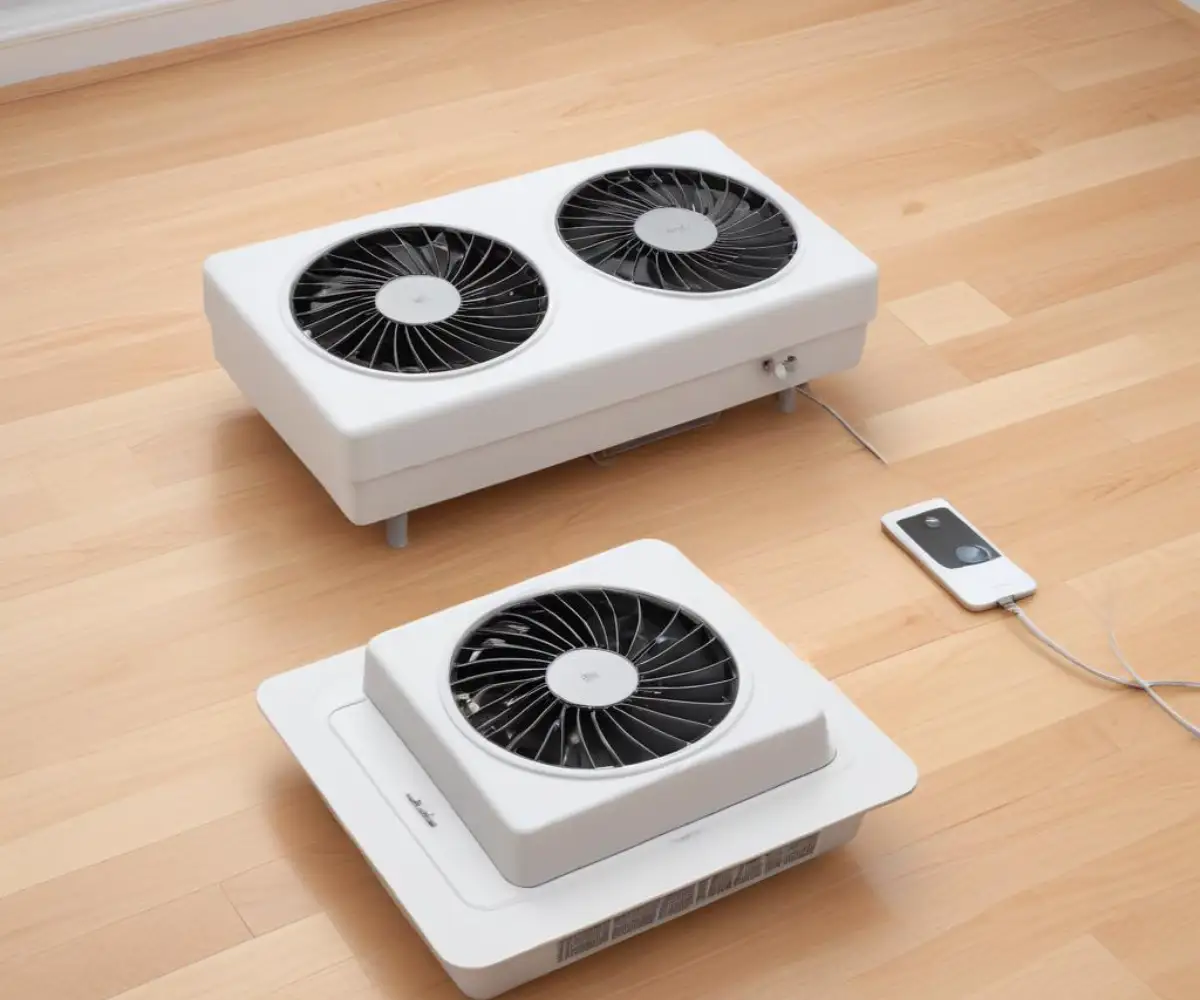
A register booster fan is a simple yet brilliant device. It consists of one or more small fans installed within your existing floor, wall, or ceiling register. These fans actively pull air from the ductwork, increasing the volume and velocity of conditioned air entering the room to help it reach the desired temperature.
Building your own allows you to select high-quality, quiet components and customize the size and power to perfectly suit your needs. You can create a powerful solution for a fraction of the cost of a store-bought unit, finally taking control of those stubborn hot and cold spots.
Planning Your Project: Tools and Materials Checklist
Gathering the right components is the first step toward a successful build. The heart of this project is a set of computer case fans, which are known for their quiet operation, low power consumption, and long lifespan. You will also need a compatible power adapter to provide the necessary low-voltage electricity.
Proper planning ensures you have everything you need on hand, preventing delays and making the assembly process smooth and efficient. This table outlines all the essential items for building your custom register booster fan.
| Component | Description | Key Considerations |
|---|---|---|
| Computer Case Fans | Standard 12V DC axial fans. Common sizes are 80mm, 92mm, or 120mm. | Measure your register opening to determine the best size and quantity. Look for fans with a good balance of airflow (CFM) and low noise (dBA). Ball-bearing fans typically last longer than sleeve-bearing fans. |
| 12V DC Power Adapter | Converts your home’s 120V AC power to 12V DC. Often called a “wall wart.” | The adapter’s amperage (A or mA) must be equal to or greater than the total amperage of all fans combined. Each fan will have its amperage listed on its sticker (e.g., 0.25A). |
| Mounting Frame/Material | A structure to hold the fans securely within the register opening. | Options include a spare register cover, a thin piece of project wood, a sturdy plastic sheet, or a 3D-printed frame. Hot glue or epoxy can also be used to secure fans directly. |
| Wiring and Connectors | Speaker wire (18-22 gauge) and connectors to link the fans to the power adapter. | Wire nuts, butt splices, or a soldering iron with heat-shrink tubing will create secure, insulated connections. Electrical tape is essential for covering any exposed wires. |
| Basic Tools | Standard tools for assembly and installation. | You will need a wire stripper/cutter, a screwdriver, a drill (optional, for mounting), and a hot glue gun (optional, for securing components). |
Step-by-Step Guide to Building Your Vent Booster Fan
With your materials gathered, you are ready to assemble your DIY register booster fan. This process involves basic mounting and low-voltage wiring, making it an accessible project for most DIY enthusiasts. Following these steps carefully will ensure a safe, reliable, and effective result.
Step 1: Measure and Prepare the Register
First, remove the existing register cover from the wall or floor. Use a tape measure to determine the exact dimensions of the duct opening. This will confirm the size and number of fans you can fit.
Clean the inside of the duct boot to remove any dust or debris. A clear workspace will make the installation process much easier.
Step 2: Mount the Fans Securely
Arrange your chosen fans on your mounting frame, ensuring they fit snugly without gaps. Mark the mounting holes and secure the fans using small screws or bolts. The goal is to create a sturdy, single unit that won’t vibrate or rattle when the fans are running.
Pay close attention to the arrows on the side of each fan; these indicate the direction of airflow. Ensure all arrows point out of the duct and into the room. Sealing any small gaps around the fans can improve efficiency, much like you would how to fill gap between tile and wood floor to prevent drafts.
Step 3: Wiring the Fans for Power
This project uses low-voltage DC power, which is much safer to work with than standard household AC wiring. You will be wiring the fans in parallel. This means connecting all the positive (typically red) wires together and all the negative (typically black) wires together.
Strip a small amount of insulation from the end of each fan wire. Twist all the red wires together and secure them with a wire nut or solder. Repeat this process for all the black wires. This is conceptually similar to the simple, safe connections you might encounter in a project like understanding how to move doorbell wiring.
Step 4: Connecting the Power Supply
Cut the connector off the end of your 12V DC power adapter, exposing the two inner wires. Strip a small amount of insulation from these wires. Typically, one wire will be marked with a white stripe or text, indicating it is the positive wire, while the plain wire is negative.
Connect the positive wire from the adapter to your bundle of red fan wires and the negative adapter wire to your bundle of black fan wires. Secure these connections and wrap them thoroughly with electrical tape. Before final installation, plug in the adapter to test that all fans spin correctly.
Step 5: Final Installation and Cable Management
Carefully place your completed fan assembly into the duct opening. It should fit snugly and securely. Run the power cord from the fan assembly along the baseboard or under a rug to the nearest wall outlet, ensuring it is not a tripping hazard.
Once plugged in, your DIY booster fan is ready to go. It will begin pulling more conditioned air into your room, helping to finally balance the temperature and improve your comfort.
Advanced Customization: Taking Your Booster Fan to the Next Level
Once you’ve mastered the basic build, you can incorporate more advanced features to enhance functionality and convenience. These additions can automate the fan’s operation and give you precise control over airflow and noise levels, turning a simple DIY project into a smart home solution.
Automating Your Fan with Smart Controls
For a truly “set it and forget it” system, connect your fan’s power adapter to a smart controller. A simple smart plug allows you to turn the fan on or off with your phone or voice commands. An even better solution is a thermostat-controlled outlet, which automatically activates the fan only when your HVAC system is actively heating or cooling.
Managing Fan Speed and Noise
While computer fans are generally quiet, you can gain more control by installing an inline DC fan speed controller. This small dial allows you to adjust the fan RPM, finding the perfect balance between maximum airflow and minimum noise. This is especially useful for bedrooms or offices where near-silent operation is preferred.
Is a DIY Register Booster Fan Right for You? Pros and Cons
While a DIY register fan is an excellent solution for many, it’s important to weigh its benefits against its limitations. It is a powerful tool for correcting isolated airflow problems but may not be a cure-all for major, underlying HVAC issues.
Advantages
The primary benefit is cost. A DIY build can be completed for under $30, compared to commercial units that often cost $80 or more. Furthermore, you have complete control over the components, allowing you to choose ultra-quiet fans or high-CFM models depending on your priority. The result is a custom solution perfectly tailored to a specific room.
Potential Drawbacks
This project requires some basic DIY skills, including simple wiring. It’s crucial to understand that a booster fan fixes the symptom (poor airflow in one room), not the root cause. If your home has severely undersized, leaky, or blocked ductwork, a booster fan will only provide a partial improvement. In such cases, a professional HVAC inspection may be necessary.
Frequently Asked Questions (FAQ)
Will a register booster fan significantly increase my electricity bill?
No. The computer fans used in this project are highly efficient and consume very little power, typically only a few watts each. The impact on your energy bill will be minimal.
Is it safe to leave the fan running continuously?
Yes. As long as you use a certified 12V DC power adapter and ensure all wire connections are properly insulated, the system is safe for continuous operation. The low voltage poses no significant fire risk.
Can I use this for both heating and cooling?
Absolutely. The fan is simply moving air. It will work just as effectively to pull cool air into a room during the summer as it will to pull warm air during the winter.
How much of a temperature difference can I really expect?
Results vary based on the severity of the airflow issue, but many users report a noticeable improvement of 2-5 degrees Fahrenheit. This is often enough to transform an uncomfortable room into a pleasant living space.