Dishwasher Leaking into Subfloor? Here’s Your Action Plan
You walk into your kitchen and something feels off. A faint, musty odor hangs in the air, or maybe the floor feels slightly spongy near the dishwasher. These are the first, subtle warnings of a dishwasher leaking into the subfloor, a silent problem that can quickly escalate into a homeowner’s nightmare, causing significant structural and financial damage.
Ignoring these signs can lead to rotted subfloors, ruined cabinets, and the dangerous growth of mold. This isn’t just a puddle to wipe up; it’s an urgent issue that demands immediate attention to protect your home’s integrity and your family’s health.
You'll Learn About
Why Is My Dishwasher Leaking? Uncovering the Hidden Culprits
A dishwasher leak that reaches the subfloor often starts as a slow, unnoticeable drip. By the time you detect it, the damage may already be extensive. Understanding the potential sources is the first step toward a solution.
Common Leak Sources and Mechanical Failures
Most leaks originate from a few key areas of the appliance. The constant exposure to water, detergent, and heat can wear down components over time, leading to failures that are often hidden from view until it’s too late.
A faulty door gasket is a frequent offender. This rubber seal around the door can become brittle, cracked, or caked with residue, compromising its watertight seal. Similarly, a loose or damaged door latch can prevent the door from closing tightly, allowing water to escape during a cycle.
Hoses and Connections: The Weak Links
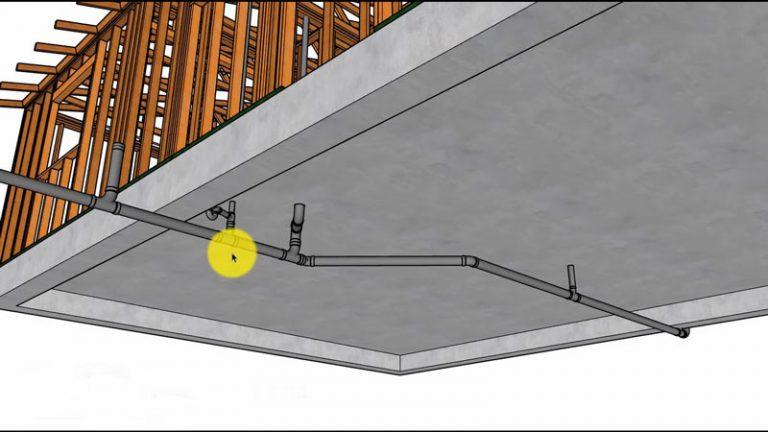
Your dishwasher relies on a network of hoses to function. The water inlet hose, which brings fresh water in, and the drain hose, which carries wastewater out, are common failure points. These hoses can crack with age, or their connections can loosen, leading to persistent drips.
A leak from the water supply line will typically be found underneath the unit. Inspecting these connections regularly can prevent a slow leak from turning into a major flood. If these hoses appear damaged or brittle, replacement is the safest course of action.
Internal Component Failures
Deeper within the machine, other components can fail. The water inlet valve can get stuck open, causing the dishwasher to overfill and leak. A malfunctioning float switch, the safety device designed to prevent overfilling, can also be the cause.
The pump, which circulates water, has seals that can wear out, causing leaks from the bottom of the unit. These types of leaks are often harder to detect because they occur directly underneath the appliance, seeping straight into your subfloor.
First Response: Immediate Steps to Mitigate Damage
The moment you suspect a leak, you must act fast to prevent further harm. Quick action can save you thousands of dollars in repairs and prevent serious issues like mold growth.
First, stop using the dishwasher immediately and turn off the power supply at the circuit breaker. Next, shut off the water supply to the appliance, which is typically located under the kitchen sink. Mop up any visible water on the kitchen floor to prevent it from seeping further into the subfloor and surrounding cabinetry.
Once you’ve contained the immediate threat, gently pull the dishwasher out from its enclosure to get a clear view of the area behind and underneath it. This will help you identify the source of the leak and assess the extent of the water damage to the subfloor and surrounding structures.
Identifying the Source: A Step-by-Step Inspection Guide
With the dishwasher pulled out, you can begin a more thorough investigation. You’ll need a flashlight to get a good look at all the components underneath and behind the appliance. Here’s a systematic approach to pinpointing the leak.
1. Examine All Hoses and Connections
Start with the most common culprits: the water inlet and drain hoses. Run your hand along the length of each hose, feeling for any moisture. Check the connection points at the dishwasher and at the household plumbing under the sink, tightening any loose fittings.
2. Inspect the Door Seal and Latch
Closely examine the rubber gasket around the dishwasher door for any signs of cracking, tearing, or residue buildup. Ensure the door latch engages securely. Sometimes, an improperly loaded lower rack can interfere with the door’s seal, causing leaks.
3. Check the Tub for Cracks
While less common, the dishwasher tub itself can develop cracks over time, especially in older models. Inspect the interior and exterior of the tub for any visible fissures that could be allowing water to escape.
4. Look for Signs Around the Pump and Motor
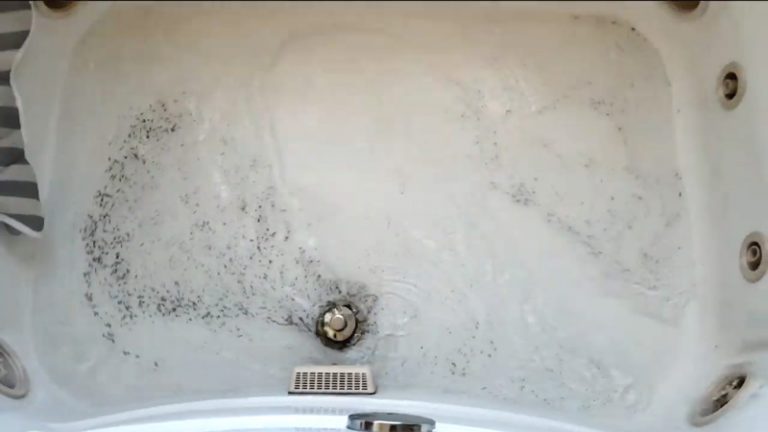
The area around the pump and motor at the base of the dishwasher is a critical inspection zone. Look for drips, rust stains, or mineral deposits (a sign of a slow, long-term leak) on these components. A failing pump seal is a common source of hidden leaks.
Assessing the Subfloor Damage: How Bad Is It?
Once you’ve identified and hopefully stopped the leak, the next critical step is to evaluate the condition of your subfloor. The extent of the damage will determine the complexity and cost of the repair.
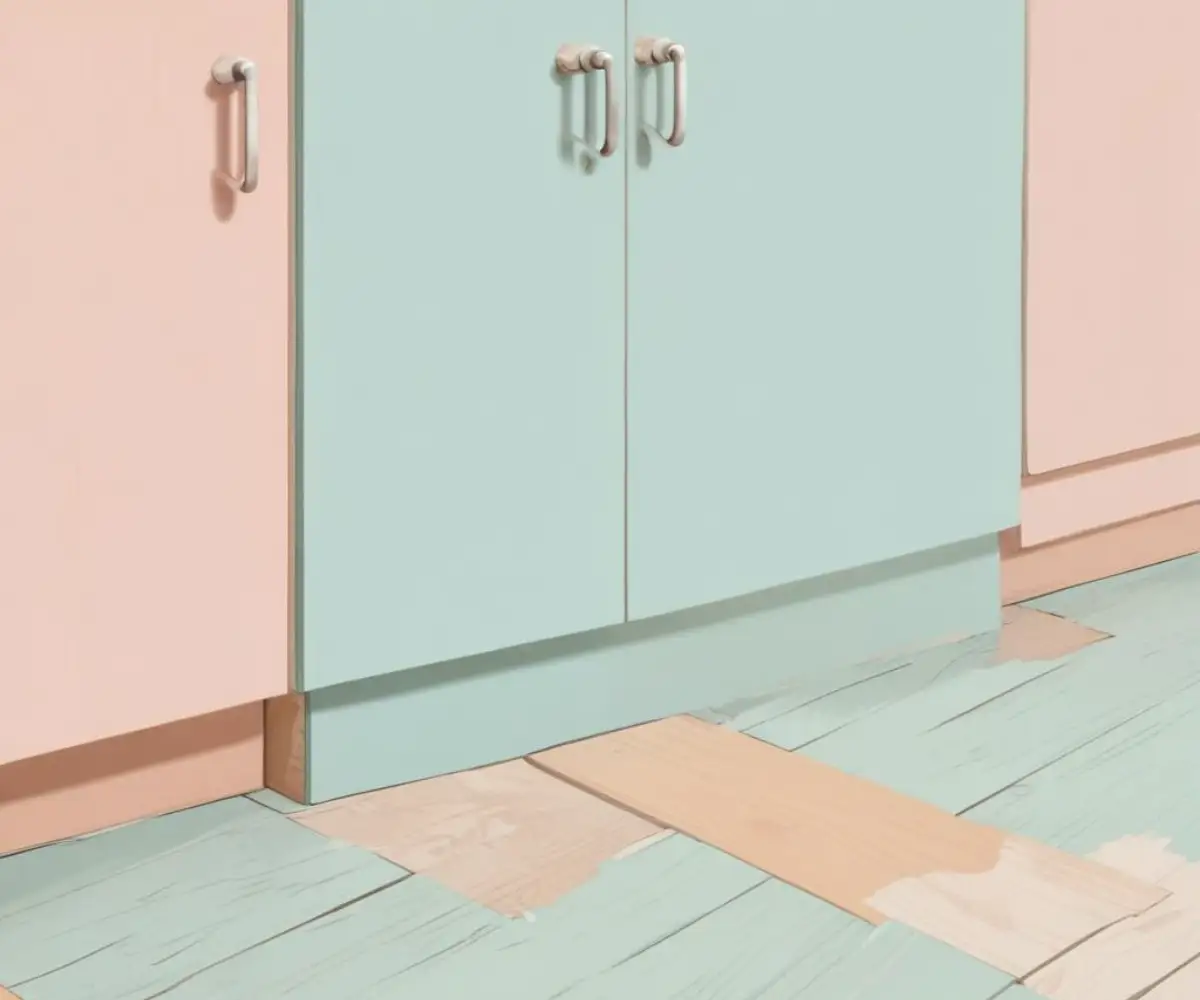
Look for discoloration, swelling, or warping in the wood. Use a screwdriver or another tool to gently poke the affected area. If the wood feels soft, spongy, or crumbles easily, it’s a clear sign of rot and indicates that the damaged section must be replaced. A musty smell is also a strong indicator of mold and mildew growth, which poses a health risk.
The Dangers of Hidden Moisture
Even if the surface feels dry, moisture can be trapped underneath your finished flooring. This creates a perfect breeding ground for mold. If you have vinyl or laminate flooring, water can get trapped beneath it, leading to a problem with water under your flooring that can go undetected for weeks.
If you discover a soft spot under your floor, it’s a serious red flag. This often means the subfloor is compromised and requires immediate attention to prevent more widespread structural issues.
The Repair Process: From Drying Out to Rebuilding
Addressing a water-damaged subfloor is a multi-step process that ranges from simple drying to complete replacement of the affected section. The approach depends entirely on the severity of the damage.
For Minor Damage: Drying and Sealing
If the leak was caught early and the subfloor is only damp without signs of structural weakness, your priority is to dry the area completely. Use high-powered fans and a dehumidifier to circulate air and pull moisture from the wood. This process can take several days.
Once the subfloor is thoroughly dry, applying a mold-inhibiting primer or a waterproof sealant can help prevent future issues. This is a crucial preventative step before reinstalling your flooring and dishwasher.
For Major Damage: Subfloor Replacement
When the subfloor is rotted, warped, or structurally compromised, replacement is the only option. This is a more involved job that requires cutting out the damaged section of plywood or OSB (oriented strand board) back to the nearest floor joists.
You will need to install new support blocking between the joists to provide a solid base for the new piece of subfloor. The new material must be the same thickness as the existing subfloor to ensure a level surface. Secure the patch with construction adhesive and screws for a durable, long-lasting repair.
| Component to Check | Common Problem | Recommended Solution |
|---|---|---|
| Door Gasket | Cracked, brittle, or dirty seal | Clean the gasket with vinegar. If damaged, replace it. |
| Water Inlet Valve | Stuck open or cracked body | Replace the entire valve assembly. This is often a job for a professional. |
| Drain Hose | Cracks, holes, or loose clamps | Tighten clamps. If the hose is damaged, replace it immediately. |
| Water Supply Line | Kinks, cracks, or loose fittings | Hand-tighten connections first. Replace the hose if it shows wear. |
| Pump Seal | Worn out, causing drips from the base | This is a complex repair; replacing the pump assembly is often best. |
| Float Switch | Stuck or malfunctioning | Test the switch for continuity. Replace if faulty. |
Cost of Repairs: What to Expect
The cost to fix a dishwasher leak and the resulting subfloor damage can vary widely. A simple hose replacement might only cost you the price of the part, while extensive subfloor repair can run into thousands of dollars.
Repairing the dishwasher itself can range from $150 to $350 for common issues like a new pump or valve. However, water damage restoration is where the costs can climb. On average, you can expect to pay between $3 and $7 per square foot for professional water damage cleanup. If the subfloor needs to be replaced, costs can range from $250 to over $1,000, depending on the size of the area and the materials used. Keep in mind that these figures don’t include the cost of replacing your finished flooring.
Prevention: Your Best Defense Against Future Leaks
The best way to deal with a dishwasher leaking into the subfloor is to prevent it from ever happening. Regular maintenance and proactive measures can save you a significant amount of stress and money.
Regularly inspect your dishwasher’s components, including the door gasket, spray arms, and filter. Clean the filter every few weeks to prevent clogs that can cause water to back up. Periodically check the hoses and connections for any signs of wear or leaks.
Invest in Proactive Protection
One of the most effective preventative measures is installing a dishwasher drain pan. This simple, inexpensive pan sits under your dishwasher and is designed to catch any leaks, directing the water to the front of the unit where you can see it immediately. This transforms a hidden leak into an obvious one, alerting you to the problem before any water reaches your subfloor.
For even greater peace of mind, consider a smart water leak detector. These small sensors can be placed under your dishwasher and will send an alert to your smartphone the moment they detect moisture, giving you the earliest possible warning of a potential disaster.
Ultimately, a dishwasher leak can be a formidable challenge, but it is a manageable one. By understanding the causes, acting quickly, and taking preventative measures, you can protect your home from the silent but devastating effects of water damage. When you see signs of water coming through your floorboards, it’s a call to action—one that you should never ignore.