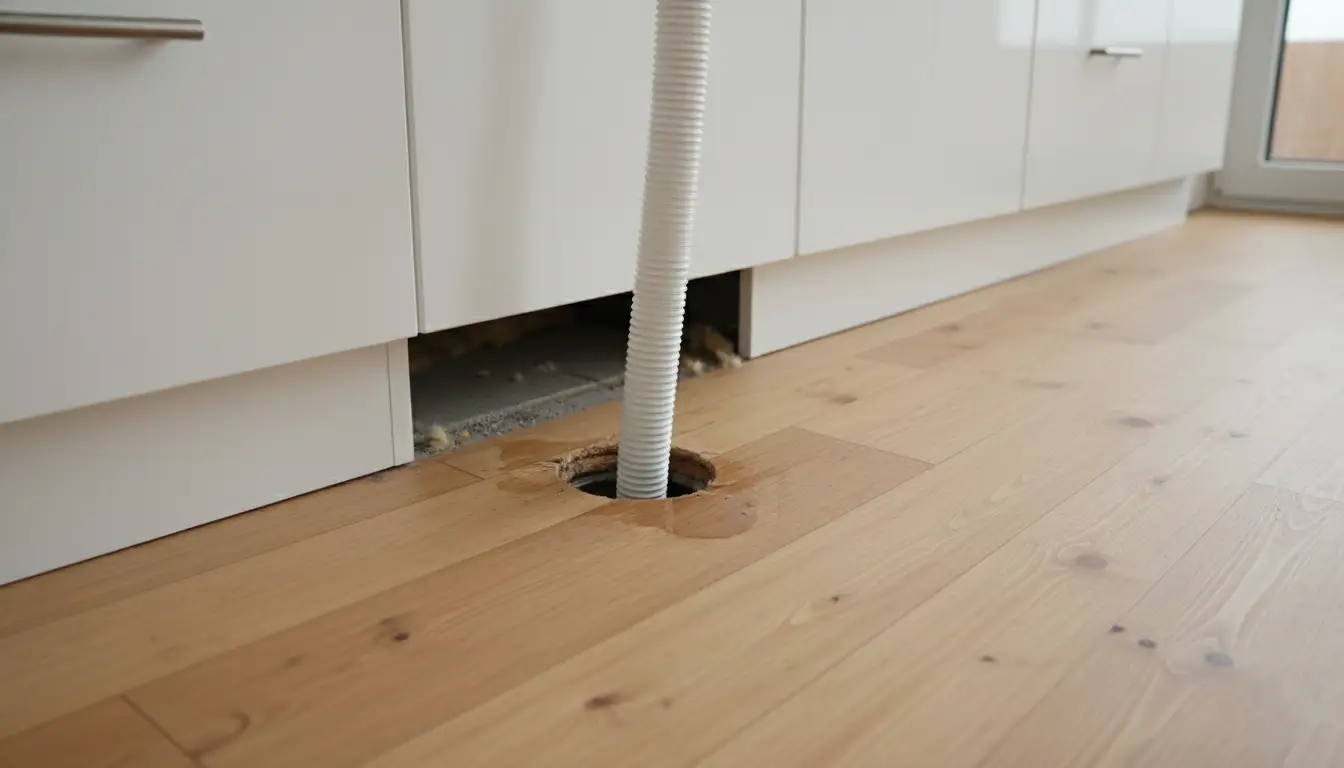
Dishwasher Drain Through Floor: The Ultimate Guide to a Cleaner Kitchen
Running a dishwasher drain through the floor is a non-standard plumbing solution that can solve complex kitchen layout challenges. While the typical installation involves connecting the drain hose to the sink’s plumbing, situations like island placements or distant drain access may necessitate this alternative route. This guide provides a comprehensive overview of the process, its compliance with plumbing codes, and the critical steps to ensure a safe and effective installation.
Understanding this method is crucial for homeowners facing unconventional kitchen designs or those looking to free up under-sink cabinet space. Proper execution prevents backflow, water damage, and ensures your appliance functions efficiently for years to come.
You'll Learn About
Is Running a Dishwasher Drain Through the Floor a Good Idea?
Routing a dishwasher drain through the floor directly to a basement or crawl space drain line is an elegant solution for specific kitchen designs, but it’s not a decision to be taken lightly. It’s often employed when the dishwasher is located in an island or far from the main sink, making a standard connection impractical. This method can create a cleaner look and free up valuable cabinet space by eliminating the drain hose from under the sink.
However, this approach comes with its own set of challenges and potential pitfalls. The primary concerns revolve around ensuring proper drainage, preventing backflow of contaminated water, and adhering to local plumbing codes, which can be strict about such installations. An improperly installed drain can lead to siphoning, where water is pulled out of the dishwasher prematurely, or worse, allow sewer gases and wastewater to enter the appliance.
Understanding the Core Problem: Backflow and Siphoning
The biggest risks with any dishwasher drain installation are backflow and siphoning. Backflow occurs when dirty water from the sink or main drain line flows back into the dishwasher. This not only contaminates your clean dishes but also poses a significant health hazard. Siphoning happens when the drain hose creates a vacuum effect, pulling water out of the dishwasher during a cycle, which can interrupt its operation and potentially damage the appliance’s pump.
Standard installations prevent this with a “high loop” or an “air gap.” A high loop involves securing the drain hose as high as possible under the countertop before it connects to the drain. An air gap is a physical device mounted on the countertop that provides a break in the drain line to prevent any possibility of backflow. When draining through the floor, achieving this same level of protection is paramount.
Code Compliance and Safety Regulations
Before you drill any holes, it is absolutely essential to check your local plumbing codes. Building codes exist to ensure safety and functionality, and non-compliance can lead to failed inspections, fines, and costly repairs. Many jurisdictions have specific rules about dishwasher drainage that may prohibit or place strict conditions on floor-based drainage.
Some codes mandate the use of an air gap, especially if the drain connection point is below a certain height from the floor. Others may allow a high loop as an alternative. When the drain is routed to a basement, the connection point is almost always lower than the dishwasher, making these backflow prevention measures even more critical. Consulting a licensed plumber or your local building department is the first and most important step.
The Role of a High Loop in a Floor Drain Setup
Even when draining through the floor, a high loop is non-negotiable. The drain hose must exit the dishwasher, loop up to the underside of the countertop, and then travel down through the floor. This high point, which should be at least 20-32 inches above the finished floor, acts as a crucial barrier against backflow and siphoning.
This simple step ensures that gravity works in your favor, preventing wastewater from the main drain from having an easy path back up the hose and into your appliance. Securing the hose firmly to the underside of the countertop with a clamp or strap is a small detail that makes a huge difference in the system’s safety and reliability.
Step-by-Step Guide to a Professional Installation
If you’ve confirmed that a floor drain is compliant with local codes and is the right solution for your kitchen, follow these steps for a safe and effective installation. This process requires basic plumbing and carpentry skills. If you are unsure at any point, it is always best to hire a professional plumber.

1. Planning the Drain Route
First, map out the path for the drain hose. The goal is to create the most direct route possible from the dishwasher to the main drain line in the basement or crawl space. Minimize the length of the hose to avoid drainage issues; most manufacturers recommend a maximum total hose length of 10 to 12 feet. A longer hose can strain the dishwasher’s pump and lead to clogs.
Identify the exact spot on the floor where you will drill the hole. This should be in an inconspicuous location, typically inside the cabinet housing the dishwasher or directly behind it. Ensure the area below is clear of electrical wiring, plumbing supply lines, and structural supports before drilling.
2. Preparing the Materials and Tools
Gathering the right supplies is key to a smooth installation. You will need a durable, high-quality dishwasher drain hose and potentially an extension kit if the provided hose is too short. Ensure any extension connections are made with proper barbed fittings and hose clamps to create a watertight seal.
Your toolkit should include a drill with a spade bit or hole saw appropriately sized for the drain hose (typically 1-1/2 inches), a tape measure, screwdrivers, pliers, and hose clamps. You will also need plumbing fittings to connect the hose to the main drain line in the basement, such as a standpipe or a wye fitting with a P-trap.
3. Creating the High Loop and Drilling the Hole
With the dishwasher in place, create the essential high loop. Secure the drain hose to the highest point possible on the back of the dishwasher cabinet or the underside of the countertop. Once the high loop is established, guide the hose down towards the pre-planned spot on the floor.
Carefully drill a clean hole through the floor and subfloor. The hole should be smooth to prevent damage to the hose. Feed the drain hose through the hole into the basement or crawl space, ensuring it is not kinked or bent sharply.
4. Connecting to the Main Drain Line
The connection method in the basement is the most critical part of this installation. There are two primary, code-compliant methods: a standpipe or a direct connection with a P-trap. For anyone planning a dishwasher with top controls installation, ensuring proper drainage from the start is key to avoiding future issues.
A standpipe, similar to what is used for a washing machine, is often the preferred method. This involves installing a vertical pipe (at least 18 inches long) with a P-trap at its base, which then connects to the main drain. The dishwasher hose is simply hooked into the top of the standpipe, creating a natural air break that effectively prevents backflow. An alternative is to connect directly to the drain line using a wye fitting and a dedicated P-trap, which also prevents sewer gases from rising. An unexpected issue like water coming through floorboards could be a sign of a poorly executed connection, highlighting the need for precision.
Potential Problems and How to Avoid Them
Even with careful planning, issues can arise. Understanding these potential problems can help you troubleshoot or, better yet, prevent them from happening in the first place. This is especially true for complex setups, such as kitchens with 2 dishwashers, where drainage systems are more intricate.
| Potential Problem | Cause | Solution |
|---|---|---|
| Standing Water in Dishwasher | Clogged hose, kinked line, or an overworked pump due to a long drain hose. | Ensure the hose is as short and straight as possible. Check for kinks and remove any debris from the dishwasher filter and the hose itself. |
| Gurgling Sounds or Bad Odors | Improperly installed or missing P-trap, allowing sewer gases to enter. | Verify that a P-trap is installed correctly on the drain connection in the basement. The P-trap must hold water to create a seal against gases. |
| Water Siphoning From Dishwasher | The absence of a proper high loop before the hose descends through the floor. | Ensure the drain hose is securely looped to the underside of the countertop, at least 20 inches above the floor, before it goes down. |
| Leaks in the Basement/Crawl Space | Loose hose clamps, cracked fittings, or a damaged drain hose. | Use high-quality hose clamps and check all connections for tightness. Protect the hose from sharp edges where it passes through the floor. |
The Standpipe vs. Direct Connection Debate
Choosing between a standpipe and a direct connection often comes down to local code and the specific layout of your plumbing. A standpipe offers superior backflow protection because of the physical air break it creates. It is generally considered the safer and more reliable option for a floor drain setup.
A direct connection using a wye fitting and a P-trap is also a viable method and can be more compact if space is limited. However, it must be vented properly to function correctly and prevent the P-trap from being siphoned dry. In either case, never connect the dishwasher drain hose directly to a sewer line without a P-trap, as this is a serious code violation and health hazard.
Final Considerations for a Flawless Operation
Finally, a few expert tips can ensure the long-term success of your installation. Use a solid, reinforced drain hose rather than a flimsy, corrugated one to prevent kinks and damage. When securing the hose, use wide, smooth straps instead of narrow zip ties that could pinch the line over time.
Regularly inspect the dishwasher’s filter and the drain connections in the basement to catch any potential clogs or leaks early. A well-maintained system will provide years of trouble-free service, making the effort of a through-the-floor installation a worthwhile investment in your kitchen’s functionality and design.

