Dirt Mounds Between Pavers? Here’s What’s Really Going On
There are few things more frustrating than meticulously maintaining a beautiful paver patio, walkway, or driveway, only to find mysterious little mounds of dirt pushing up between the joints. This common problem can make an otherwise pristine hardscape look unkempt and neglected. More importantly, these dirt mounds are often a symptom of a deeper issue that, if ignored, could lead to more significant problems.
These unwelcome piles are not just random occurrences; they are tell-tale signs of specific activities happening just beneath the surface. From industrious insect colonies to hidden water problems, understanding the root cause is the first and most critical step. This guide will help you diagnose what’s causing those dirt mounds, provide a clear, actionable plan to eliminate them, and offer expert strategies to ensure they don’t return.
You'll Learn About
Unmasking the Culprits: What’s Causing Those Dirt Mounds?
Before you can effectively treat the problem, you need to play detective. The appearance and location of the mounds offer crucial clues to their origin. Generally, these dirt piles can be attributed to one of three main culprits: insects, earthworms, or a failure in the paver’s foundational structure.
The Prime Suspect: Ants and Their Underground Networks
The most frequent cause of fine, sandy mounds between pavers is ants. Pavement ants, in particular, are notorious for setting up their colonies in the convenient, pre-excavated real estate beneath paving stones. The sand or stone dust used to create the base and fill the joints is the perfect material for them to build their intricate networks of tunnels and chambers.
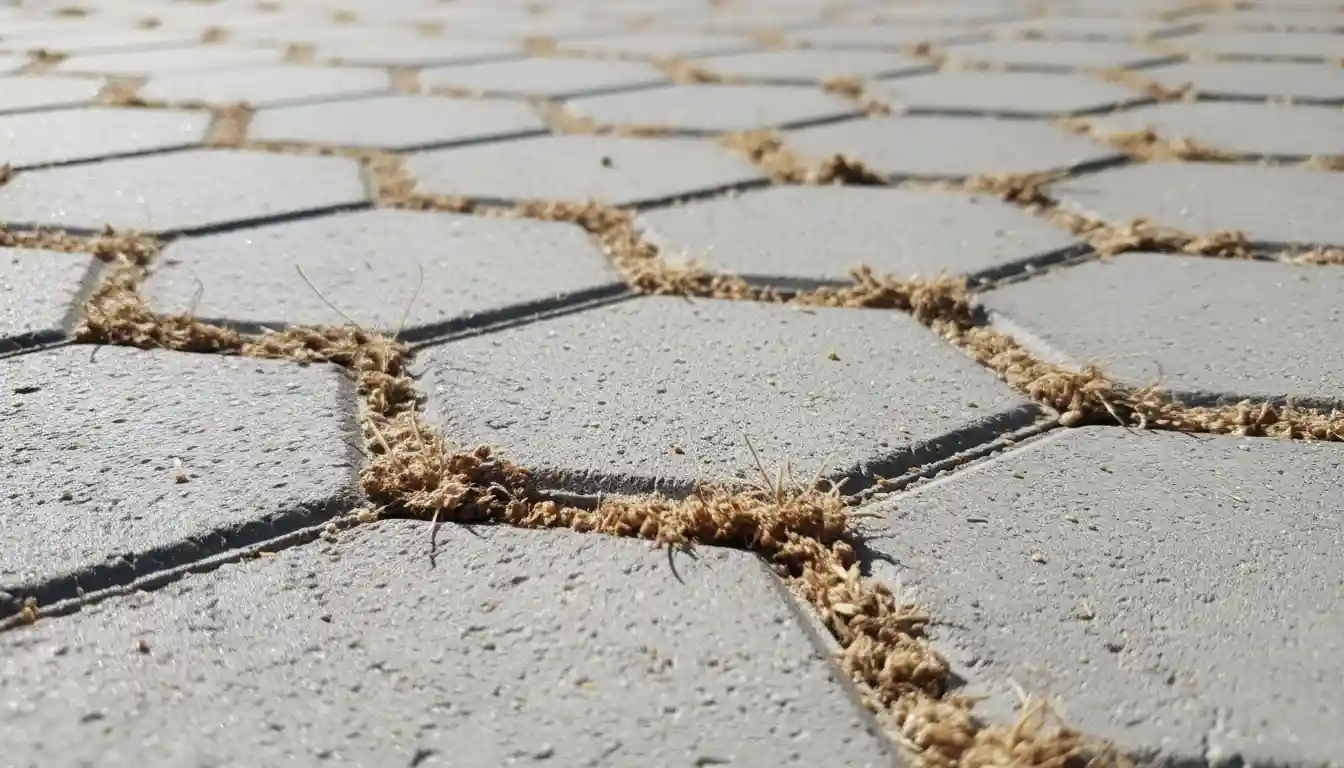
When ants excavate, they push the displaced material up and out of the joints, creating the characteristic small, volcano-shaped mounds you see on the surface. These mounds often have a visible central hole, which is the entrance to the nest. Because the pavers absorb and retain heat from the sun, they create a stable, warm environment, making the underside of your patio an ideal year-round habitat for a thriving ant colony.
Earthworms and Their Castings: A Sign of Healthy Soil?
If the mounds appear more clumpy, moist, and granular, you might be looking at earthworm castings. After a heavy rain, it’s common to see these small piles of digested soil that earthworms excrete on the surface. While earthworms are incredibly beneficial for aerating soil and recycling nutrients in a garden, their castings can be a nuisance on a hardscape.
The presence of numerous worm castings is often linked to high moisture levels. Pavers can trap water underneath, creating a damp, inviting environment that attracts earthworms from the surrounding lawn or garden beds. Though harmless, these muddy piles can be unsightly and, when smeared, can stain the paver surface.
The Hidden Issue: Water, Erosion, and Base Failure
Perhaps the most serious cause of dirt mounds is related to water and the integrity of your paver installation itself. If your paver area has poor drainage, an improper slope, or failing edge restraints, water can infiltrate the base layers. This water can wash away the jointing sand and even the finer particles of the bedding sand beneath the pavers.
A much deeper issue that is often misdiagnosed is hydrostatic pressure. When the ground beneath your patio becomes completely saturated with water, the pressure can physically force fine particles of soil and sand upward through the paver joints. This phenomenon is a critical sign of a compromised or inadequate paver base and indicates that the problem is more than just pests; it’s a structural issue.
Your Step-by-Step Battle Plan to Reclaim Your Patio
Once you have a better idea of the cause, you can take targeted action. Following a clear, methodical approach will not only remove the current mounds but also address the underlying issue to prevent them from coming back. This plan involves a three-step process: diagnosis, removal, and a specific, cause-based treatment.
Step 1: Accurate Diagnosis – Ant Hill, Worm Casting, or Base Failure?
Begin by closely examining the mounds and the surrounding pavers. For a clear diagnosis, pay attention to the details. Are there visible ants moving in and around the pile? Poke a mound with a small stick. Does it collapse into fine, dry sand, or is it dense and moist? Are the pavers around the mounds still level and stable, or do they feel loose, wobbly, or sunken?
This careful observation is key. Treating for ants when the real problem is a saturated base will be ineffective and frustrating. The table below provides a simple guide to help you distinguish between the likely causes based on their distinct characteristics.
| Characteristic | Ant Mounds | Earthworm Castings | Base/Water Issues |
|---|---|---|---|
| Appearance | Fine, sandy, often with a central hole. Uniform grain size. | Clumpy, granular, moist, muddy. Looks like small pellets of soil. | Can be sandy or muddy. Often appears as a “slurry” pushed up. |
| Texture | Dry and loose. | Damp, sticky, or pasty when wet. Crumbly when dry. | Varies, but often feels gritty from the base material. |
| Pest Activity | Visible ants on or near the mound. | No visible insects. Worms may surface after heavy rain. | No pest activity directly associated with the mound. |
| Associated Paver Issues | Pavers may become slightly loose over time as sand is excavated. | None. The pavers themselves are usually unaffected. | Pavers are often uneven, wobbly, sunken, or show signs of shifting. |
Step 2: Immediate Removal and Cleaning
Regardless of the cause, the first physical step is to remove the existing mounds. For dry, sandy mounds caused by ants, a stiff-bristled brush is effective for sweeping them away. Follow this with a powerful shop vacuum to suck the loose material out of the joints, which removes part of their nest and any food sources.
Avoid using a strong jet of water from a hose, as this can wash out the essential jointing sand and potentially worsen any underlying moisture problems. For damp worm castings, wait for them to dry, at which point they can be easily brushed away without smearing across the paver surface.
Step 3: Targeted Solutions for the Specific Cause
With the area cleaned, it’s time to apply a solution tailored to your diagnosis. A one-size-fits-all approach won’t work; what resolves an ant infestation will do nothing for base failure. Choose the appropriate remedy based on your findings in Step 1.
For Ant Infestations:
Your goal is to eliminate the colony, not just the visible workers. Start with the least invasive methods. Pouring boiling water into the nest entrance can be effective for small colonies but may need to be repeated. A safer, highly effective option is diatomaceous earth (food-grade), a natural powder that you can sprinkle into the joints. It works by abrading the ants’ exoskeletons, causing them to dehydrate.
For persistent infestations, ant bait stations are a superior long-term solution. Worker ants carry the slow-acting poison back to the nest, which eliminates the entire colony, including the queen. This method is far more effective than contact-killing sprays, which only kill the foraging ants you see. Place bait stations along ant trails and near nest openings for the best results.
For Earthworm Castings:
The presence of earthworms is a sign of a healthy ecosystem, so the goal is not to eliminate them. Instead, you should focus on making the area less attractive to them. This almost always comes down to managing moisture. Improve the drainage around your paver patio by ensuring downspouts are directed away from the area and that the surrounding soil isn’t overly saturated from irrigation.
Aerating the adjacent lawn can also help improve drainage and encourage worms to stay in the yard rather than migrating under the patio. Regularly sweeping the patio to remove organic debris like leaves and grass clippings will also reduce the food sources that attract them to the surface.
For Water and Base Issues:
This is the most challenging problem to solve and often indicates a flaw in the original installation. The first step is to identify and correct any external water sources. Clean your gutters, extend downspouts, and re-grade any surrounding landscape that slopes toward the patio. Proper water management is crucial.
If the sand between the joints is consistently washing out, the immediate solution is to refill them. However, for a lasting fix, you must upgrade the material. This brings us to the single most effective preventative measure for keeping pavers secure and pest-free.
The Ultimate Prevention: Fortifying Your Pavers for the Future
Treating the current problem is only half the battle. To ensure you don’t find yourself sweeping up dirt mounds again next season, you need to be proactive. The key lies in creating an environment that is inhospitable to pests and resilient to the forces of water and erosion.
The Power of Polymeric Sand: Your Best Defense
Polymeric sand is a game-changer for paver maintenance. It’s a special mixture of fine sand and a polymer binding agent that, when activated with water, hardens to form a firm yet flexible joint. This hardened barrier is the most effective way to prevent future problems.
The benefits are significant. It locks pavers together, preventing them from shifting or wobbling. It creates an impenetrable barrier that stops ants and other insects from burrowing down between the joints. It also blocks weed seeds from taking root and is highly resistant to being washed out by rain. Applying polymeric sand is a straightforward process: clean the joints thoroughly, sweep the sand in, lightly compact it, and then gently mist it with water according to the manufacturer’s directions.
Proper Drainage: The Unsung Hero of Paver Maintenance
No amount of joint stabilization will work if the base beneath your pavers is constantly saturated with water. A properly installed paver surface should have a slight slope—typically a quarter-inch drop for every foot—to direct water away from your home’s foundation. This is a fundamental aspect of a durable hardscape.
If your patio is in a low-lying area that collects water, consider installing a French drain along the perimeter. This is a trench filled with gravel and a perforated pipe that will intercept surface and groundwater, channeling it safely away. Addressing a failing paver base is a significant undertaking, and it highlights how foundational work contributes to the overall cost and longevity of home improvements, much like understanding why front doors are so expensive reveals the hidden complexities in their construction.
Regular Maintenance and Inspection
Finally, a simple routine of regular maintenance can prevent small issues from becoming major headaches. Make it a habit to sweep your paver surfaces weekly to remove dirt and organic debris that could break down and provide a medium for weeds and insects. While sweeping, take a moment to visually inspect the joints.
Look for any cracks, gaps, or areas where the sand may be eroding. Catching these small failures early and touching them up with a bit of polymeric sand is far easier than dealing with a widespread pest infestation or significant paver shifting later on.
When to Call a Professional Landscaper
While many of these solutions are well within the grasp of a determined DIYer, there are times when calling in a professional is the wisest course of action. If you observe widespread and significant sinking, heaving, or shifting of your pavers, this likely points to a serious failure of the base layer. This requires excavation and professional reconstruction to fix properly.
Similarly, if you have a massive and persistent pest infestation that doesn’t respond to DIY treatments, a professional pest control service will have access to more effective solutions. If you suspect a major base failure that requires excavation, it’s crucial to consult a professional. This level of work goes beyond simple paver maintenance and can involve complex issues like needing to know the procedure for moving an underground gas line if utilities are located nearby.
Ultimately, seeing dirt mounds between your pavers is a call to action. By correctly identifying the cause—be it ants, worms, or water—you can apply the right solution. Take the time to address the root of the problem and invest in preventative measures like polymeric sand. With a little effort, you can restore the beauty and integrity of your hardscape, ensuring it remains a source of pride for years to come.