Crawl Space Dryer Vent Problems? Stop Moisture & Fire Risks Now
That damp, musty smell from your crawl space might be more than just ground moisture. An improperly installed or neglected dryer vent could be silently pumping gallons of humid, lint-filled air into the foundation of your home, creating a hidden hazard that demands immediate attention.
Many homeowners overlook the dryer vent that runs through their crawl space, but this out-of-sight component can lead to serious problems, from rampant mold growth and wood rot to devastating house fires. Understanding the risks is the first step toward a safer, more efficient home.
You'll Learn About
Why Your Crawl Space Dryer Vent Is a Ticking Time Bomb
When a dryer vent is not routed correctly to the exterior of your home, it terminates in the crawl space, releasing everything your dryer is designed to expel directly under your floors. This creates a cascade of issues that can compromise your home’s structural integrity and your family’s health.
The Hidden Dangers: Fire, Mold, and Pests
The lint expelled from your dryer is not just messy; it’s highly flammable. The U.S. Fire Administration reports that thousands of house fires each year are caused by dryers, with failure to clean being a primary factor. A crawl space full of dry, fluffy lint is a perfect fuel source for an accidental spark.
Beyond the fire risk, there’s the issue of moisture. A single dryer cycle can release over a gallon of water vapor. When this hot, moist air is dumped into a cool, dark crawl space, it condenses on wooden joists, insulation, and ductwork, creating the perfect breeding ground for mold and mildew. This can lead to wood rot, structural damage, and poor indoor air quality as mold spores find their way into your living space.
An open-ended vent pipe is also an open invitation for pests. Rodents, insects, and other vermin are attracted to the warm, sheltered environment of a crawl space and will use the vent as a superhighway into your home. Once inside, they can cause further damage by chewing on wires and insulation.
Energy Waste and Appliance Damage You Can’t Ignore
A vent that is clogged with lint, has too many bends, or is improperly terminated forces your dryer to work much harder. This backpressure not only leads to significantly longer drying times but also causes a sharp increase in your energy bills. Your dryer is running longer and fighting against itself to do its job.
This constant strain can also cause premature wear and tear on the appliance itself. Overheating is a common symptom of a blocked vent, which can damage critical components like the heating element and thermal fuse. If you’ve ever wondered about a strange new dryer heating element smell, a venting issue could be the underlying cause, as the appliance struggles to push air through a restricted path.
The Anatomy of a Code-Compliant Crawl Space Vent System
To avoid these dangers, a dryer vent must be installed according to strict safety standards and building codes, such as the International Residential Code (IRC). Proper installation ensures that lint, moisture, and hot air are safely and efficiently transported outside your home.
Understanding Building Code Essentials (IRC)
Building codes are not mere suggestions; they are requirements designed to ensure safety. The IRC explicitly states that dryer exhausts must terminate outside the building and be equipped with a backdraft damper. Venting into a crawl space, attic, or any other interior area is strictly prohibited.
The code also specifies a maximum length for dryer ducts, typically 35 feet from the dryer to the exterior vent hood. This maximum length is reduced for every bend in the ductwork—for example, a 90-degree elbow is equivalent to a 5-foot reduction. Furthermore, screws that protrude into the duct are not allowed, as they can catch lint and create blockages.
Choosing the Right Materials: A Critical Decision
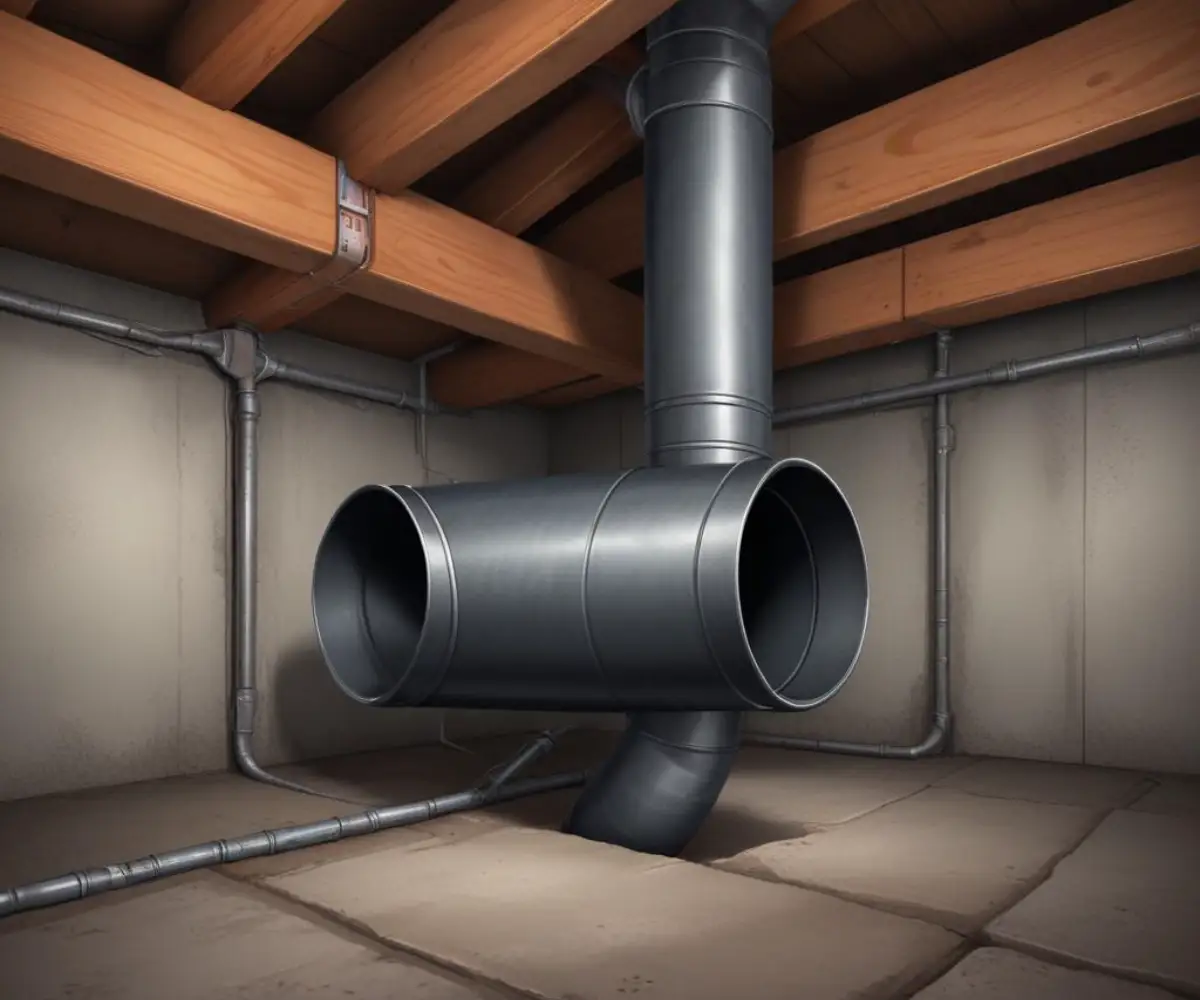
The material used for your dryer vent is one of the most critical aspects of a safe installation. Flimsy, plastic, or foil accordion-style ducts are not only against code for use within walls or crawl spaces but are also a significant fire hazard due to their tendency to trap lint and crush easily. Rigid metal ducting is the gold standard for crawl space installations.
Here is a comparison of common dryer vent materials:
| Material Type | Best Use Case | Pros | Cons |
|---|---|---|---|
| Rigid Metal Duct (Aluminum or Steel) | Inside walls, crawl spaces, long runs | – Smooth interior prevents lint buildup – Highly durable and crush-resistant – Meets all building codes |
– More difficult to install – Requires precise measurements |
| Semi-Rigid Metal Duct | Transition from dryer to wall/floor connection | – More durable than foil – Holds its shape well – Can be bent to form smooth curves |
– Not for use inside walls/crawl spaces – Can be crushed if not careful |
| Flexible Foil/Vinyl Duct | Not Recommended | – Inexpensive and easy to find | – Prohibited by most building codes for concealed use – Ribbed interior traps lint – Easily crushed or punctured, creating a fire hazard |
Step-by-Step Guide: Installing Your Crawl Space Dryer Vent Like a Pro
Properly installing a dryer vent through a crawl space is a manageable DIY project for those with basic carpentry and tool skills. The key is careful planning and adherence to safety codes.
Step 1: Planning Your Vent Route
The goal is to create the shortest and straightest path possible from the back of the dryer to the outside. Measure the total distance and count the number of turns you’ll need to make. Remember to subtract the equivalent length for each elbow from your total 35-foot maximum.
In some homes, the layout may present a challenge, requiring a longer or more complex route. If you find yourself in a situation where the ideal path is obstructed, you may need to reconsider the appliance’s location, a process similar to planning to move your washer and dryer to the other side of the wall, where vent routing is a primary concern.
Step 2: Gathering Your Tools and Materials
Before you begin, assemble everything you need. This will prevent multiple trips to the hardware store and ensure a smooth workflow.
Tools:
- Drill with a long bit and a 4.25-inch hole saw
- Tape measure
- Metal snips or shears
- Caulking gun
- Safety glasses and gloves
Materials:
- 4-inch rigid metal duct sections
- 4-inch 90-degree and/or 45-degree rigid metal elbows
- Exterior vent hood with a damper
- UL-listed foil tape (never use standard duct tape)
- Metal straps or hangers
- Exterior-grade caulk
Step 3: Creating the Exit Point
From inside the crawl space, choose a spot on the rim joist (the wooden board that sits on top of the foundation wall) for your exit. Ensure the location is free of electrical wires, plumbing, and structural supports. Drill a pilot hole from the inside out to mark the center.
From the outside, use the 4.25-inch hole saw to cut the exit hole. Insert the exterior vent hood, ensuring the louvered flaps are horizontal. Secure it to the house with screws and seal the perimeter with exterior-grade caulk to prevent water and air leaks.
Step 4: Assembling and Securing the Ductwork
Starting from the exterior vent hood, begin connecting sections of rigid ducting, working your way back toward the dryer’s entry point into the crawl space. Use the UL-listed foil tape to seal every seam and joint. This is a critical step to prevent lint and moist air from leaking into the crawl space.
Support the duct run every 4 to 6 feet using metal straps or hangers secured to the floor joists above. This prevents the duct from sagging, which can create low spots where lint and moisture can accumulate. For optimal performance, try to maintain a slight upward slope from the dryer towards the exterior exit, which helps prevent condensation from pooling in the line.
Advanced Solutions for Common Crawl Space Venting Challenges
Sometimes, a straightforward installation isn’t possible due to the home’s layout. Long runs, high humidity, and pests require specialized solutions to ensure a safe and effective venting system.
Battling Long Vent Runs: The Dryer Vent Booster Fan
If your total vent length, including deductions for bends, exceeds the 35-foot IRC limit, your dryer’s blower will not be powerful enough to exhaust the air effectively. This is where a dryer vent booster fan becomes necessary. These inline fans are installed within the duct run to increase airflow.
A booster fan helps push air over long distances, preventing lint buildup and reducing drying times. They are activated automatically by sensing air pressure when the dryer is running, providing the extra power needed to maintain proper ventilation and efficiency.
Unseen Threats: Crawl Space Humidity and Radon Gas
Even a properly sealed vent system can be affected by the ambient conditions of your crawl space. If your crawl space has high humidity, it’s crucial to have a high-quality vapor barrier on the ground to prevent moisture from affecting the ductwork and the rest of your home’s structure.
In areas where radon gas is a concern, it’s vital to ensure your vent installation does not compromise any existing radon mitigation systems. A poorly sealed exit point could potentially alter the air pressure in the crawl space, which might impact the effectiveness of a radon suction system. Always seal penetrations meticulously.
Fort Knox Pest Control for Your Vent Termination
The standard louvered vent hood offers basic protection, but determined pests can sometimes find their way through. For enhanced security, consider upgrading to a dedicated pest-proof vent cover. These covers often feature a floating shuttle or cage design that allows lint to escape but prevents birds, mice, and other critters from entering.
Frequently Asked Questions (FAQ)
Can you vent a dryer directly into a crawl space?
Absolutely not. This is a direct violation of building codes and a serious safety hazard. It introduces massive amounts of moisture, which causes mold and wood rot, and flammable lint, which creates a significant fire risk.
What is the best material for a dryer vent in a crawl space?
The only code-compliant and safe material for a dryer vent running through a crawl space is rigid or semi-rigid metal ducting. Never use flexible vinyl or foil ducts, as they can trap lint and are easily crushed.
How often should I clean my crawl space dryer vent?
You should inspect and clean your dryer vent at least once a year. If you have a large family, pets, or a particularly long vent run, you may need to clean it more frequently, such as every six months.
Can a dryer vent run downwards in a crawl space?
This is highly discouraged. A downward slope can trap lint and allow condensation to pool, creating a dense, sludgy blockage over time. The ideal installation maintains a slight, continuous upward slope toward the exterior exit.
Maintenance is Non-Negotiable: Your Seasonal Checklist
Installation is only half the battle. Regular maintenance is essential to keep your crawl space dryer vent operating safely and efficiently. An annual inspection and cleaning should be a non-negotiable part of your home maintenance routine.
How to Inspect and Clean Your Crawl Space Vent
Be vigilant for signs of a clog, such as clothes that take multiple cycles to dry, a dryer that feels hot to the touch, or a burning smell. Annually, disconnect the ductwork and use a rotary brush cleaning kit attached to a drill. This tool snakes through the entire length of the vent, breaking up compacted lint and debris.
Start from the dryer side and push the brush through to the exterior. Then, go outside and clean from the exterior hood inward. A vacuum or leaf blower can be used to clear out the dislodged lint, ensuring the entire line is completely clear.
The Professional vs. DIY Decision
While annual cleaning can be a DIY task, there are times when calling a professional is the smarter choice. If you have an exceptionally long run, a booster fan, or suspect a pest infestation within the vent line, a professional has the specialized tools and experience to handle the job safely.
Hiring an expert for the initial installation or for complex maintenance provides peace of mind, much like trusting a pro for a tricky dishwasher with top controls installation. When safety and code compliance are on the line, professional expertise is a worthwhile investment.