Cost to Remove Dog Door in Wall: The Shocking Price You Aren’t Expecting
That through-wall dog door seemed like a brilliant idea at first. It offered your furry friend freedom and saved you from playing doorman a dozen times a day. But now, whether you’re selling your home, have a new pet, or are simply tired of the energy loss and security risk, it’s time for it to go. You’re left with a hole in your wall and a big question: what is the cost to remove a dog door in a wall?
The answer is more complex than you might think. While you might budget a couple of hundred dollars, the final bill can easily soar into the thousands depending on a few critical factors. This guide will break down every cost, from DIY patch jobs to professional repairs on complex exterior walls, ensuring you aren’t blindsided by the final invoice.
You'll Learn About
Why the Cost to Remove a Dog Door Varies So Wildly
You can’t get a single flat-rate price for this job because every wall is different. The material, the size of the door, and whether you do it yourself or hire a professional are the three biggest factors that will determine your total cost. Understanding these variables is the key to setting a realistic budget.
Factor 1: Your Wall’s Material is the Biggest Cost Driver
The single most significant factor influencing the price is the material of your interior and, more importantly, your exterior wall. Repairing a simple interior drywall patch is straightforward and cheap. Matching a complex exterior siding is where costs can skyrocket.
Drywall: This is the best-case scenario. Drywall is the easiest and cheapest material to repair. A simple patch job is well within the skills of a competent DIYer or a handyman.
Stucco: Repairing stucco is a multi-step process that requires skill to match the existing texture and color. A poor patch job on a stucco wall is incredibly obvious and can decrease your home’s curb appeal. This often requires a specialist and significantly increases labor costs.
Brick or Stone Veneer: This is the most complex and expensive scenario. It involves sourcing matching bricks or stones, which can be difficult for older homes, and requires a skilled mason to seamlessly integrate the new material. The labor is intensive and commands the highest price.
Factor 2: Size and Complexity of the Original Installation
Not all dog doors are created equal. A small flap for a chihuahua is a much simpler patch than an extra-large door for a Great Dane. The larger the hole, the more materials and labor are needed to frame, insulate, and patch the opening.
Additionally, if the original installer had to cut through a wall stud, the repair becomes more structural. A professional will need to ensure the wall’s integrity is properly restored by sistering the stud, adding extra cost and labor to the project.
Factor 3: DIY vs. Hiring a Professional
Your willingness to get your hands dirty can save you a significant amount of money, primarily in labor costs. A DIY repair on a standard drywall wall might only cost you the price of materials. However, taking on a project beyond your skill level, like a stucco or brick repair, can lead to a costly mess that requires a professional to fix anyway.
Hiring a handyman is a great middle-ground for common repairs. For specialized exteriors, a dedicated contractor is almost always worth the investment to ensure a seamless, weatherproof, and professional finish.
Cost Breakdown: What Are You Actually Paying For?
Understanding where your money goes is crucial. The cost is split between two main categories: the professional’s time and the physical materials needed to complete the job. This is where you can see the true difference between a DIY project and a professional hire.
Professional Labor Costs
When you hire a pro, you’re paying for their time, skill, and tools. A general handyman may charge between $50 to $100 per hour. A simple drywall repair might take 2-4 hours, putting your labor cost in the $100 to $400 range.
However, if you need a stucco specialist or a mason for a brick wall, their rates are higher, often charging by the square foot. Stucco repair can range from $60 to $120 per square foot for a professional job. Masonry work for brick repair is often similar, with professionals charging a minimum fee of $200 to $400 just to show up.
Material Costs for a DIY Repair
If you choose the DIY route, you’re only on the hook for materials. For a standard interior and exterior wall repair, you might need a 2×4 for framing, insulation, a drywall patch kit, joint compound, primer, and paint. On the exterior, you’ll need sheathing, a moisture barrier, and siding-specific patching material.
These materials are relatively inexpensive. Your total material cost for a standard DIY job will likely fall between $75 and $200, depending on the quality of materials and the tools you already own.
| Service Level | Estimated Cost Range | Best For |
|---|---|---|
| DIY (Do-It-Yourself) | $75 – $200 | Homes with standard drywall interiors and simple wood or vinyl siding. Requires basic carpentry and finishing skills. |
| Handyman | $250 – $600 | The most common scenario. Ideal for standard wall materials where you want a professional finish without hiring a specialist. |
| Specialist Contractor (Stucco/Masonry) | $500 – $1,500+ | Required for homes with stucco, brick, or stone exteriors. The cost is high but necessary for a seamless, weatherproof repair. |
Step-by-Step Guide to DIY Dog Door Removal (And Saving Money)
If you have a standard wall and some basic home improvement skills, removing the dog door yourself is the most cost-effective solution. This step-by-step guide will walk you through the process, ensuring a solid and clean repair. Always prioritize safety by wearing gloves and eye protection.
Step 1: Gather Your Tools and Materials
Before you start, make sure you have everything you need. This includes a drill or screwdriver, a pry bar, a tape measure, a saw, a utility knife, framing lumber (2x4s), insulation, drywall, joint compound, putty knives, and painting supplies. For the exterior, you’ll need sheathing, house wrap, and the appropriate siding and sealant.
Step 2: Removing the Pet Door and Frame
Start by unscrewing the pet door frame from both the interior and exterior walls. Most dog doors are telescopic and held together with long screws. Once the screws are out, you should be able to pry the two halves apart and remove them from the wall, leaving you with a clean opening.
Step 3: Re-Framing the Opening
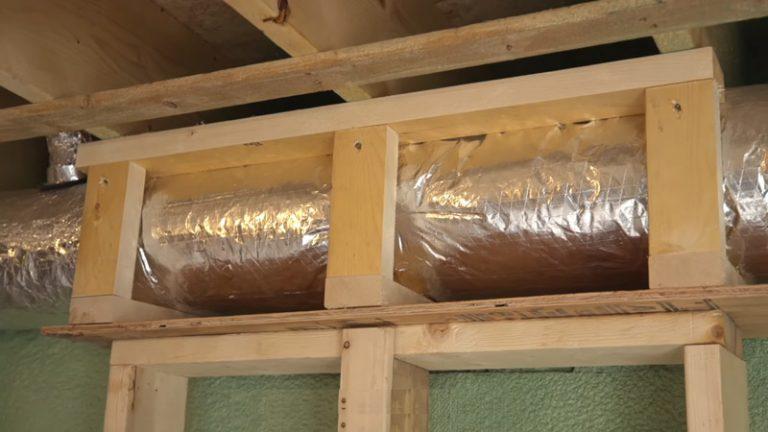
You now have a hole in your wall that needs structural support. Measure the inside of the opening and cut 2×4 lumber to fit snugly within the wall cavity, creating a box frame. Attach these new studs to the existing wall studs with screws to create a secure structure for your new wall patches.
Step 4: Insulating the Void
Don’t skip this step! An uninsulated patch can lead to energy loss and a noticeable cold spot on your wall. Cut a piece of fiberglass or foam board insulation to fit tightly within your new framing. This simple step is critical for maintaining your home’s energy efficiency.
Step 5: Patching the Interior Wall (Drywall)
Cut a piece of drywall to the exact size of the interior opening. Screw it into the new wood frame you built. Apply joint compound (mud) over the seams, using drywall tape to reinforce the joints and prevent cracking. Apply two to three thin coats, sanding smoothly between each coat, until the patch is perfectly flush with the existing wall.
Step 6: Repairing the Exterior Wall
The exterior repair follows similar principles. First, attach a piece of exterior-grade sheathing to your new frame. Cover the sheathing with a moisture barrier like Tyvek, overlapping it with the existing barrier to prevent water intrusion. Finally, install your exterior patch, whether it’s a new piece of siding, a stucco patch kit, or new brickwork.
Step 7: Finishing Touches (Sanding, Priming, and Painting)
Once your interior drywall patch is smooth and dry, it’s time for the final touches. Prime the patched area to ensure the paint absorbs evenly. Then, paint the patch to match the rest of your wall. Getting a perfect paint match can be tricky; it’s often best to paint the entire wall from corner to corner for a seamless look.
Hiring a Pro: When Is It Worth the Cost?
While a DIY approach can save money, there are times when hiring a professional is the smarter, safer, and ultimately more cost-effective choice. A botched repair can be expensive to fix and can compromise your home’s exterior protection.
When to Call a Handyman
A reputable handyman is perfect for the most common dog door removal projects. If your wall is standard wood-frame construction with drywall on the inside and a common siding like vinyl or wood on the outside, a handyman has all the skills needed to deliver a great result at a reasonable price.
When You Need a Specialized Contractor
You must hire a specialist for certain exteriors. If your home has a stucco or brick veneer exterior, do not leave this job to a general handyman. A stucco contractor or a mason has the specific skills to blend the patch flawlessly and ensure it’s properly waterproofed. A bad patch on these materials will stick out like a sore thumb.
How to Get Accurate Quotes
When seeking professional help, get at least three quotes. Provide clear photos of both the interior and exterior walls, as well as the dimensions of the dog door. This will help contractors give you a more accurate estimate of the time and materials required for the job.
Hidden Costs and Common Mistakes to Avoid
Whether you’re doing it yourself or hiring a pro, there are a few potential pitfalls that can add unexpected costs to the project. Being aware of these ahead of time can help you avoid costly surprises.
The Challenge of Matching Textures and Paint
One of the biggest challenges is making the repair invisible. Matching the exact texture of drywall or stucco is an art form. Likewise, even if you have the original paint can, the color on the wall has likely faded over time, making a perfect touch-up impossible. Budget for painting the entire wall for the best results.
Ignoring Insulation and Weatherproofing
Simply plugging the hole isn’t enough. You must properly insulate the wall cavity and install a moisture barrier on the exterior. Failing to do so can lead to higher energy bills and, worse, create an entry point for water that can cause rot and mold inside your walls.
A poorly sealed hole is also an open invitation for pests. Properly sealing the exterior is the best way to ensure you don’t later have to figure out how to get rid of mice that found a new way into your home.
Structural Surprises
In some cases, the original dog door installation may have involved cutting a wall stud. If this wasn’t done correctly, you might find that the wall requires additional framing to be structurally sound. This is a crucial repair that a professional can identify and correct safely.
Beyond the Patch: Securing and Enhancing Your Home
Once the hole is gone, your wall is secure again. This is a great time to evaluate your home’s overall security. Since the dog door was a potential weak point, consider upgrading your door locks. Finding the best rekey kit allows you to easily change your locks without replacing all the hardware.
With the exterior wall now a blank canvas, you have new opportunities. You could even add some flair to your patio or backyard space where the door used to be. Learning how to attach LED strip lights to concrete can be a great way to add modern accent lighting and highlight your newly repaired, solid wall.
Conclusion: Is Removing Your Dog Door a Good Investment?
Removing an unwanted dog door is always a good investment. It improves your home’s energy efficiency, enhances its security, and restores its aesthetic appeal. The cost can range from a simple DIY project under $100 to a professional job exceeding $1,000, driven almost entirely by your exterior wall material.
By understanding the factors that influence the price and honestly assessing your own DIY skills, you can make an informed decision that fits your budget. Whether you do it yourself or hire a trusted professional, you’ll be rewarded with a secure, seamless wall and improved home value.