Convert 240V to 120V Outlet: The Ultimate Safety Guide
You have an old, unused 240-volt outlet sitting on the wall. It might be from a previous electric dryer, a window air conditioner, or a workshop tool that is long gone. Now, you see that spot as the perfect place for a TV, a computer desk, or a charging station, all of which require a standard 120-volt outlet.
The problem seems simple on the surface: just swap the outlets. However, this is one of the most misunderstood and potentially dangerous electrical projects a homeowner can attempt. Applying 240 volts to a 120-volt device will instantly destroy it and can create a serious fire or shock hazard.
Successfully and safely converting a 240V circuit to a 120V outlet is absolutely possible, but it depends entirely on the wiring that already exists inside your walls. This guide will walk you through the process, focusing on the critical safety steps and the one wire that makes all the difference.
You'll Learn About
Understanding the Fundamental Difference: 120V vs. 240V Wiring
Before touching a single wire, it is crucial to understand why these two circuits are different. The distinction goes beyond the shape of the outlet; it lies in how power is delivered from your home’s main electrical panel.
A standard 120-volt circuit uses three wires: one hot wire (usually black) that carries the electrical current, one neutral wire (white) that completes the circuit, and a ground wire (bare copper or green) for safety. A 240-volt circuit, on the other hand, uses two hot wires (often black and red), each carrying 120 volts, along with a ground wire.
The All-Important Neutral Wire
The key to this entire conversion process is the presence, or absence, of a dedicated neutral wire in the 240V circuit. For a 120V outlet to function, it needs a hot wire and a neutral wire to create a 120V potential. The 240V circuit achieves its higher voltage by using two hot legs without a neutral for older installations.
Modern 240V installations (typically since the mid-1990s) use a 4-wire setup: two hot wires, a neutral wire, and a ground wire. This is because modern appliances like dryers and ovens have components like timers and lights that run on 120V. If your 240V outlet has this 4-wire setup, the conversion is relatively straightforward. Older homes often have 3-wire 240V circuits that only have two hot wires and a ground. You cannot safely create a 120V outlet from a 3-wire 240V circuit without running a new wire.

Safety First: Tools and Precautions
Working with electricity is inherently dangerous. A mistake can lead to severe injury, death, or fire. If you are ever in doubt, stop immediately and call a licensed electrician.
Before you begin, you must turn off the power. Go to your main electrical panel, find the double-pole breaker that controls the 240V outlet, and switch it to the “OFF” position. Use a voltage tester at the outlet to confirm there is absolutely no power before proceeding.
Essential Tools for the Job
Gathering the right tools ensures you can do the job safely and efficiently. You will need:
- Non-contact voltage tester
- Multimeter
- Phillips and flathead screwdrivers
- Wire strippers
- Needle-nose pliers
- New 120V single-pole breaker (15 or 20 amp)
- New 120V receptacle (outlet)
- Wire nuts and electrical tape
How to Convert the Outlet: A Step-by-Step Guide
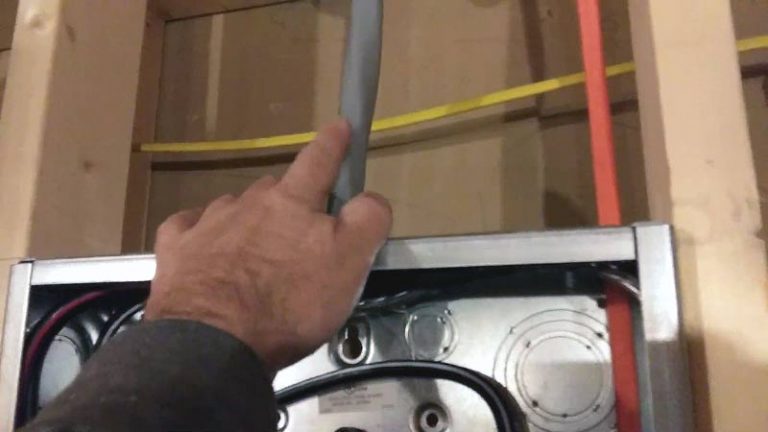
The correct procedure depends entirely on the wiring you find inside the outlet box. After shutting off the power and verifying it is off, carefully remove the outlet cover and pull the existing 240V receptacle from the box to inspect the wires.
Scenario 1: You Have a 4-Wire Circuit (The Ideal Situation)
If you see four wires (typically black, red, white, and bare copper/green), you are in luck. This modern wiring includes the necessary neutral wire for a safe conversion.
Step 1: Modify the Circuit at the Breaker Panel. With the power off, open your electrical panel. Locate the double-pole breaker connected to your circuit. Disconnect both hot wires (black and red) from the breaker.
Step 2: Cap the Unused Hot Wire. You only need one hot wire for a 120V circuit. Choose one to leave unused (conventionally, the red wire). Cap the red wire with a wire nut and wrap it securely with electrical tape. Do this at both the panel and inside the outlet box. This wire will now be dormant.
Step 3: Install the New Breaker. Remove the double-pole 240V breaker. Install a new single-pole 120V breaker in its place. The amperage must match the wire gauge; use a 15-amp breaker for 14-gauge wire and a 20-amp breaker for 12-gauge wire.
Step 4: Connect the Wires at the Panel. Connect the black hot wire to the new 120V single-pole breaker. The white neutral wire should already be connected to the neutral bus bar, and the ground wire to the ground bus bar. Ensure these connections are secure.
Step 5: Install the New 120V Outlet. Back at the outlet box, install the new 120V receptacle. Connect the black wire to the brass-colored screw (hot), the white wire to the silver-colored screw (neutral), and the bare copper/green wire to the green screw (ground). The capped-off red wire remains untouched in the back of the box.
Step 6: Power Up and Test. Close up the panel and the outlet box. Turn the new breaker on. Use a multimeter or outlet tester to verify that the outlet provides approximately 120 volts and is wired correctly.
Scenario 2: You Have a 3-Wire Circuit (The Dangerous Situation)
If you open the box and find only three wires (two hots and a ground), you have a problem. This configuration lacks a neutral wire, which is non-negotiable for a 120V outlet.
Some dangerously incorrect advice suggests using the ground wire as a neutral. NEVER do this. The ground wire is a safety feature designed to carry current only during a fault. Using it as a current-carrying neutral wire energizes the grounding system and the metal casings of all connected appliances, creating a severe and constant shock hazard.
The only safe and code-compliant solution for a 3-wire circuit is to run a new cable from the panel to the outlet. This is a job best left to a qualified electrician, as it may involve fishing wires through walls. While it is tempting to find a shortcut, the risk is not worth it. Sometimes you need to add power where there wasn’t any before, and the principles of safety are the same as when you convert a flood light to an outlet; it must be done to code.
Alternative Solution: The Step-Down Transformer
If rewiring is not an option, you can use a heavy-duty step-down voltage converter. This is a device that plugs into your existing 240V outlet and provides one or more 120V receptacles. While it avoids any electrical work, it’s a bulky and often expensive workaround.
This solution is best for temporary situations or for use in a garage or workshop, not as a permanent, elegant solution inside your living space. It doesn’t truly “convert” the outlet in the wall, it just adapts the power externally. While some may think repurposing wiring is simple, it’s not like the attempt to convert a phone jack to an electrical outlet; the high voltage involved demands a much higher standard of care.
Comparing Your Conversion Options
Choosing the right path depends on your wiring, budget, and comfort level with electrical work. Here is a breakdown of the methods.
| Conversion Method | Complexity | Safety Level | Permanence | Estimated Cost |
|---|---|---|---|---|
| Rewiring a 4-Wire Circuit | Moderate (DIY Possible) | Very High (If done correctly) | Permanent | ≈ US $ 150–800 (Cost of breaker and outlet) |
| Rewiring a 3-Wire Circuit | High (Electrician Recommended) | Very High (When done by a pro) | Permanent | ≈ US $ 2,000–8,000 for a moderate rewiring job; or up to US $ 8,000–15,000+ for larger or complex rewires. |
| Using a Step-Down Transformer | Very Low (Plug and play) | High (With a quality, UL-listed unit) | Not Permanent | play voltage converter)≈ US $ 140–180 for a typical 1500–3000 W transformer (some models run around US $ 137–$178) |
Frequently Asked Questions
Homeowners often have similar questions about this project. Here are some of the most common ones.
Can I just replace the 240V receptacle with a 120V one and use one of the hot wires?
No. Without changing the breaker in the panel, you would still be sending 240V down the line. A single-pole breaker is required to provide the correct 120V power and overcurrent protection.
What is the cost to have an electrician convert a 240V outlet to 120V?
If you have a 4-wire circuit, the job is very simple for an electrician and may only cost $100-$200. If a new wire must be run for an older 3-wire circuit, the cost could increase to $300-$800 or more, depending on the difficulty of the wire run.
Is this conversion against the electrical code?
Converting a 240V circuit to a 120V circuit is perfectly acceptable under the National Electrical Code (NEC), provided it is done correctly. The most important rule is that you must have a separate hot, neutral, and ground wire. Once converted, you can even expand on this new outlet; if you find you need more plug-in options, you might consider learning how to double your outlets from the newly installed box.
Conclusion: When in Doubt, Call a Professional
Converting a 240V outlet to 120V can be a fantastic way to make your home more functional, turning a useless plug into a valuable power source. For those with modern, 4-wire circuits, it can be a manageable DIY project that requires careful attention to detail.
However, the discovery of older, 3-wire cabling should be an immediate stop sign. The lack of a neutral wire makes a safe conversion impossible without new wiring. In this case, the expertise of a licensed electrician is not just a recommendation; it is essential for the safety of your home and family.