Connecting 10/3 to 10/2 Wire: A Comprehensive Guide
Electrical wiring projects can be daunting, especially when dealing with different types of wires like 10/3 and 10/2. Understanding how to properly connect these wires is crucial for both safety and functionality.
This guide will walk you through the process, explaining the differences between 10/3 and 10/2 wire, the necessary tools and materials, and the step-by-step procedure for making the connection. Additionally, we’ll cover important safety precautions and common issues you might encounter.
You'll Learn About
Understanding Wire Types

What is 10/3 Wire?
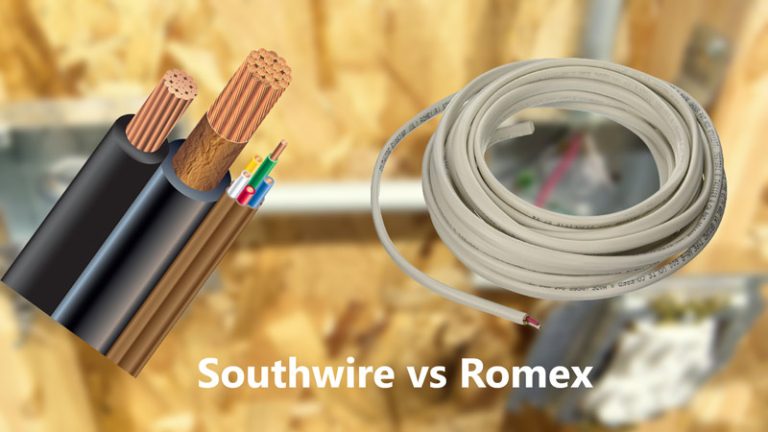
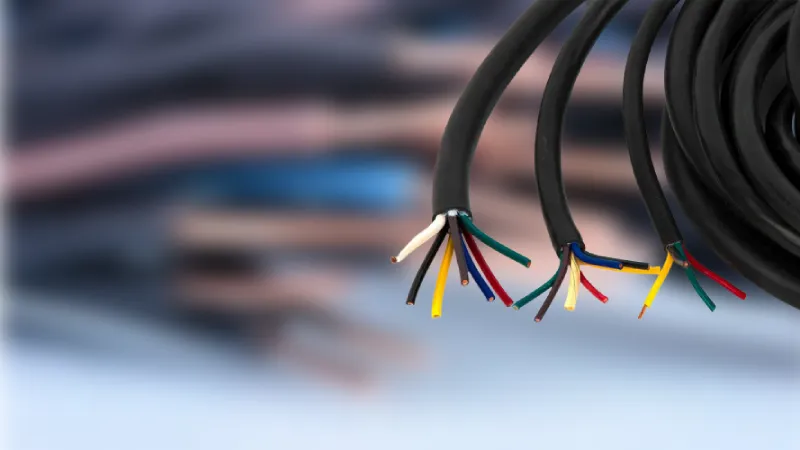
10/3 wire consists of three insulated conductors and a bare ground wire, all enclosed in a protective sheath. The three conductors are typically color-coded black, red, and white, representing two hot wires and one neutral wire, respectively. This type of wire is commonly used for 240-volt circuits, such as those for electric dryers, ovens, and other high-power appliances.
What is 10/2 Wire?
10/2 wire, on the other hand, consists of two insulated conductors and a bare ground wire, also enclosed in a protective sheath. The two conductors are usually black and white, representing one hot wire and one neutral wire. 10/2 wire is generally used for 120-volt circuits, which are common for most household outlets and lighting.
Key Differences
The primary difference between 10/3 and 10/2 wire is the number of conductors. 10/3 wire has three conductors plus a ground, while 10/2 wire has two conductors plus a ground. This difference dictates their specific uses and how they are connected.
Tools and Materials Needed
Essential Tools
- Wire Strippers: For removing insulation from the wires.
- Wire Cutters: To cut the wires to the desired length.
- Screwdrivers: Both flathead and Phillips for connecting wires to terminals.
- Voltage Tester: To ensure the circuit is not live before working on it.
- Electrical Tape: For insulating connections.
- Wire Nuts: For safely joining wires together.
- Cable Clamps: To secure the wires in place.
Materials
- 10/3 Wire: Depending on the length needed for your project.
- 10/2 Wire: Depending on the length needed for your project.
- Junction Box: To house the wire connections safely.
- Grounding Screws: For securing the ground wires.
Safety Precautions
General Safety Tips
- Turn Off Power: Always turn off the power at the breaker box before starting any electrical work.
- Use a Voltage Tester: Verify that the circuit is not live before touching any wires.
- Wear Safety Gear: Use insulated gloves and safety glasses to protect against electric shock and debris.
- Follow Local Codes: Ensure all work complies with local electrical codes and standards.
Electrical Safety
- Proper Insulation: Make sure all wire connections are properly insulated to prevent short circuits.
- Secure Connections: Ensure all wire nuts and terminal connections are tight and secure.
- Grounding: Properly ground all connections to prevent electrical hazards.
Step-by-Step Guide to Connecting 10/3 to 10/2 Wire
Connecting 10/3 wire to 10/2 wire is a common task in electrical projects when you need to extend or adapt wiring between circuits. Both 10/3 wire and 10/2 wire are commonly used in residential and commercial applications, where 10/3 is used for circuits requiring two hot wires (e.g., 240-volt circuits) and a neutral, and 10/2 is often used for 120-volt circuits with one hot wire and a neutral. The process involves several critical steps to ensure the wires are connected properly, safely, and in compliance with electrical codes. This guide will walk you through the steps needed to connect these two types of wires effectively.
Step 1: Prepare the Wires
Before making any connections, the first step is to prepare the wires for installation.
Cut to Length
Use wire cutters to cut both the 10/3 and 10/2 wires to the required lengths. It is important that the wires are cut to an appropriate size to reach your junction box and the desired connection points without excess slack. Measure carefully to avoid cutting too short, as this could lead to difficulty in making the connections or create the need for additional wire.
Strip the Insulation
Once the wires are cut, use wire strippers to remove approximately 3/4 inch of insulation from the ends of all conductors—this includes the black (hot), white (neutral), and bare (ground) wires. Properly stripping the insulation ensures that the metal conductors inside the wires are exposed and can make good electrical contact when twisted together. Be cautious not to nick or damage the wire itself while stripping, as this can result in weakened wiring or potential safety hazards.
Step 2: Set Up the Junction Box
A junction box is necessary for making safe and compliant connections. This box will house the wiring connections and protect them from physical damage and potential electrical hazards.
Install the Junction Box
First, mount the junction box in an accessible location where you plan to make the wire connections. Ensure the box is installed securely and is easily accessible for future maintenance or inspection. The box should be positioned according to local electrical code requirements, typically within reach but not obstructing other electrical components.
Insert Cable Clamps
To ensure that the wires are securely fastened and do not shift within the junction box, insert cable clamps into the junction box openings. These clamps will hold the 10/3 and 10/2 wires in place, preventing strain on the connections once they are made. Cable clamps also help prevent the wires from pulling out of the box, which could lead to loose or exposed connections that are unsafe.
Step 3: Connect the Wires
Now that your wires are prepared and the junction box is ready, it’s time to make the actual electrical connections.
Hot Wires
Start by connecting the hot wires. The 10/2 wire will have a black hot wire, and the 10/3 wire will have both a black and a red wire (for two hot wires). If you only need a single hot wire, connect the black wire from the 10/2 to the black wire from the 10/3. The red wire in the 10/3 can be capped with a wire nut if it’s not being used in the circuit, ensuring it doesn’t make contact with anything else and avoid short circuits.
Neutral Wires
Next, connect the neutral wires. The 10/2 wire has a white neutral wire, and the 10/3 wire also has a white neutral wire. Simply twist the white wires from both cables together and secure them with a wire nut. This creates a complete circuit path for the neutral current.
Ground Wires
For the ground wires, both the 10/2 and 10/3 cables will have a bare copper ground wire. Twist the two bare ground wires together, and then attach them to the grounding screw inside the junction box. This grounding connection helps ensure that any stray electrical current is safely routed to the ground, reducing the risk of electric shock or fire.
Step 4: Secure the Connections
Once the wires are connected, it’s important to ensure that the connections are secure and properly insulated to prevent any electrical hazards.
Twist and Nut
After twisting the wires together, use wire nuts to secure the connections. Make sure the wire nuts are twisted tightly and that there is no exposed wire sticking out from underneath. This ensures a safe, stable connection that won’t come loose over time. If needed, check the connections by gently tugging on each wire to make sure they are firmly in place.
Tape for Safety
For added safety, wrap electrical tape around each wire nut and the connected wires. This additional layer of insulation helps prevent accidental shorts or contact with other wires or conductive materials, further reducing the risk of electrical problems.
Step 5: Close the Junction Box
With the connections made, you’re now ready to close up the junction box.
Check Connections
Before securing the junction box cover, double-check all the connections. Ensure that each wire is tightly connected, and there is no exposed wire or loose connections. Inspect the wire nuts to ensure they are secure and that the wires are properly twisted together.
Close the Box
Once you’re satisfied with the connections, securely fasten the junction box cover. The cover helps protect the wiring from physical damage and prevents accidental contact with live wires. It also helps to keep the box organized and free of debris.
Step 6: Test the Circuit
Finally, after completing the connections and closing the junction box, it’s time to test the circuit to ensure everything works correctly.
Restore Power
Turn the power back on at the breaker panel to restore electricity to the circuit. Be sure to check that the breaker controlling the circuit is switched to the “on” position.
Test for Functionality
To confirm the connection is successful, use a voltage tester to check for proper power at the outlets or devices connected to the circuit. If the circuit is properly wired, you should see the expected voltage. Alternatively, you can plug in a device to test whether it operates correctly, verifying that the electrical current is flowing as intended.
By following these steps carefully, you can connect 10/3 wire to 10/2 wire safely and efficiently. Always follow electrical codes and standards for your area, and if you are unsure or uncomfortable working with electrical systems, it’s always a good idea to consult a licensed electrician for assistance.
Troubleshooting Common Issues
No Power
- Check Breaker: Ensure the breaker is not tripped and is providing power to the circuit.
- Inspect Connections: Double-check all wire connections in the junction box to ensure they are tight and secure.
Overheating Wires
- Check Load: Ensure the connected load does not exceed the wire’s capacity.
- Inspect Insulation: Make sure all connections are properly insulated to prevent short circuits.
Flickering or Intermittent Power
- Secure Connections: Recheck all wire nuts and terminal connections for tightness.
- Inspect Wire Condition: Ensure there are no damaged or frayed wires.
Comparison of 10/3 and 10/2 Wire Uses
| Wire Type | Number of Conductors | Common Uses | Voltage Rating | Typical Applications |
|---|---|---|---|---|
| 10/3 | 3 + ground | 240-volt circuits | 240V | Electric dryers, ovens, large appliances |
| 10/2 | 2 + ground | 120-volt circuits | 120V | Household outlets, lighting |
Conclusion
Connecting 10/3 to 10/2 wire is a task that requires careful planning, attention to detail, and strict adherence to safety protocols. By understanding the differences between these wire types, preparing adequately, and following a systematic approach, you can ensure a safe and functional electrical connection.
Always prioritize safety by turning off power before starting work, using appropriate tools, and following local electrical codes. Properly executed, this connection will provide reliable power for your household needs.
Connecting 10/3 to 10/2 wire requires careful attention to ensure proper grounding and safety. Always consult an electrician if you’re unsure. For more electrical tips, check out our guides on white Romex 12-2 and pigtail vs daisy chain outlets. If you’re tackling other projects, like running wire through a top plate, proper planning ensures safety.

