Composite Decking Shed Base: Guide to a Flawless, Rot-Proof Foundation
You’ve invested in beautiful, low-maintenance composite decking, and now you need a storage shed. The immediate question is a daunting one: can you combine the two? Can you place a heavy shed directly onto those pristine composite boards without causing a disaster?
The thought of pouring a separate, ugly concrete slab next to your stunning deck is disheartening. Yet, the fear of a sagging, damaged deck or a damp, moldy shed is very real. This is the core problem many homeowners face—the desire for a seamless, durable outdoor space clashing with the structural demands of a heavy storage unit.
This guide will solve that problem for you. We will walk you through the critical considerations, potential dangers, and the exact steps to safely and securely place a shed on your composite decking, creating a functional and aesthetically pleasing backyard solution.
You'll Learn About
Is Putting a Shed on Composite Decking a Good Idea?
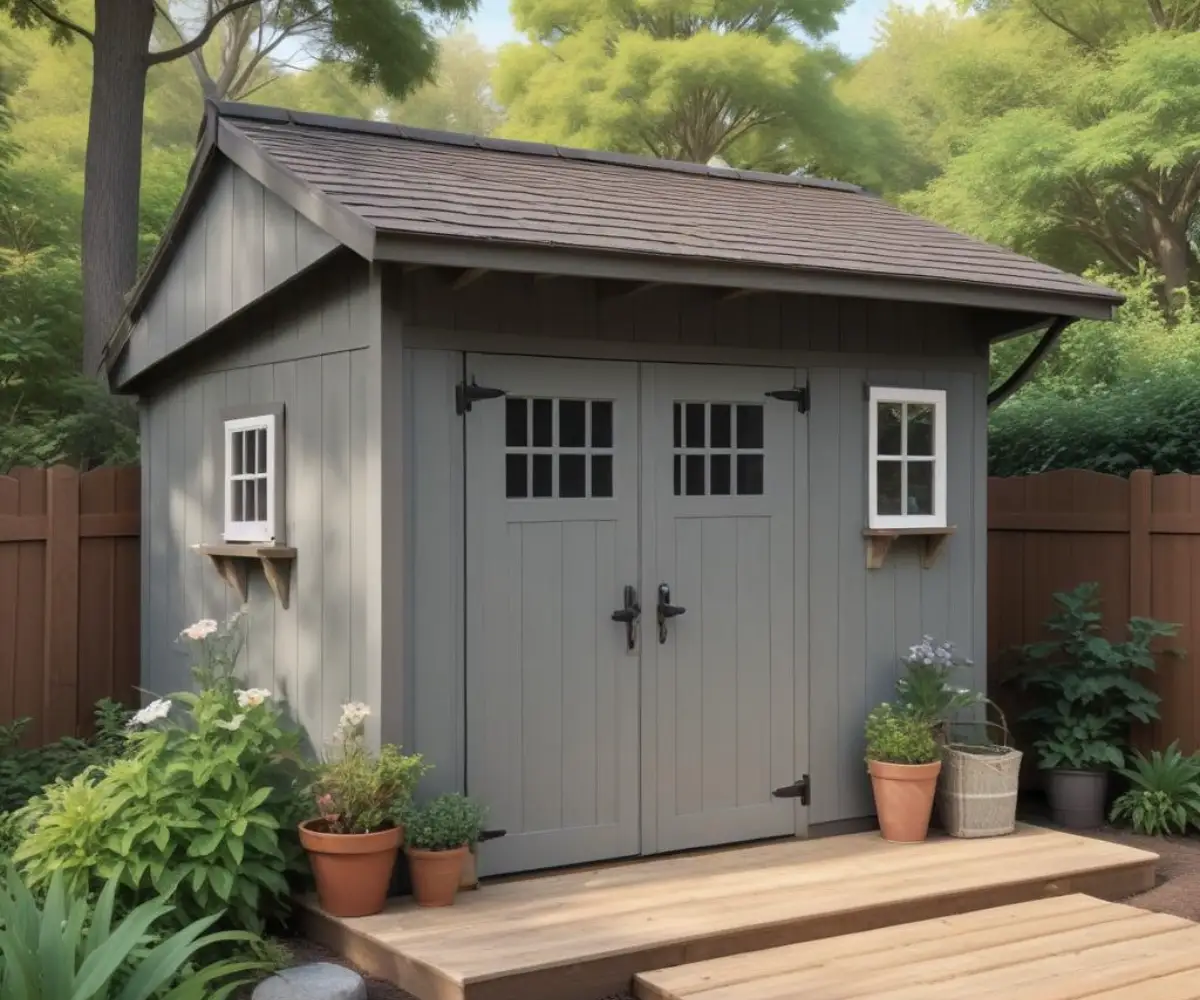
The short answer is yes, you absolutely can put a shed on composite decking. However, it requires careful planning and execution. Composite decking is prized for its resistance to rot, moisture, and insects, making it an appealing base for an outdoor structure. Unlike wood, it won’t splinter or decay when exposed to the elements.
But the success of this project hinges entirely on the strength of the structure *underneath* the decking boards. The decking itself is just the surface; the real strength lies in the substructure of joists, beams, and footings below. Simply placing a shed on top without considering the underlying support is a recipe for failure.
The Hidden Dangers: What You Must Know Before You Start
Before you even move a single tool, understanding the risks is paramount. Overlooking these critical factors can lead to expensive repairs for both your shed and your deck. Many standard decks are simply not built to handle the immense, concentrated weight of a shed.
Weight, Pressure, and Your Deck’s Breaking Point
The primary concern is weight. Even a small, empty shed can weigh several hundred pounds. Once you fill it with lawn equipment, tools, and storage, that weight can easily exceed a ton. This creates two types of loads: the dead load (the shed itself) and the live load (the contents and anyone inside).
Most decks are designed to support a distributed load of people and furniture, not the constant, heavy point loads from the four corners of a shed. Without proper support, this concentrated pressure can cause the decking boards to sag, warp, or even crack over time. The underlying joists can bow or fail, leading to a catastrophic collapse.
The Silent Killer: Moisture and Trapped Water
Another significant risk is trapped moisture. Placing a shed directly on the deck surface creates a pocket of space with poor air circulation. Even though composite decking is moisture-resistant, the area beneath the shed can become a breeding ground for mold and mildew if water gets trapped.
Proper ventilation is crucial to allow any moisture to evaporate. Without it, the underside of your shed’s flooring (which is often wood-based) can begin to rot. Ensuring there is a gap for air to circulate is one of the most important steps in this process. Good airflow also helps keep the deck structure dry and healthy, prolonging its life.
Step-by-Step Guide: Building a Rock-Solid Shed Base on Your Composite Deck
Now for the solution. Follow these steps meticulously to ensure your shed is both safe and stable, protecting your investment in your deck for years to come.
Step 1: Assess and Reinforce Your Deck’s Substructure
This is the most critical phase. You need to get under your deck and inspect its construction. Look at the joists—the parallel beams that the deck boards are attached to. For a standard deck, joists are often spaced 16 inches on center.
To support a shed, you must reinforce this structure directly under the shed’s footprint. This involves adding extra joists to reduce the spacing to 12 inches or even 8 inches on center. You should also add blocking—short pieces of lumber installed perpendicularly between the joists—to prevent them from twisting and to distribute the load more effectively. If your deck is elevated, you may need to add more support posts and footings directly beneath where the shed will sit.
Step 2: Create a Raised Foundation or “Sleeper” Base
Never place the shed’s floor frame directly onto the composite decking. You need to create a secondary, raised base that sits on top of the deck. This achieves two critical goals: it allows for essential airflow and helps distribute the weight across multiple joists rather than just on the decking boards.
Use pressure-treated 4×4 or 4×6 lumber to build a rectangular or square frame that matches the dimensions of your shed’s base. These are often called “sleepers” or “skids.” Lay these sleepers on the deck, ensuring they run perpendicular to the deck joists below. This orientation is key for effective weight transfer.
Step 3: Level and Secure the Base
Your deck likely has a slight slope away from the house for drainage. You must ensure your shed’s base is perfectly level. Use a long level and composite shims to make micro-adjustments until the sleeper frame is perfectly flat and stable. An unlevel base will put stress on the shed’s frame, causing doors and windows to stick.
Once level, secure the sleeper base to the deck. Drive long, corrosion-resistant structural screws through the sleepers, through the composite decking, and firmly into the joists below. This anchoring prevents the shed from shifting or moving, especially during high winds.
Step 4: Assemble Your Shed
With a strong, level, and secure base in place, you can now build your shed on top of it. Whether you are building from a kit or from scratch, follow the manufacturer’s instructions carefully. The solid foundation you’ve prepared will make the assembly process much smoother and ensure the final structure is sound.
When planning the shed’s location, consider its proximity to property lines and utilities. If you have outdoor fixtures, you might need to think about how to safely work around them. For instance, ensuring you have a proper gas pipe cover for outside aesthetics and safety is a detail that shouldn’t be overlooked in your overall backyard design.
Beyond the Base: Using Composite Materials for Your Entire Shed
Why stop at the base? Composite materials are now widely used for shed siding and even roofing. A shed built from composite materials offers the ultimate in low-maintenance outdoor storage. It will resist fading, cracking, and insect damage far better than a traditional wood shed.
While the upfront cost is higher, the long-term benefits are substantial. You will save countless hours and dollars on painting, staining, and repairs. The durability means a composite shed can often outlast its wooden counterparts by many years, making it a wise investment. The ease of cleaning these surfaces is also a major plus, a simple task compared to the effort it sometimes takes to clean a 2nd floor balcony or other hard-to-reach outdoor areas.
Composite vs. Traditional Shed Bases: A Head-to-Head Comparison
Is a composite deck foundation always the best choice? It depends on your situation. A traditional concrete slab or a gravel pad foundation has its own set of pros and cons.
| Foundation Type | Pros | Cons | Best For |
|---|---|---|---|
| Composite Deck Base | Aesthetically pleasing and seamless with existing deck; Excellent drainage and airflow (if raised); No excavation required. | Requires a very strong, often reinforced, deck substructure; Not suitable for very large or heavy sheds; Can be complex to execute correctly. | Small to medium-sized sheds on a property with an existing, well-built deck. |
| Concrete Slab | Extremely durable and permanent; Provides the most stable and level surface; Can support immense weight. | Expensive and labor-intensive to install; Permanent, cannot be easily moved; Poor drainage without proper grading. | Large workshops, garages, or sheds for storing very heavy equipment like tractors. |
| Gravel Pad | Excellent drainage; Most affordable option; Relatively easy DIY installation; Allows for some ground settling. | Less permanent than concrete; Can be prone to weeds if not properly prepared with landscape fabric; Shed floor is close to the ground. | Most standard-sized sheds on slightly sloped or uneven ground. |
Frequently Asked Questions (FAQs)
Can I use composite decking boards as the actual floor for my shed?
Yes, you can use composite decking for the shed floor itself, but it requires some adjustments. You would build a pressure-treated joist system for the shed’s base and then install the composite boards on top, just like a mini-deck. Be aware that you will need to ensure the joist spacing is narrow enough (typically 12 inches on center) to support the decking and prevent sagging under heavy items.
How much weight can my composite deck hold?
This is impossible to answer without a professional assessment. The capacity depends on the size and spacing of your joists, the span between support beams, and the quality of the footings. If you have any doubts, consult a structural engineer or a professional deck builder before proceeding. The safety and integrity of your structure depend on it.
Do I need a permit to put a shed on my deck?
This varies significantly by location. Many municipalities have rules regarding the size and placement of accessory structures like sheds. Adding a significant structure to your deck could also fall under local building codes. Always check with your local building department to understand the requirements and to avoid potential fines or being forced to remove the structure.
Building a shed also means thinking about year-round utility. Storing emergency supplies is a common use, and it’s wise to be prepared for anything, even an unexpected partial power outage during a storm. A well-built shed provides a secure place for generators, batteries, and other essential gear.