Why is my collet connector stuck and refusing to open? Here’s Your Ultimate Rescue Guide
There are few home repair moments more frustrating than the one you’re having right now. You’re under a sink, in a tight space, trying to disconnect a simple faucet hose, but the collet connector is stuck. That small piece of plastic or brass, designed for quick connections, has become an immovable object, bringing your entire project to a screeching halt.
You’ve pushed, pulled, and wiggled, but it refuses to budge. This guide is here to tell you that you’re not alone and, more importantly, to provide a clear path to victory over that stubborn connector. We’ll break down why this happens and give you a full arsenal of techniques to get it free without damaging your plumbing.
You'll Learn About
Why Do Collet Connectors Get Stuck in the First Place?
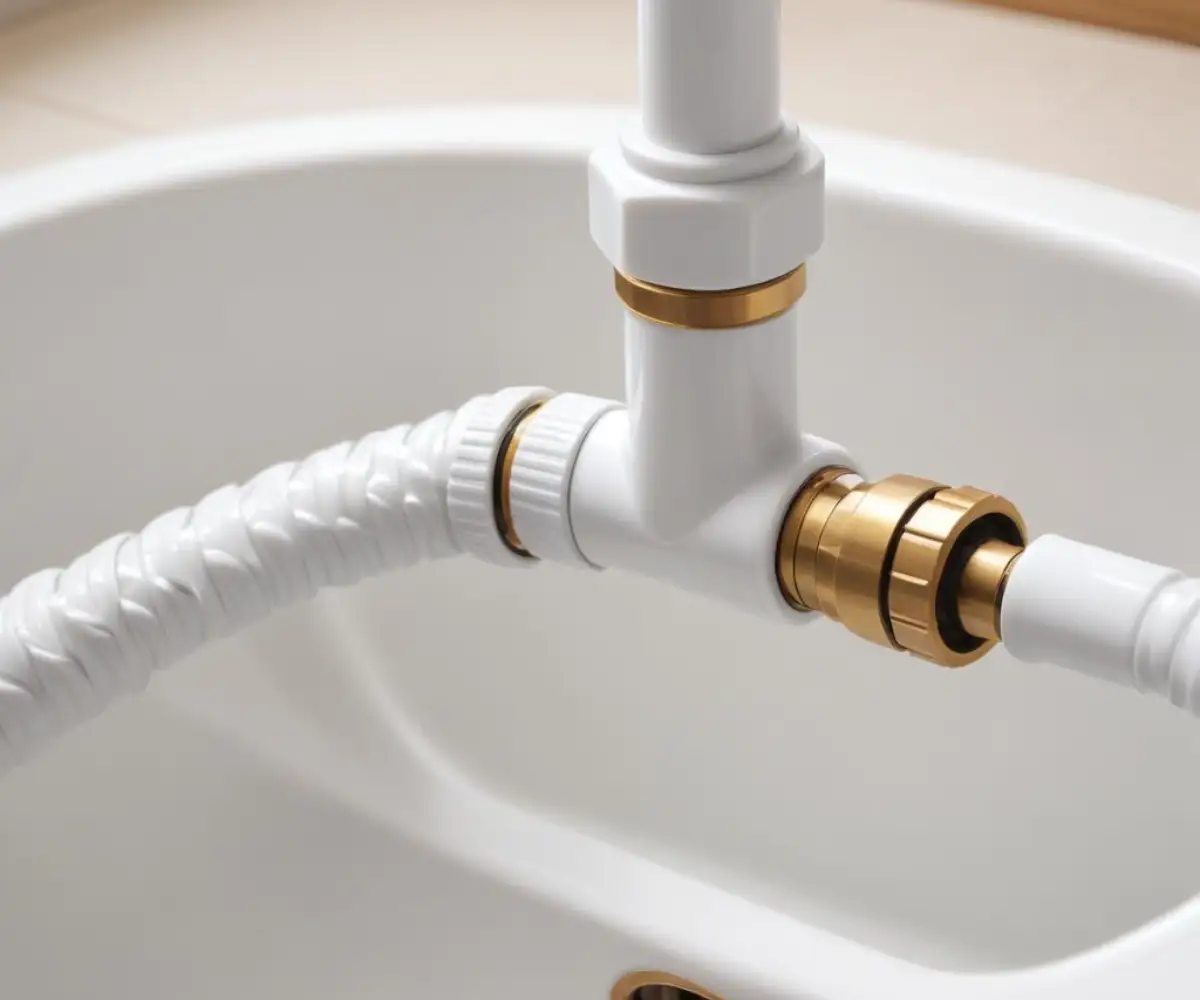
Understanding the root cause of a stuck collet connector is the first step toward freeing it. These fittings, often called “push-to-connect” or “quick-connect,” rely on a simple mechanism: a collet with small metal teeth grips the pipe, and a rubber O-ring creates a watertight seal. To release it, you push the collet in, which retracts the teeth and allows the pipe to slide out. When this simple action fails, it’s usually due to one of these culprits.
The Number One Cause: Mineral Buildup
If you live in an area with hard water, this is almost certainly your problem. Over years of use, minerals like calcium and magnesium precipitate out of the water and form a rock-hard scale. This limescale effectively glues the moving parts of the collet together, making it impossible to depress the release ring.
Debris and Contamination
Small particles of grit, sand, or pipe debris can easily find their way into the collet mechanism during installation or from the water supply itself. These tiny obstructions can jam the delicate teeth of the collet, preventing them from retracting when you push on the release collar. This is especially common in older homes with galvanized pipes.
Physical Damage or Warping
Plastic collets, while durable, can become brittle over time, especially when exposed to temperature fluctuations. The release collar can deform or crack, meaning the pressure you apply isn’t being distributed evenly to release the teeth. Likewise, if the pipe was inserted forcefully at an angle, it could have damaged the internal O-ring or the collet itself, causing a jam.
First Things First: Preparation is Key
Before you wage war on the connector, a few preparatory steps will make the job safer and increase your chances of success. Rushing in with brute force is a recipe for a broken fitting and a much bigger plumbing problem.
Step 1: Shut Off the Water Supply
This is non-negotiable. Locate the shut-off valve for the specific fixture you’re working on, which is usually directly under the sink. Turn it clockwise until it’s firmly closed. If there isn’t a dedicated valve, you’ll need to shut off the main water supply to your house.
Step 2: Relieve Water Pressure
After closing the valve, open the faucet to drain any remaining water and relieve all pressure in the line. If you try to disconnect the collet with the line pressurized, it will be nearly impossible to remove and will spray water everywhere once it finally gives way.
Step 3: Clean the Area
Wipe down the collet connector and the surrounding pipe with a rag. Removing any grease, grime, or surface-level mineral deposits will give you a better grip and a clearer view of what you’re working with. Sometimes, what seems like a major jam is just a sticky situation that a good cleaning can help resolve.
How to Free a Stuck Collet Connector: From Gentle Nudges to Last Resorts
We’ll start with the least aggressive methods and work our way up. Always begin with the simplest solution before escalating to more forceful techniques. Remember, the goal is to free the connector without breaking it.
Method 1: The “Push and Wiggle” Technique
Before you reach for any tools, let’s perfect the basic removal technique. The key to releasing a collet is applying inward pressure on the collar while simultaneously pulling the pipe outward. It’s a two-part motion that must happen at the same time.
Firmly push the pipe *into* the fitting first to release any tension on the gripping teeth. Then, using your thumb and index finger, apply firm, even pressure on the release collar. While holding that pressure, wiggle the pipe slightly as you pull it out. This slight twisting or wiggling motion can help break the seal of mineral buildup.
Method 2: Introduce a Lubricant or Descaler
If the basic technique fails, it’s time to address the most likely culprit: mineral buildup. A penetrating lubricant or a descaling agent can work wonders here. Spray a generous amount of a product like WD-40 or a specialized calcium and lime remover directly onto the collet ring.
Let the product sit for at least 15-20 minutes to penetrate the tiny gaps and start dissolving the mineral deposits. After letting it soak, return to Method 1 and try the push, wiggle, and pull technique again. You may need to reapply the spray and wait longer for particularly stubborn cases.
Method 3: The Power of a Disconnect Tool
For just a few dollars, you can get a simple tool that makes this job infinitely easier. A collet disconnect tool (often called a disconnect clip or release tool) is a U-shaped piece of plastic designed to slide over the pipe and apply perfectly even pressure to the entire release collar at once. This is far more effective than trying to apply even pressure with just your fingers.
Slide the tool onto the pipe, push it firmly against the collet’s release ring, and then pull the tubing out. It provides the leverage and uniform force that is often needed to pop a stuck connector free. Tackling home repairs often comes down to having the right tool for the job, much like knowing the best brush for painting cedar shakes can make an exterior project simpler.
Method 4: Gentle Heat Application (With Extreme Caution)
Heat can cause the plastic or metal of the fitting to expand slightly, which can be just enough to break the bond of corrosion or mineral scale. This method should be used with extreme caution, especially with plastic fittings and pipes. Overheating can easily melt or damage the components.
Use a hairdryer or a heat gun on a low setting. Gently warm the outside of the collet fitting for about 30-60 seconds. The goal is to make it warm to the touch, not hot. Immediately after heating, try again with the disconnect tool or your fingers. The slight expansion might be all you need.
Method 5: The Last Resort – Careful Use of Pliers
This is the final option before moving to destructive removal because the risk of damaging the connector is high. If you must use pliers, use two pairs. One pair of channel-lock pliers should be used to hold the body of the fitting steady. Use a second pair of pliers to grip the release collar and push it in.
Do not squeeze too hard, as you can easily crack a plastic collar. The goal is to use the pliers to apply steady, even pressure on the collar while you pull the hose with your other hand. This provides more force than your fingers but also carries more risk.
Summary of Removal Techniques
Navigating DIY projects, whether it’s a simple plumbing fix or figuring out how hard is it to replace stair railings, requires a clear plan. Here’s a quick reference for tackling your stuck collet connector.
| Method | Required Tools | Difficulty | Primary Use Case |
|---|---|---|---|
| Push and Wiggle | Hands | Easy | Slightly stuck connectors with minor debris. |
| Lubricant/Descaler | Penetrating Oil, Descaler, Rag | Easy | Connectors stuck due to mineral buildup or corrosion. |
| Disconnect Tool | Collet Disconnect Tool | Easy | Most common and effective method for stubborn fittings. |
| Gentle Heat | Hairdryer or Heat Gun | Medium | Seized connectors where thermal expansion might help. High caution required. |
| Pliers (Last Resort) | Two pairs of Pliers | Hard | Extremely stuck fittings where the risk of damage is acceptable. |
When the Connector Breaks: The Point of No Return
Sometimes, despite your best efforts, the collet connector breaks during removal. The plastic collar might snap, or the body of the fitting could crack. If this happens, your repair job has now become a replacement job.
At this stage, the only option is destructive removal. You will need to carefully cut the pipe as close to the fitting as possible using a tubing cutter. You will then need to purchase a new fitting and potentially a small section of pipe to complete your repair. While frustrating, it’s a manageable setback.
Preventing a Stuck Collet Connector in the Future
Once you’ve successfully removed the stuck connector and completed your project, a few simple steps can prevent this headache from happening again.
Proper Installation Technique
When installing a new collet connector, ensure the pipe end is clean and cut squarely. Use a deburring tool to smooth any rough edges, which can otherwise damage the O-ring and lead to leaks or jams. Push the pipe in with a firm, steady motion until you feel it seat fully.
Use Silicone Lubricant
Applying a small amount of plumber’s silicone grease to the end of the pipe and the O-ring inside the new fitting can make a world of difference. It helps create a better seal and prevents minerals from bonding the components together, making future removal much smoother.
Consider a Water Softener
If you find that mineral buildup is a constant issue throughout your home, the best long-term solution is to install a whole-house water softener. This will not only protect your plumbing fittings but also extend the life of your appliances, from your dishwasher to your water heater. It’s a significant home upgrade that solves the problem at its source.
Dealing with a stuck collet connector can be a test of patience, but with the right knowledge and a methodical approach, it’s a problem you can solve. By starting with gentle methods and only escalating when necessary, you can free the fitting and get your plumbing project back on track. Sometimes even the simplest tasks around the house, like figuring out how to signal outgoing mail on wall mounted mailbox, require a little ingenuity.