Caulk Sealing Secrets: Get a Flawless, Pro-Level Finish Now
You see it everywhere. The cracked, peeling, or moldy line of caulk around your bathtub. The frustrating draft coming from a window you thought was sealed shut. These seemingly small failures are signs of a bigger problem: improper caulk sealing.
A bad caulking job isn’t just ugly; it’s a gateway for water damage, mold growth, and energy loss. Many homeowners try to fix it, only to end up with a sticky, uneven mess that fails even faster than the original.
This guide cuts through the confusion. We’ll show you the professional techniques, the right materials, and the critical steps that make the difference between a temporary patch and a durable, waterproof, and invisible seal. Stop the cycle of constant repairs and learn how to do it right the first time.
You'll Learn About
Why Your Caulk Fails: The 3 Hidden Culprits
Before you can achieve a perfect seal, you have to understand why the old one failed. It almost always comes down to one of three critical errors that even experienced DIYers make. Ignoring these is like building a house on a foundation of sand.
The number one reason for failure is applying new caulk directly over old, failing material. This is a cardinal sin of sealing. Old caulk is often contaminated with oils, soap scum, or mold, and its surface is too unstable for a new bead to adhere to properly. It’s a guaranteed failure.
Secondly, poor surface preparation can doom your project from the start. Applying caulk to a dusty, damp, or dirty surface prevents a strong bond. The seal might look good for a week, but it will quickly pull away, creating gaps for water and air to penetrate.
Choosing the Wrong Weapon: Caulk Type Matters
Using the wrong type of caulk for the job is another common mistake. You wouldn’t use interior paint on the outside of your house, and the same logic applies here. An acrylic latex caulk will quickly dissolve in a high-moisture area like a shower, while a pure silicone caulk might be too difficult to paint along your baseboards.
Each formulation is designed for specific conditions, materials, and flexibility requirements. Understanding the difference is not just helpful; it’s essential for a long-lasting, professional-grade seal. Don’t let the wrong choice undermine all your hard work.
Your Guide to Caulk Types: Choosing the Right Sealant
Navigating the caulk aisle can be overwhelming, with dozens of tubes all promising the best results. The truth is, the “best” caulk depends entirely on your project. Understanding the fundamental differences between the main types will empower you to choose with confidence.
The three most common types you’ll encounter are Acrylic Latex, 100% Silicone, and Hybrid formulas. Each has a distinct set of properties, ideal use cases, and application nuances. Making the right selection is the first and most important step in your caulk sealing project.
The Ultimate Caulk Comparison Table
To simplify your decision, we’ve broken down the key characteristics of each major caulk type. Use this table as a quick reference guide before you head to the hardware store to ensure you buy the perfect product for your specific needs, whether it’s for a bathroom, kitchen, or exterior window.
| Feature | Acrylic Latex Caulk | 100% Silicone Caulk | Hybrid (Polyurethane/Advanced Polymer) |
|---|---|---|---|
| Best For | Interior trim, baseboards, drywall repairs, painting projects. | Kitchens, bathrooms, showers, plumbing fixtures, exterior windows. | Exterior siding, windows, doors, concrete, gutters, high-movement joints. |
| Paintable? | Yes, very easily. Often labeled as “paintable”. | No, paint will not adhere to pure silicone. | Yes, typically paintable after curing. Check the label. |
| Water Resistance | Low. Not suitable for areas with prolonged water exposure. | Excellent. 100% waterproof and ideal for wet environments. | Excellent. Highly waterproof and weatherproof. |
| Flexibility | Low. Can crack in joints with significant movement. | High. Remains permanently flexible to absorb movement. | Very High. Offers superior flexibility and crack resistance. |
| Cleanup | Easy. Cleans up with just water and a rag. | Difficult. Requires mineral spirits or other solvents. | Difficult. Requires mineral spirits or a specific solvent. |
| Odor | Low to none. | Strong vinegar-like smell during cure (acetic cure). | Low to moderate, typically less harsh than silicone. |
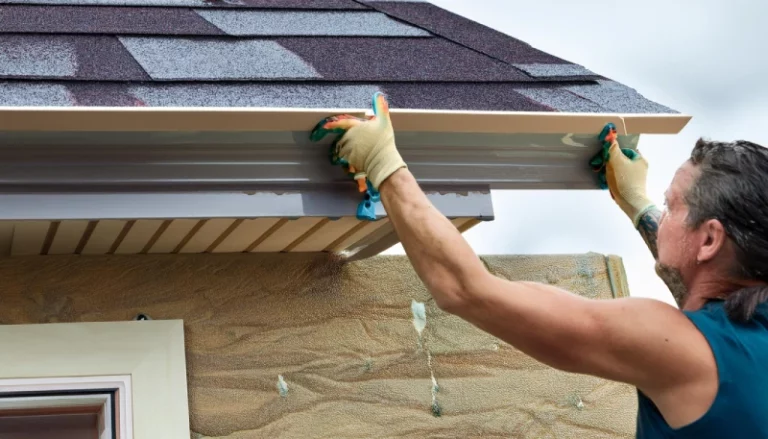
The Pro Toolkit: Gear Up for a Perfect Seal
Having the right tools is non-negotiable for a professional-looking caulk line. Fumbling with the wrong gear will lead to frustration and a messy result. Before you even think about starting, gather these essential items to make the job smoother, cleaner, and more effective.
At a minimum, you will need a quality caulk gun, a utility knife, and painter’s tape. We recommend a dripless caulk gun to avoid messy run-on after you release the trigger. A sharp utility knife is crucial for opening the tube correctly, and painter’s tape is the secret weapon for impossibly straight lines.
For removing old caulk, a dedicated caulk removal tool and a plastic scraper are invaluable. For deeper gaps, especially in showers or around windows, using a backer rod for caulking is a pro secret that saves caulk and creates a more durable joint.
The 6 Steps to Flawless Caulk Sealing
Now that you’ve chosen the right caulk and assembled your tools, it’s time to get to work. This six-step process breaks down the project into manageable stages. Follow them precisely, and you will achieve a seal that is not only beautiful but also incredibly durable.
Do not rush these steps. Patience and attention to detail, especially in the preparation stages, are what separate an amateur patch from a professional, long-lasting repair. Each step builds upon the last to ensure a perfect final result.
Step 1: The Great Removal – Erase the Old Caulk
The most critical step is the complete removal of the old caulk. Use your caulk removal tool to break the seal and a utility knife to carefully cut along the edges. Be cautious not to scratch the surfaces of your tub, tile, or countertop.
Once the bulk of it is gone, use a plastic razor blade or scraper to remove any remaining residue. There can be zero old caulk left. This ensures the new sealant makes a direct, powerful bond with the clean substrate material for maximum adhesion.
Step 2: Deep Clean – Prepare for Adhesion
With the old caulk gone, the next step is to meticulously clean the joint. Vacuum up any dust and debris. Then, scrub the area with a stiff brush and a suitable cleaner. For silicone caulk removal residue, you’ll need mineral spirits. For old latex caulk, isopropyl alcohol works well.
After cleaning, the area must be bone dry. Any lingering moisture will prevent the new caulk from curing properly and will compromise the seal. Use a hairdryer or let it air dry completely for several hours or even overnight if necessary.
Step 3: Prepare the Tube – The Perfect Cut
How you prepare the caulk tube is just as important as the application itself. First, if you’re having trouble, learn how to open a stubborn caulk tube without damaging it. Next, use your utility knife to cut the tip of the nozzle at a 45-degree angle.
The size of the opening should be slightly smaller than the gap you intend to fill. A common mistake is to cut the opening too large, which results in a messy, oversized bead. If you do accidentally cut the caulk tube too big, it’s better to start with a new nozzle or tube than to fight with it.
Step 4: The Application – Laying the Perfect Bead
Insert the tube into the caulk gun. Puncture the inner seal with a stiff wire or the tool built into the gun. For the straightest lines, apply painter’s tape along both sides of the joint, leaving a consistent gap for the caulk line.
Apply steady, consistent pressure to the trigger while moving the gun at a consistent speed along the joint. Push the caulk into the joint rather than pulling it. This forces the sealant into the gap, creating a stronger, more complete seal. Work in manageable sections of 2-3 feet at a time.
Step 5: Tooling – The Secret to a Smooth Finish
Tooling is the process of smoothing the bead of caulk immediately after application. This step is not optional; it ensures the caulk makes full contact with both surfaces of the joint and creates a clean, concave profile that looks professional.
You can use a dedicated caulk tooling tool, an ice cube, or your finger dipped in a bit of water (for latex) or denatured alcohol (for silicone) to prevent sticking. Apply light, consistent pressure and drag the tool along the entire length of the bead in one smooth motion. Immediately remove the painter’s tape by pulling it away from the joint at a 45-degree angle.
Step 6: Cure and Clean – The Final Wait
The final step is the easiest and perhaps the hardest: leave it alone. Caulk needs time to cure and develop its final strength and water-resistant properties. The cure time will be listed on the tube and can range from 30 minutes to be “water-ready” to 7-10 days for a full cure.
Respect this curing time. Do not touch, poke, or expose the caulk to water or cleaning chemicals before it is ready. Wiping up any uncured caulk smudges should be done immediately with the appropriate solvent (water for latex, mineral spirits for silicone).
Pro Tips for an Invisible Repair
Want to take your caulk sealing skills from good to great? These professional tips and tricks will help you achieve a finish so clean it looks like it was done by a machine. They address the small details that make a huge difference in the final appearance and longevity of your work.
The first tip is to always have a roll of paper towels handy. Caulking is inherently messy, and being able to quickly wipe the nozzle or your tooling finger can prevent stray smudges that are difficult to remove later. A clean workspace is a successful workspace.
Another great trick is to warm the caulk tube slightly in a bucket of warm water before use, especially on a cold day. This makes the caulk less viscous and easier to gun, resulting in a smoother, more controllable bead. This small effort pays big dividends in application quality.
Common Caulking Mistakes and How to Avoid Them
Even with the right instructions, it’s easy to fall into common traps. Being aware of these potential pitfalls ahead of time can save you from a frustrating rework. Here are the most frequent mistakes that DIYers make when tackling a caulk sealing project.
The most common error is applying too much caulk. It’s tempting to fill a gap with a huge bead, but this only makes tooling more difficult and creates a thick, unsightly line. A bead that is properly sized to the gap is stronger and looks infinitely better. If the gap is too large, use a backer rod first.
Another mistake is not tooling immediately. Caulk begins to “skin over” very quickly, sometimes in as little as two minutes. Once this skin forms, tooling will drag and tear it, creating a terrible texture. Always tool the bead as soon as you lay it down.
The Final Seal: Your Path to Perfection
Caulk sealing is a skill that blends preparation, technique, and the right materials. By understanding the causes of failure, choosing the correct sealant, and following a methodical, step-by-step process, you can transform this often-frustrating task into a satisfying one.
Don’t settle for cracked, leaky, or ugly caulk lines any longer. You now have the professional knowledge to remove the old material correctly, prepare the surface perfectly, and apply a new bead that is smooth, durable, and waterproof. Your home will not only look better but will also be better protected from the elements.