Clematis on Your House: The Ultimate Guide to Avoiding Disaster
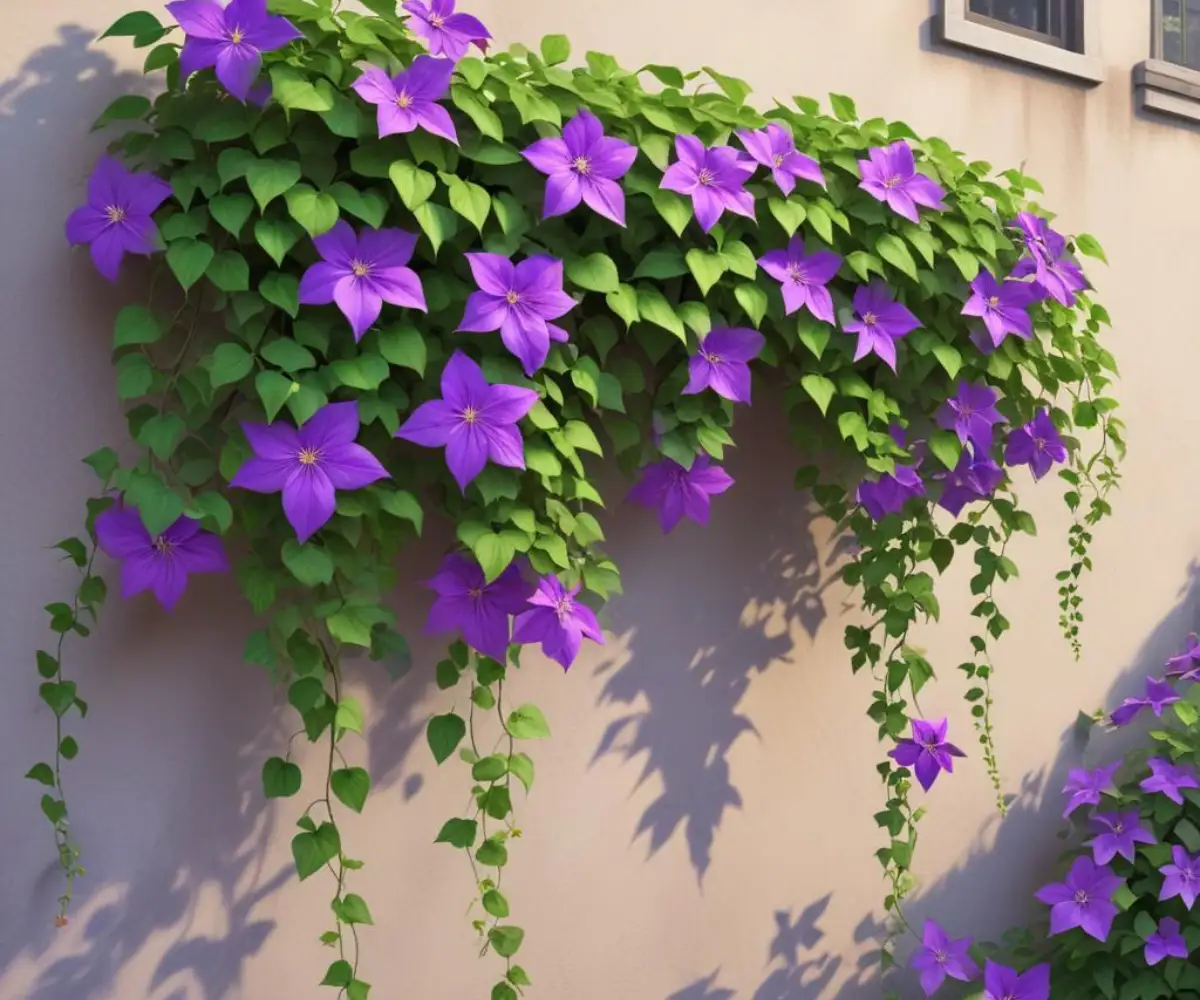
The vision is captivating: a cascade of vibrant, star-shaped flowers blanketing the side of your home, turning a plain wall into a living masterpiece. Growing clematis on a house is a timeless gardening dream. But for many, this dream is clouded by a significant fear—the worry that these beautiful vines will wreak havoc on their home’s exterior.
This hesitation is the number one problem homeowners face. Will the roots crack the foundation? Will the stems tear off the siding? These concerns often lead to abandoning the idea altogether, leaving walls bare and gardening aspirations unfulfilled. The good news is that with the right knowledge and techniques, you can achieve this stunning look without compromising your home’s integrity.
You'll Learn About
Deconstructing the Myths: What Really Happens When Clematis Meets a House?
Before you can confidently plant a clematis against your house, it’s crucial to separate fact from fiction. Many fears stem from confusing clematis with more aggressive, damaging vines like English ivy. Understanding how clematis actually grows is the key to dispelling these myths and preventing potential problems.
Let’s address the most common concerns head-on and reveal the simple truths that make this project not only possible, but perfectly safe when done correctly. This knowledge forms the foundation of a successful and worry-free vertical garden that will enhance your home’s beauty for years to come.
Myth 1: Clematis Roots Will Destroy Your Foundation
The most persistent fear is that clematis roots will behave like tree roots, aggressively seeking out and widening cracks in your home’s foundation. This is fundamentally a misunderstanding of the plant. Clematis have fibrous, not thick and woody, root systems.
These roots lack the power to bust through solid concrete or pry apart sound mortar. The real, albeit minimal, risk comes from pre-existing, significant cracks. The solution is simple and preventative: plant your clematis at least 18-24 inches away from the foundation wall to give the roots ample space in properly prepared soil, rather than forcing them to search for purchase against the concrete.
Myth 2: The Vine Will Rip Siding Off Your Walls
Here lies the most critical distinction: vines like Boston Ivy and English Ivy climb using adhesive pads or invasive aerial roots that cling directly to surfaces. When removed, they can take paint, render, and pieces of mortar with them. Clematis are entirely different; they are “twiners.”
A clematis climbs by wrapping its delicate leaf stems around thin supports, like wires, netting, or the rungs of a trellis. It has no physical mechanism to “stick” to your wall. Therefore, the vine itself poses no direct threat to your siding, brick, or stucco. The danger comes from an improperly installed support structure or allowing the vine’s weight to become too much for a flimsy trellis, not from the plant’s natural growth habit.
Your Blueprint for Success: Choosing the Right Clematis and Location
Success begins long before you dig a hole. Selecting the right variety of clematis for your specific location is paramount. With hundreds of cultivars available, choosing one that matches your climate, wall space, and maintenance preferences is the first step toward a thriving vertical display.
Equally important is understanding the unique microclimate created by a house wall. Factors like sun exposure, reflected heat, and rain shadow effects must be considered to give your plant the best possible start. Thoughtful planning at this stage prevents the majority of future problems.
Matching the Vine to Your Vision and Wall
Not all clematis are created equal when it comes to adorning a house. A vigorous variety like a Clematis montana can quickly overwhelm a smaller space, while a more compact variety might be perfect for framing a doorway. Consider the mature size of the plant—some reach 8 feet, others can climb to 30 feet.
Pay close attention to the pruning group, as this dictates your maintenance schedule. Group 2 and 3 clematis, which bloom on new wood, are often easier for beginners as they allow for more forgiving pruning. Researching specific cultivars will ensure you get the flower color, size, and growth habit you desire.
The Golden Rule for Houses: “Feet in the Shade, Head in the Sun”
This classic clematis mantra is even more critical when planting against a house. The base of a house wall can become intensely hot and dry, baking the sensitive root system. You must ensure the root zone stays cool and moist.
You can achieve this by planting low-growing perennials or annuals at the base to provide living shade. Alternatively, apply a thick 2-3 inch layer of mulch, or even strategically place a decorative stone or paver to shield the soil from direct sun. The wall itself will provide the sun the top of the plant craves, but protecting its “feet” is non-negotiable for long-term health.
The Support System: Your Home’s Most Important Protection
This is where planning pays off the most. Since a clematis cannot cling to a wall on its own, you must provide a support structure. The type of support and, more importantly, how you install it, is the single most critical factor in protecting your home from any potential issues.
Letting a dense vine grow directly against a wall traps moisture, invites pests, and can hinder maintenance. The professional solution is to create a small but crucial air gap between the support system and the house wall, ensuring proper ventilation and safeguarding your exterior surfaces.
Creating the Essential Air Gap
Regardless of your home’s exterior, the goal is to mount your trellis or wire system so it stands off from the wall by at least 1-3 inches. This promotes air circulation, which dramatically reduces the risk of moisture buildup, mildew, or rot on your siding. It also gives the clematis leaf stems room to twine completely around the supports, creating a stronger hold.
This air gap makes wall maintenance, like painting or cleaning, possible without having to completely remove the mature vine. It is the defining feature of a professional, damage-free installation and a detail that should never be overlooked.
Choosing the Right Support for Your Siding
The material of your house dictates the best installation method. Each surface presents its own challenges and requires a specific approach to ensure a secure and safe mounting.
- For Brick or Masonry: The best practice is to drill into the mortar joints, not the bricks themselves. Use masonry anchors and “vine eyes”—specialized screws with a hole for threading wire—to create a wire trellis. This method is strong, minimally invasive, and easy to repair if needed.
- For Wood Siding: You can mount a wooden trellis directly, but it’s far better to attach it to horizontal wooden battens first. These battens are then screwed to the wall, creating the necessary air gap behind the trellis itself.
- For Vinyl Siding: Never drill directly into the face of vinyl siding. This can cause cracking and void warranties. The proper method involves using specialized vinyl siding hooks that clip into the seams between panels, or by installing a mounting block. When dealing with complex areas, understanding how to properly manage a 45-degree vinyl siding corner can inform how to best place supports for a seamless look.
| Clematis Variety | Mature Height | Flower Color | Pruning Group | Ideal For |
|---|---|---|---|---|
| ‘Jackmanii’ | 10-12 feet | Deep Purple | 3 (Hard Prune) | Sunny walls, classic look |
| ‘Nelly Moser’ | 8-10 feet | Pink with Lilac Stripe | 2 (Light Prune) | North or East-facing walls (color fades in sun) |
| ‘Sweet Autumn’ | 20-30 feet | Small, White, Fragrant | 3 (Hard Prune) | Covering large, expansive walls quickly |
| ‘Rebecca’ | 6-8 feet | Vibrant Magenta Red | 2 (Light Prune) | Smaller spaces, framing doorways, containers |
Step-by-Step Planting and Training for a Flawless Display
With the planning complete, it’s time for the most rewarding part: planting and training your clematis. Proper planting technique is vital for establishing a robust root system that will support vigorous growth for decades. The initial training you provide in the first couple of years will set the stage for a well-behaved and beautifully structured vine.
Follow these steps carefully to avoid common pitfalls and give your clematis the perfect start. Patience during this establishment phase will be rewarded with a healthier plant and more abundant blooms in the future.
The Perfect Planting Hole
Dig a hole that is at least 18 inches deep and wide, located about 18-24 inches away from your home’s foundation. Discard the excavated soil if it is poor quality (heavy clay or very sandy) and replace it with a 50/50 mix of high-quality compost and topsoil. Amending the soil provides the rich, well-draining environment clematis needs to thrive.
The Secret to a Resilient Plant
When you place the clematis plant in the hole, position it so that the crown—the point where the stems emerge from the root ball—is 3 to 5 inches deeper than it was in the nursery pot. Backfill the hole, gently firming the soil around the plant. This deep planting encourages the development of multiple underground stems, making the plant more resilient and helping it recover from damage or disease like clematis wilt.
Gentle Guidance: Training in the First Two Years
After planting, angle the young, flexible stems toward the base of your support structure. As new shoots emerge, don’t let them flail in the wind. Gently guide them onto the trellis or wires, securing them loosely with soft plant ties or twine.
The goal in the first year is to encourage strong root growth and establish a basic vertical framework. In the second year, begin training stems horizontally as well as vertically to encourage fuller, more even coverage of the support structure. This early guidance prevents a tangled mess later on.
Long-Term Care for a Healthy House-Climbing Clematis
Once established, clematis are remarkably durable plants. However, a clematis growing against a house has specific needs that differ from one growing on a freestanding structure. Consistent care, particularly regarding water, nutrients, and pruning, will ensure your vine remains a beautiful feature rather than a neglected problem.
Proactive monitoring for pests and diseases is also crucial. The reduced airflow against a wall can sometimes create an environment where issues can take hold if not addressed promptly. A well-maintained plant is always the most pest and disease-resistant.
Watering and Feeding Against a “Rain Shadow”
The eaves of a house create a “rain shadow,” meaning the soil at the base of the wall receives significantly less rainfall than the rest of the garden. You must provide consistent, deep watering, especially during dry spells. Check the soil regularly and water thoroughly when the top two inches are dry.
Feed your clematis with a balanced, low-nitrogen fertilizer (like a 5-10-10 formula) in the spring as new growth begins. An additional feeding after the first wave of flowering can encourage a second flush of blooms on repeat-flowering varieties. Avoid high-nitrogen fertilizers, which promote leafy growth at the expense of flowers.
Pruning for Blooms and Wall Health
Strategic pruning is not just about getting more flowers; it’s also about maintaining the health of both the plant and your house wall. Regular pruning thins out the vine, which improves air circulation and prevents a dense, matted growth that can trap moisture against your siding.
Follow the guidelines for your clematis’s specific pruning group. For all groups, always remove any dead, damaged, or weak stems to keep the plant healthy and tidy. A well-pruned clematis is an open, airy clematis that poses no threat to the surface behind it.
Keeping an Eye on Pests and Disease
The protected environment against a wall can occasionally lead to issues with pests like aphids or fungal diseases like powdery mildew. Good air circulation from proper support installation and pruning is the best defense. If you spot problems, treat them early with insecticidal soap for pests or a horticultural fungicide for mildew.
Sometimes, unexplained issues in the home can be attributed to outdoor factors. For example, if you ever notice a persistent, unpleasant odor, it is worth investigating all possible sources, as even a seemingly unrelated charcoal smell in the house could have an unusual origin that needs to be addressed for peace of mind.
Beyond the Basics: Creative Ways to Use Clematis on Your Home
Once you’ve mastered the fundamentals of safely growing clematis on a house, you can explore more creative applications. A single vine on a large wall is beautiful, but clematis also offers opportunities to highlight architectural features and create stunning plant combinations, turning your home’s exterior into a dynamic, multi-layered garden.
These ideas can elevate your design from a simple planting to an integrated part of your home’s landscape. The versatility of clematis allows for endless creativity, making it one of the most rewarding vertical gardening plants available.
Framing Architectural Features
Use more compact clematis varieties to create elegant living frames around windows and doorways. By installing a wire support system that follows the contours of the feature, you can train the vine to perfectly accentuate the architecture. This technique adds a soft, romantic touch and draws the eye to the most beautiful parts of your home.
Pairing with Other Climbers
For a truly spectacular, season-long display, consider planting your clematis with a climbing rose. The rose provides a sturdy framework for the clematis to weave through, and their bloom times can be chosen to overlap or follow one another. This classic combination creates a rich, cottage-garden feel with layers of color and texture.
The principles of providing strong, well-ventilated support are equally vital in these mixed plantings. The versatility of this vine is remarkable. For instance, many of these same principles can be adapted when you want to transform a simple fence with clematis into a beautiful, private screen.
Conclusion: Embrace the Vertical Garden with Confidence
The fear of damaging your home should not prevent you from realizing the dream of a clematis-draped wall. By understanding that clematis are twiners, not clingers, and by committing to proper installation techniques, you eliminate virtually all risks. The key is not to let the vine grow directly on the house, but to provide a safe, secure support system that allows for crucial airflow.
With the right plant variety, the correct support structure, and thoughtful placement, growing clematis on your house is a safe, manageable, and incredibly rewarding project. You can transform a blank wall into a breathtaking vertical garden that will bring you joy and enhance your home’s curb appeal for many years.