Can’t Find Dryer Vent? Your Ultimate Guide to This Hidden Hazard
You push the start button on your dryer, expecting warm, dry clothes in an hour. Instead, the laundry room turns into a sauna, the dryer gets alarmingly hot, and your clothes are still damp. These are classic red flags pointing to a serious problem: a missing, blocked, or improperly installed dryer vent. It’s a surprisingly common issue that many homeowners overlook, but one that carries significant risks.
Failing to locate and maintain your dryer vent isn’t just an inconvenience; it’s a major safety hazard. From potential house fires to carbon monoxide poisoning, the consequences of a poorly vented dryer are severe. This guide provides a comprehensive, step-by-step approach to finding that elusive vent and ensuring your home and family are safe.
You'll Learn About
Why a Hidden or Blocked Dryer Vent is a Ticking Time Bomb
A dryer’s primary function is to expel hot, moist air and highly flammable lint outside your home. When that pathway is blocked, nonexistent, or terminates inside, a cascade of dangerous problems begins. Understanding these risks is the first step toward appreciating the urgency of locating your vent.
The most immediate danger is fire. The U.S. Fire Administration reports thousands of home clothes dryer fires each year, with the leading cause being a failure to clean the vents. Lint accumulates, the dryer overheats, and the flammable material ignites. Another severe risk, particularly with gas dryers, is carbon monoxide (CO) poisoning. If a gas dryer cannot vent its combustion byproducts outside, this odorless, colorless gas can build up inside your home, leading to serious health issues or even death. If you have a gas dryer that gives off a distinct odor, it’s a critical warning sign that requires immediate attention; you can learn more if your GE gas dryer smells like gas.
Telltale Signs of a Venting Problem
Before you start your search, be aware of the symptoms that your dryer is struggling to breathe. These signs often point directly to a blocked or hidden vent:
- Excessively Long Drying Times: If a normal load takes two or more cycles to dry, it’s a strong indicator that moist air isn’t escaping.
- Overheating Appliance: A dryer that is hot to the touch is working too hard because trapped heat cannot be expelled.
- High Humidity: The laundry room feels like a steam room during or after a cycle. This excess moisture can lead to mold and mildew growth.
- Burning Smell: A distinct burning odor often means lint has built up on the heating element or within the ductwork and is scorching.
- Lack of Lint on the Screen: While it seems counterintuitive, very little lint on the trap can mean airflow is too poor to carry it there.
The Search Begins: A Systematic Guide to Finding Your Dryer Vent
Finding your dryer vent requires a methodical approach. The ideal path for a vent is the shortest, straightest route from the dryer to the outdoors. Start with the most obvious locations and work your way to the less common ones.
Step 1: Start at the Source – Behind the Dryer
This is the most logical starting point. Carefully pull your dryer away from the wall. You should see a 4-inch diameter duct—ideally made of rigid or semi-rigid metal—connected to the back of the appliance. Observe the direction it goes: straight into the wall, down through the floor, or up toward the ceiling. This initial direction provides the first major clue to its termination point.
If you see a flexible, foil-like duct that is crushed or has numerous kinks, you’ve already identified a potential problem. These ducts are prone to trapping lint and restricting airflow. It’s best practice to replace them with smooth-walled metal ducting.
Step 2: The Exterior Perimeter Sweep
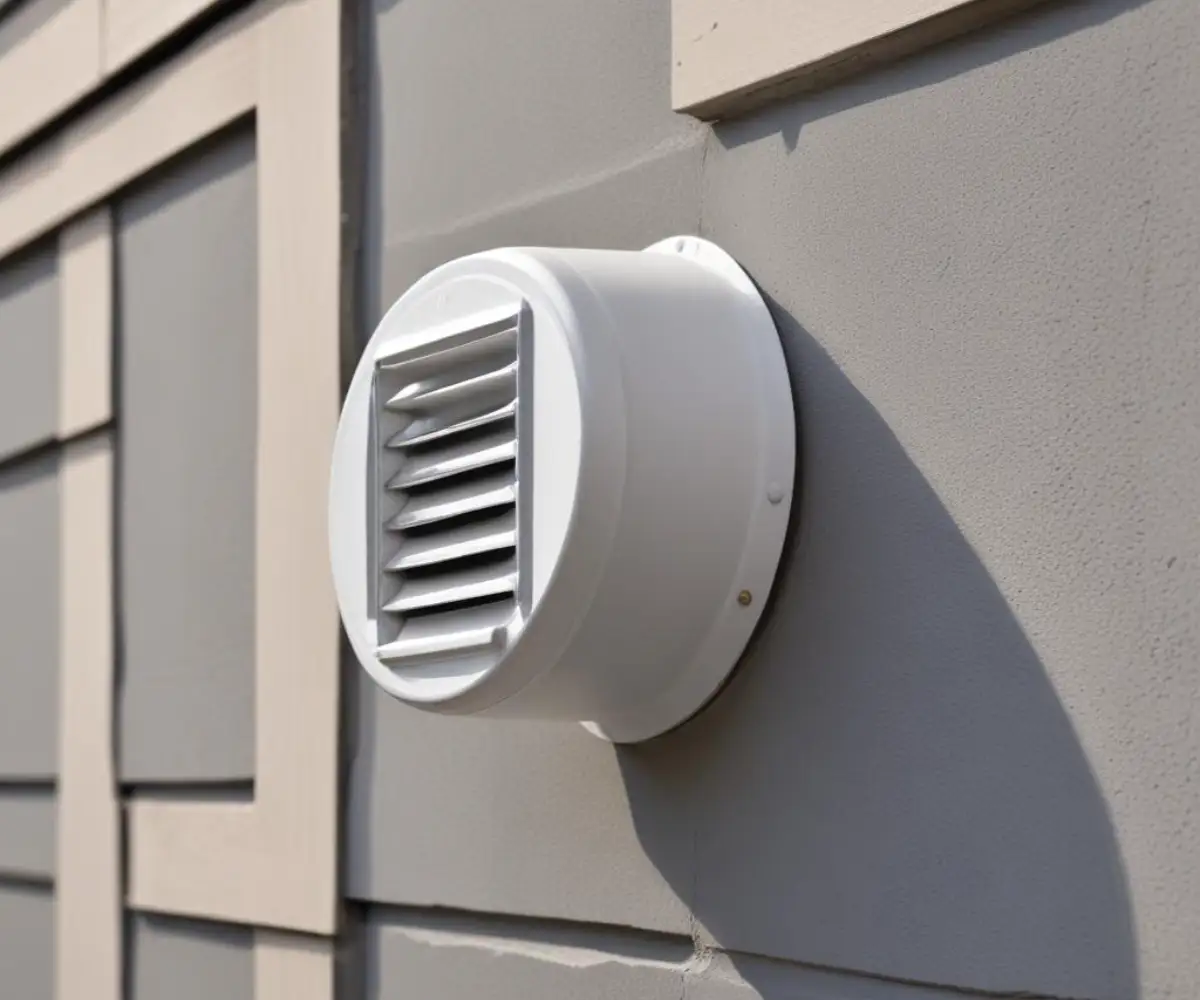
With the dryer’s exhaust direction in mind, go outside and walk the perimeter of your home. Look for a 4-inch vent cover, which may be plastic or metal and often has louvers or a flap that opens when the dryer is running. The most common location is on the exterior wall directly corresponding to the laundry room, typically about one to two feet off the ground.
Don’t forget to check behind obstacles. Landscaping shrubs, decks, or AC units can easily obscure a vent cover. If you’re still struggling, have someone turn the dryer on (on a no-heat or “fluff” setting) while you are outside. You may be able to hear the air or feel it escaping, guiding you to the location.
Step 3: Checking Basements and Crawl Spaces
If your laundry room is on the first floor or in the basement and the vent went down through the floor, your next stop is underneath. Head into the basement or crawl space. Using a flashlight, look at the floor joists and follow the path from directly below the laundry room toward the nearest exterior wall. You should see the metal ductwork running along or between the joists to a termination point on the foundation wall.
While you’re there, inspect the ductwork for any disconnects or damage. It’s not uncommon for ducts in crawl spaces to become detached or damaged by pests.
Step 4: Investigating the Attic and Roof
In multi-story homes or situations where the laundry room is centrally located, venting through the roof is a possibility, though it’s less ideal due to the length and vertical run. If the vent duct behind your dryer went upwards, your search should lead you to the attic. Look for a 4-inch insulated duct running across the attic floor or along the rafters to a specific roof penetration.
From the outside, a roof vent for a dryer looks similar to other roof vents but is specifically designed for this purpose. It is crucial that the vent terminates through the roof, not in the attic. Venting hot, moist air directly into an attic is a recipe for mold, mildew, and wood rot.
What If The Vent Terminates Indoors?
In some cases, especially in apartments or older homes where exterior venting wasn’t feasible, you might find the vent terminates inside. This is often done using an “indoor dryer vent kit,” which typically consists of a container of water or a filter system designed to catch lint. These are not a safe long-term solution.
Indoor kits do not effectively manage moisture, pumping it directly into your living space. This raises humidity levels, which can damage walls and promote mold growth. Furthermore, they are completely unsafe for gas dryers, as they would vent carbon monoxide directly into your home. If you discover an indoor venting system, creating a proper route to the exterior should be a top priority.
The Worst-Case Scenario: No Vent At All
It’s unsettling, but some installations might have no vent system at all. The dryer may be exhausting hot air and lint directly into the wall cavity or simply into the room behind the machine. This is an extremely hazardous situation that creates a significant fire risk and, with a gas dryer, a deadly CO hazard. If you suspect this is the case in your home, discontinue using the dryer immediately and call a professional.
Installing a new vent is a job that requires cutting a precise hole through an exterior wall, which may involve siding, brick, or concrete. While some DIY-savvy homeowners might tackle this, it often pays to hire a professional to ensure it’s done correctly and to code. The cost of professional installation is a small price to pay for safety and peace of mind. Knowing how much to move washer and dryer can give you a baseline for budgeting, as vent installation is often part of the scope.
Choosing the Right Materials: A Critical Component of Safety
Once you locate your vent, it’s essential to ensure it’s made from the correct materials. The type of ductwork used is not just a suggestion; it’s a critical safety factor. Building codes are very specific about what is acceptable.
| Duct Material Type | Pros | Cons | Best Use Case |
|---|---|---|---|
| Rigid Metal (Aluminum or Galvanized Steel) | Smooth interior prevents lint buildup; excellent airflow; highly durable. | Inflexible, requires elbows for turns. | Highly Recommended. The main duct run through walls, floors, and attics. |
| Semi-Rigid Metal (Flexible Aluminum) | Flexible for tight spaces; holds its shape better than foil. | Ribbed interior can trap some lint; can be crushed. | Acceptable for the transition between the dryer and the wall connection. |
| Flexible Foil (Plastic or Vinyl) | Very flexible and easy to install. | Not Recommended. Highly flammable; easily crushed; deep ridges trap lint, creating a major fire hazard. Prohibited by most building codes. | Should be replaced immediately if found. |
Found the Vent, But It’s in a Bad Spot: Rerouting and Relocation
Sometimes, the problem isn’t that you can’t find the vent, but that it’s in a terrible location. A vent run that is too long (typically over 35 feet, including deductions for bends) or has too many turns severely reduces dryer efficiency and increases fire risk. In these cases, rerouting the vent is the best solution.
The goal of rerouting is to create a shorter, more direct path to the outside. This might involve choosing a different exterior wall for termination. For example, learning how to reroute dryer vent from garage to outside can be a practical solution if the current path is long and convoluted. Similarly, if you are planning a laundry room renovation, such as considering if you can move your washer & dryer to the other side of the wall, it presents the perfect opportunity to optimize the vent path for safety and efficiency.
The Unseen Dangers of Unconventional Venting Paths
Beyond length, the geometry of the vent path matters. Every 90-degree turn in a vent run is equivalent to adding several feet of straight pipe in terms of airflow resistance. Multiple sharp bends create traps where lint can accumulate rapidly. Vertical runs, while sometimes necessary, can also pose a challenge as gravity works against the expulsion of heavy, damp lint, causing it to settle at the bottom of the vertical elbow.
Using smooth rigid metal ducting is especially critical in these complex runs. The smooth interior provides the least amount of friction, giving the airflow the best chance to carry lint all the way to the exterior vent cap. Regular, thorough cleaning becomes even more important for systems with longer or more complex paths.
Your Dryer Vent is Found: The Final Steps to Safety
Locating your dryer vent is a huge accomplishment, but the job isn’t quite done. The final, crucial step is maintenance. Now that you know where the vent terminates, you can establish a routine for cleaning it. At a minimum, the entire duct run, from the back of the dryer to the exterior cap, should be professionally cleaned at least once a year.
Remove the exterior vent cover and clean away any accumulated lint or debris. Ensure the flap or louvers can move freely. A cover that is stuck shut is just as bad as a clog inside the pipe. By taking these proactive steps, you transform a hidden household hazard into a well-maintained system, ensuring your dryer operates safely and efficiently for years to come.