Peel and Stick Tiles on Your Ceiling? Avoid a DIY Disaster with This Guide
That drab, stained, or popcorn-textured ceiling is an eyesore you no longer wish to endure. You’ve seen the incredible transformations online—stunning, patterned ceilings that redefine a room, all seemingly accomplished with the simple magic of peel and stick tiles. It seems like the perfect weekend project: affordable, fast, and requiring minimal tools.
But before you start adding those tiles to your online cart, a crucial question hangs in the air, quite literally: can you actually use peel and stick tiles on the ceiling? The short answer is yes, but the long answer is far more complex and fraught with potential for a gravity-induced DIY disaster.
Successfully installing peel and stick tiles overhead is not a matter of simply peeling and sticking. It’s an exercise in careful preparation, material selection, and understanding the forces working against you. This guide will walk you through the science of adhesion, the critical steps for success, and how to ensure your new ceiling stays up for years to come.
You'll Learn About
The Big Question: Can You Really Put Peel and Stick Tiles on a Ceiling?
The appeal of using peel and stick tiles for a ceiling makeover is undeniable. It’s a project that promises a significant aesthetic upgrade without the mess and expense of drywall replacement or professional plastering. For many homeowners, it represents a direct, accessible path to covering up imperfections and adding custom character to a room.
However, the primary challenge is simple and relentless: gravity. Unlike floors that benefit from downward pressure and walls that experience minimal load, ceilings are in a constant battle against this downward pull. The adhesive on a standard peel and stick tile, designed for floors or a backsplash, is often not formulated to withstand this persistent force over time, especially when other environmental factors are introduced.
Success requires a methodical approach that goes far beyond the product’s basic instructions. Understanding why these applications fail is the first step toward ensuring yours doesn’t.
Why Peel and Stick Tiles Fail on Ceilings: The Science of Adhesion
When peel and stick ceiling tiles begin to droop or fall, it’s rarely a random event. The failure can almost always be traced back to a specific set of scientific and environmental factors that compromise the adhesive bond. Ignoring these factors is the most common mistake a DIYer can make.
Gravity: The Unseen Enemy
The most obvious challenge is gravity. Every tile, no matter how lightweight, is being pulled downward 24/7. This constant, low-grade stress on the adhesive can, over months or years, be enough to weaken the bond, leading to sagging corners and eventual detachment. Heavier tiles, of course, will succumb to this force much faster.
This is why tile weight is a critical selection criterion. Lightweight materials like foam or thin PVC are inherently better suited for ceiling applications than heavier vinyl or metal alternatives. Every ounce matters when you’re fighting a constant downward pull.
Humidity and Temperature: The Adhesive Killers
Adhesives are chemical compounds sensitive to their environment. High humidity, common in bathrooms and kitchens, is a primary culprit in adhesive failure. Moisture in the air can slowly work its way between the tile and the ceiling surface, breaking down the glue’s chemical bonds and reducing its tackiness.
Temperature fluctuations create a different problem. Materials expand when heated and contract when cooled. Your ceiling and the tiles will expand and contract at different rates, creating a shearing force that can gradually break the adhesive bond. This is especially problematic in rooms with poor insulation or direct sun exposure.
The Hidden Menace: Poor Sub-Ceiling Ventilation
A factor that almost no one talks about is the condition of the space *above* your ceiling. Inadequate ventilation in an attic or the space between floors can lead to moisture buildup. This trapped moisture can slowly migrate through the drywall or plaster, compromising the ceiling from behind and pushing your tiles off—no amount of surface prep can prevent this.
Before starting a project like this, it is vital to ensure the space above is dry and properly ventilated. This hidden issue is often the mysterious cause of failures that occur even when the installer has done everything else correctly on the visible surface.
The Critical Role of Surface Preparation
The final, and most controllable, factor is the surface itself. The adhesive on peel and stick tiles needs a pristine, non-porous, and structurally sound surface to form a lasting bond. Any layer of dust, grease, or peeling paint acts as a barrier, meaning the tile is only sticking to that unstable layer, not the ceiling itself.
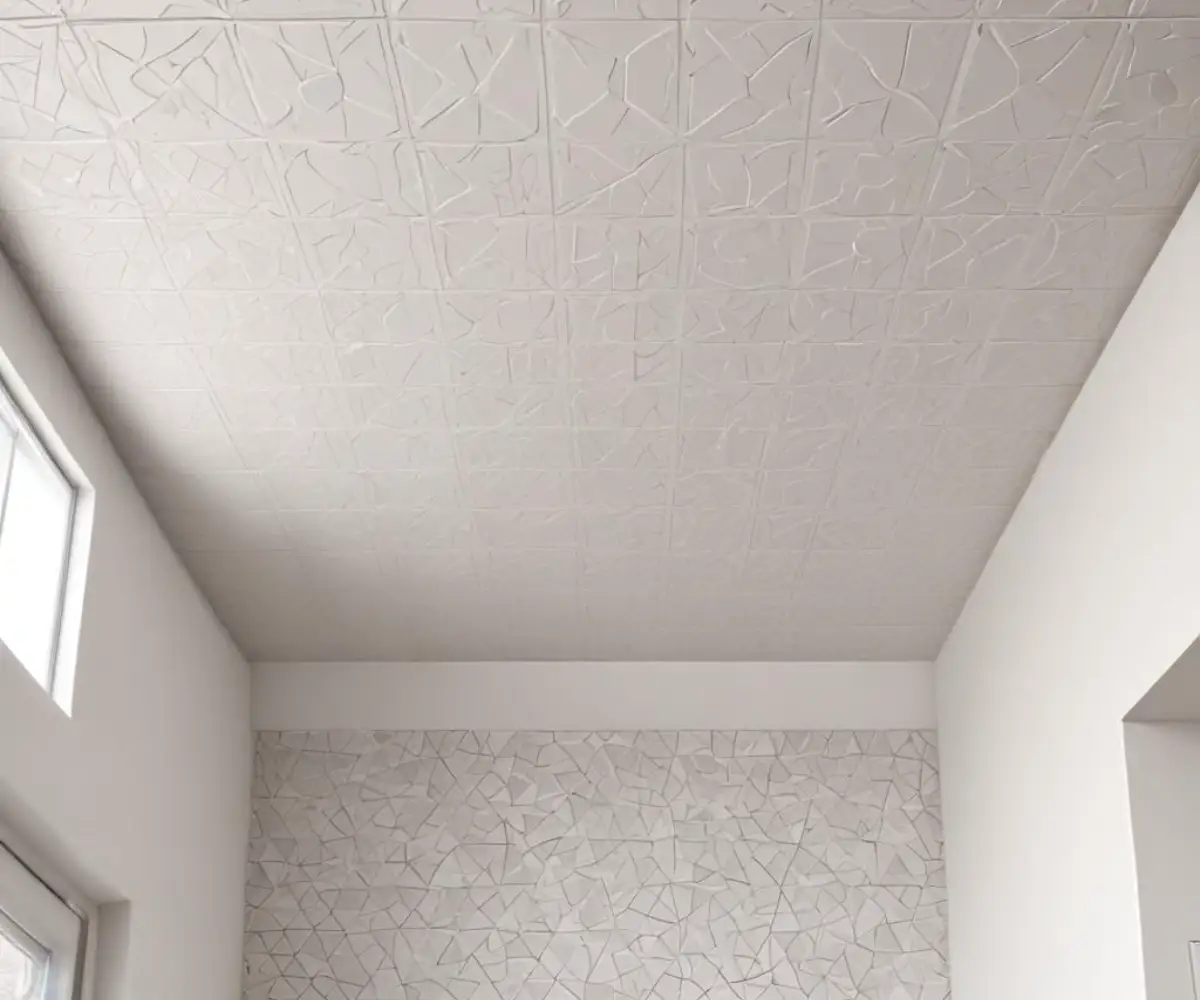
Perhaps the biggest mistake is attempting to apply these tiles over a textured surface like a popcorn ceiling. The reduced surface area contact means the bond will be weak from the start and is virtually guaranteed to fail.
Choosing the Right Ammunition: Not All Peel and Stick Tiles Are Equal
The success of your project begins with selecting the right product. The term “peel and stick tile” covers a vast range of materials and qualities, and choosing one specifically suited for the rigors of an overhead application is non-negotiable.
Material Matters: Vinyl, Foam, and Beyond
The material of the tile directly impacts its weight and rigidity—two crucial factors for a ceiling application. Lightweight options are always preferable. Styrofoam or foam tiles are exceptionally light, making them an excellent choice for ceilings. They are easy to cut and place, and their low weight puts minimal stress on the adhesive.
Thin PVC (polyvinyl chloride) tiles are another popular option, offering durability and often a more decorative, faux-tin appearance. They are lightweight, waterproof, and easy to clean, making them suitable for various rooms. Heavier, thicker vinyl tiles intended for flooring should be avoided, as their weight is a significant disadvantage.
Adhesive Quality: The Make-or-Break Factor
Not all adhesives are created equal. The adhesive backing on a budget-friendly tile is likely not formulated for the constant pull of gravity. Look for products that are either specifically marketed for ceilings or boast a “high-tack” or “construction-grade” adhesive.
However, even with the best built-in adhesive, relying on it alone is a significant risk. For any ceiling application, using a supplemental adhesive is not just recommended—it should be considered mandatory. This provides an extra layer of bonding that the tile’s own adhesive cannot guarantee against gravity and environmental changes.
| Material | Weight | Best For… | Pros | Cons |
|---|---|---|---|---|
| Lightweight Vinyl (PVC) | Low | Kitchens, Bathrooms, Decorative Finishes | Durable, waterproof, easy to clean, wide variety of designs (e.g., faux tin). | Can warp under intense heat, quality varies significantly by brand. |
| Styrofoam/Foam | Very Low | Covering popcorn ceilings, bedrooms, living rooms. | Extremely lightweight, paintable, good for imperfect surfaces, easy to cut. | Can look cheap if not finished properly, soft and easily dented, potential fire hazard if not Class A rated. |
| Metal/Faux Tin (Heavier) | Moderate to High | Not generally recommended for peel and stick on ceilings. | Highly durable, authentic look. | Weight is a major issue for adhesion, requires mechanical fasteners (nails) in addition to adhesive. |
The Ultimate 7-Step Installation Guide for a Ceiling That Lasts
Following a meticulous installation process is the key to a long-lasting and beautiful peel and stick tile ceiling. Skipping any of these steps dramatically increases the risk of failure.
Step 1: Meticulous Ceiling Inspection and Repair
Before you even think about opening a box of tiles, conduct a thorough inspection of your ceiling. Look for any signs of moisture damage, such as stains or soft spots, which could indicate a leak or ventilation issue that must be addressed first. Check for cracks, loose plaster, or peeling paint.
Any imperfections must be repaired. This is the time to fix structural issues. For instance, knowing how to properly cover old smoke detector holes or other minor gaps will ensure a flat, stable base. For more significant damage, you may need to learn how to temporarily cover a hole in the ceiling before undertaking a more permanent repair. All repairs must be fully cured and sanded smooth.
Step 2: Creating the Perfect Canvas – Surface Preparation
This is the most critical stage. First, clean the entire ceiling surface thoroughly to remove any dust, cobwebs, or grease. A solution of Trisodium Phosphate (TSP) or a strong degreasing cleaner is highly recommended. After cleaning, rinse the surface with a damp cloth and allow it to dry completely—at least 24 hours.
If you have a textured ceiling, you must get rid of the texture. Applying tiles directly to a popcorn or stippled surface will fail. You have two options: scrape the texture off, which is messy but effective, or cover it with a thin layer of drywall or plywood, creating a new, smooth surface.
Step 3: The Non-Negotiable Priming Stage
Never apply peel and stick tiles to bare drywall, plaster, or joint compound. These surfaces are porous and will suck the moisture out of the adhesive, weakening the bond. You must seal the surface with a high-quality primer.
Use a shellac-based or oil-based stain-blocking primer. This creates a non-porous, uniform surface that promotes maximum adhesion. Making the right choice is crucial; for challenging surfaces, the debate over products like Roman Pro 999 vs Gardz highlights how vital the right foundational sealer is for project success. Allow the primer to cure fully according to the manufacturer’s instructions.
Step 4: Plan Your Layout Like a Pro
Don’t just start in a corner. To achieve a professional, balanced look, find the center of the room by measuring and snapping chalk lines from the midpoints of opposing walls. The intersection of these lines is your starting point.
Do a “dry fit” by laying out a row of tiles on the floor to see how they will look and to plan your cuts for the edges of the room. This helps you avoid ending up with tiny, awkward slivers of tile along a highly visible wall.
Step 5: The Secret to Unbeatable Adhesion (Supplemental Adhesive)
Do not rely solely on the self-adhesive backing of the tiles. For a ceiling application, you must use an additional adhesive. A high-tack, fast-grabbing construction adhesive is an excellent choice.
Apply a thin, uniform bead of the construction adhesive around the perimeter of the back of each tile and a small ‘S’ or ‘X’ shape in the middle. Be careful not to apply too much, as it can squeeze out the sides. This secondary adhesive provides a much stronger, more permanent bond that is essential for fighting gravity.
Step 6: Application and Pressure
Once your supplemental adhesive is applied, carefully peel the backing paper off the tile. Align the tile with your chalk lines and press it firmly into place. This is where pressure becomes critical.
The adhesive on most peel and stick tiles is pressure-sensitive, meaning it needs significant force to create a proper bond. Use a J-roller or a small seam roller to go over the entire surface of the tile, paying special attention to the corners and edges. This action fully activates the adhesive and removes any air bubbles.
Step 7: Finishing Touches and Curing
If any supplemental adhesive squeezes out between the tiles, wipe it away immediately with a damp cloth or mineral spirits, depending on the adhesive’s instructions. Allow the adhesive to cure for at least 24-48 hours, during which time you should avoid high humidity in the room (e.g., long, hot showers).
Inspect the tiles after a day to ensure all edges are firmly secured. If you notice any lifting, you may be able to apply more pressure or carefully inject a small amount of construction adhesive under the edge with a syringe.
Long-Term Care and Common Problems to Watch For
Your new ceiling is up, but the work isn’t entirely over. Proper care and knowing how to handle potential issues will keep it looking great for years.
How to Clean Your New Tiled Ceiling
Maintenance is generally easy. For most PVC or vinyl tiles, a simple wipe-down with a damp cloth and mild detergent is all that’s needed to remove dust or grime. For foam tiles, especially if painted, a gentle dusting is preferable. Avoid using harsh abrasive cleaners or solvents that could damage the tile’s finish.
What to Do If a Tile Starts to Peel
If you notice a corner or edge starting to come loose, address it immediately. Often, you can reactivate the bond by gently heating the tile with a hairdryer and pressing it firmly back into place with a roller. If that fails, carefully pry the loose section up and apply a small amount of construction adhesive before pressing it back down.
If multiple tiles start failing, it likely points to a larger underlying issue that was missed during preparation, such as moisture or an improperly cleaned surface. At that point, a more significant repair or re-installation may be necessary.
The Reality of Removal
It’s important to understand that while often marketed as a temporary or renter-friendly solution, removing peel and stick tiles—especially those installed on a ceiling with supplemental adhesive—is a significant undertaking. The process typically involves heating each tile with a heat gun to soften the adhesive, then using a scraper to pry it off.
This process will almost certainly cause damage to the drywall or plaster underneath, requiring patching, sanding, and repainting. Think of this as a semi-permanent installation, not a temporary cosmetic fix.
The Verdict: Are Peel and Stick Ceiling Tiles a Good Idea?
Peel and stick tiles can be a fantastic solution for transforming a ceiling, but only for the right person and the right project. They are not a shortcut to a new ceiling; they are a project that demands the same level of care and preparation as painting or any other significant DIY task.
This project is an excellent idea if:
- You are meticulous and willing to follow every preparation step without compromise.
- You choose a lightweight, high-quality tile suitable for a ceiling.
- You commit to using a supplemental, high-strength construction adhesive.
- Your ceiling is smooth, flat, and in good structural condition.
Ultimately, the success of a peel and stick ceiling rests entirely on the quality of the preparation. When done correctly, it’s a durable, cost-effective, and beautiful upgrade. When rushed, it’s a literal DIY headache waiting to fall on your head.