Compression Fittings on Soft Copper: Your Ultimate Guide to a Leak-Proof Seal
You’re in the middle of a plumbing project, faced with a coil of soft copper tubing. The question hits you like a blast of cold water: can you use compression fittings on soft copper? It’s a common scenario for DIY enthusiasts and even seasoned professionals, and the answer is critical to preventing a disastrous leak down the road.
Getting this connection wrong can lead to slow drips that damage floors and ceilings or catastrophic failures that flood your home. The good news is that you absolutely can use compression fittings on soft copper, but there’s a crucial, non-negotiable step that makes all the difference between a secure, lasting seal and a ticking time bomb.
You'll Learn About
What is Soft Copper and Why Does It Pose a Challenge?
First, it’s important to understand the material you’re working with. Soft copper, also known as annealed copper, is tubing that has been heat-treated to make it flexible. This flexibility is its greatest strength, allowing it to be bent around obstacles without needing numerous elbow fittings.
However, this same malleability is its primary weakness when it comes to certain types of connections. Unlike rigid or “hard” copper pipes, soft copper can easily be deformed, crushed, or misshapen under pressure. This is precisely why using a standard compression fitting alone is a recipe for failure.
The Mechanics of a Compression Fitting
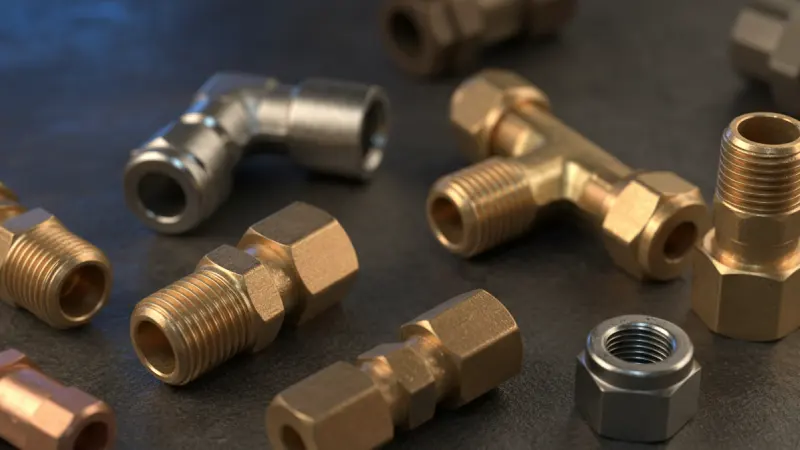
A compression fitting works by creating a seal through force. It consists of three main parts: the fitting body, a compression nut, and a ferrule (often called an “olive” or ring). As you tighten the nut, it forces the ferrule to clamp down onto the outside of the pipe, compressing it against the body of the fitting to create a watertight seal.
On a hard copper pipe, the pipe is strong enough to resist the ferrule’s force, allowing the ferrule to deform and create the seal. But when you try this on soft copper, the force can easily crush the pipe itself, preventing a proper seal and potentially restricting water flow.
The Golden Rule: Always Use an Insert Stiffener
The solution to this problem is simple yet absolutely essential: you must use an insert stiffener. A stiffener, also called an insert, is a small brass or copper sleeve that you slide into the end of the soft copper tube before assembling the fitting.
This component is not optional. The insert provides the internal support the soft copper tube needs to withstand the compressive force from the ferrule. It prevents the tube from collapsing, ensuring the ferrule can create a tight, 360-degree seal against a solid, round surface. Without it, you are almost guaranteed a leak.
Step-by-Step Guide: A Perfect Connection Every Time
Installing a compression fitting on soft copper is straightforward when you follow the correct procedure. Rushing or skipping a step is where problems begin. Gather your tools and follow these instructions carefully for a reliable, leak-free joint.
Step 1: Get Your Tools and Materials
Before you start, make sure you have everything you need. You will require a quality tube cutter, a deburring tool, two appropriately sized wrenches, the compression fitting, and, most importantly, the correct size insert stiffener for your tubing.
Step 2: Make a Clean, Square Cut
Using a pipe cutter designed for copper, make a clean, square cut at the desired length. A straight cut is essential for the tube to sit properly inside the fitting. An angled cut can lead to an uneven seal and leaks.
Step 3: Deburr the Pipe End
After cutting, the inside and outside edges of the pipe will have small, sharp burrs. Use a deburring tool or a small file to smooth these edges. This crucial step prevents burrs from damaging the fitting or creating tiny channels for water to escape.
Step 4: Assemble the Components
Now, slide the compression nut onto the copper tube, ensuring the threads face the end of the pipe. After the nut, slide the ferrule (olive) onto the tube. The order is critical for the fitting to work.
Step 5: Insert the Stiffener
This is the key step for soft copper. Push the insert stiffener firmly into the end of the copper tube. It should be a snug fit, providing the necessary internal support for the connection.
Step 6: Join the Fitting
Insert the end of the copper tube (with the nut, ferrule, and stiffener in place) into the body of the compression fitting. Push it in until it bottoms out against the internal shoulder of the fitting. This ensures the connection is fully seated.
Step 7: Tighten the Nut Correctly
Hand-tighten the nut onto the fitting body. Then, using two wrenches—one to hold the fitting body steady and one to turn the compression nut—tighten the nut. Do not over-tighten. A common rule of thumb is to tighten one-half to three-quarters of a turn past hand-tight. Over-tightening can crush the pipe even with an insert, damage the ferrule, or even crack the nut.
Step 8: Check for Leaks
Once the joint is assembled, slowly turn the water supply back on and carefully inspect the fitting for any drips or weeping. If you see a small leak, you can try tightening the nut a slight quarter-turn more. If it continues to leak, you may need to disassemble, inspect the components, and reassemble.
Common Mistakes to Avoid at All Costs
Many leaks and failures are due to simple, preventable errors. Be mindful to avoid these common pitfalls:
- Forgetting the Insert: The number one mistake. Without it, the soft copper will collapse under pressure.
- Over-tightening: More is not better. Excessive force will damage the pipe, the ferrule, and the fitting, leading to leaks.
- Reusing Ferrules: The ferrule is a single-use component. Once compressed, it has permanently formed to the old pipe and will not create a new, reliable seal.
- Uneven Cuts: A pipe that is not cut squarely will not seat properly in the fitting, making a leak almost inevitable.
Understanding these small details can make a huge difference. For example, ensuring your tools are in good condition is vital; a dull pipe cutter can deform the pipe, which could be an issue if you, say, dont have 7 32 drill bit or the right tool for another part of the job and are tempted to improvise.
Compression vs. Other Fittings for Soft Copper
While compression fittings are a great option, it’s worth knowing the alternatives and when they might be a better choice. Your decision can be influenced by the application, accessibility, and pressure requirements.
Flare Fittings
Flare fittings are often considered a more robust and vibration-resistant option for soft copper. They work by using a special tool to create a “flare” or bell-shaped end on the tubing, which is then pressed against the fitting body by a nut. This method is common in high-pressure applications like HVAC, refrigeration, and gas lines. For instance, if you were troubleshooting a gas appliance like a fireplace, you might encounter flare fittings on the soft copper gas line, a topic related to understanding the whole system, much like our guide on gas fireplace uneven flame causes and fixes.
Soldered/Brazed Joints
Soldering (or brazing for higher temperatures) creates a permanent, metallurgical bond between the pipe and fitting. This is the professional standard for long-term, inaccessible plumbing installations. However, it requires a torch, flux, solder, and a fair amount of skill to execute correctly.
Push-to-Connect Fittings
These modern fittings offer incredible ease of use—you simply push the pipe into the fitting to create a seal. While convenient, there is ongoing debate about their long-term reliability compared to traditional methods like compression or soldering, especially in concealed locations.
To help you decide, here is a comparison of how compression fittings stack up against other common types for both soft and hard copper applications.
| Feature | Compression on Soft Copper | Compression on Hard Copper | Flare Fitting (Soft Copper) | Soldered Joint (Either) |
|---|---|---|---|---|
| Requires Insert/Stiffener | Yes (Essential) | No | No | No |
| Risk of Over-tightening | High (Can crush pipe) | Moderate (Can damage ferrule) | Moderate (Can crack flare) | N/A |
| Ease of Installation | Easy | Easy | Moderate (Requires flare tool) | Difficult (Requires torch/skill) |
| Vibration Resistance | Good | Good | Excellent | Excellent |
| Removable/Reusable | Yes (with new ferrule) | Yes (with new ferrule) | Yes | No (Permanent) |
| Best For | Accessible repairs, appliance hookups (e.g., icemakers) | Exposed plumbing, shut-off valves | Gas lines, HVAC, high pressure | Permanent, inaccessible plumbing |
Frequently Asked Questions (FAQs)
Here are some quick answers to the most common questions about using compression fittings on soft copper.
How tight should a compression fitting be on soft copper?
The standard guideline is hand-tight plus one-half to three-quarters of a turn with a wrench. The key is to create a seal without deforming the pipe. Never tighten to the point where the fitting feels like it’s bottoming out.
Can you reuse a compression fitting on soft copper?
You can reuse the nut and the fitting body, but you should never reuse the ferrule (olive). The ferrule deforms to create a seal on the first installation and will not seal reliably a second time. Always use a new ferrule for a new connection.
Are compression fittings reliable for gas lines on soft copper?
While compression fittings can be used for gas, flare fittings are often preferred and may be required by local codes due to their superior resistance to vibration. Always check your local plumbing and gas codes before undertaking any gas line work.
What if my fitting leaks after installation?
If you have a minor drip, try tightening the nut another one-eighth to one-quarter turn. If that doesn’t work, turn off the water, disassemble the joint, and inspect all components. Check that the insert is fully seated, the pipe cut is square, and the ferrule is not damaged.
The Final Verdict on Soft Copper Connections
So, can you use compression fittings on soft copper? The answer is a resounding yes, but only if you follow the single most important rule: always use an internal support stiffener. This small, inexpensive part is the key to transforming a potentially weak joint into a strong, durable, and leak-proof connection.
By using the correct technique, avoiding common mistakes, and understanding when to choose a compression fitting over an alternative, you can confidently tackle your plumbing projects. Ensuring a proper seal not only protects your home from water damage but is also a crucial part of maintaining an efficient home, a principle that extends to other areas like proper insulation, a topic we explore in our Mass Save insulation reviews.
With this guide, you now have the expert knowledge to create a perfect seal every time, ensuring your plumbing work is safe, reliable, and built to last.
