Shower Curtain with a Shower Pan: The #1 Mistake You Can’t Afford to Make
You’re standing in the middle of a bathroom renovation. The old tub is gone, and a sleek, modern shower pan sits in its place, promising a fresh, clean start. Now comes the critical decision that stumps countless homeowners: enclose it with a pricey glass door or opt for the simple, versatile shower curtain?
It’s a debate that pits modern aesthetics against practicality and budget. Many fear that a shower curtain paired with a low-profile shower pan is a recipe for a flooded bathroom floor. They imagine water seeping out, creating a slippery hazard and potentially causing long-term water damage.
The truth is, you can absolutely use a shower curtain with a shower pan and achieve a perfectly dry, functional, and stylish bathroom. However, success hinges on avoiding one critical mistake in your setup. This guide will walk you through the science of water containment, the definitive pros and cons, and the exact steps to create a leak-proof shower that gives you the best of both worlds.
You'll Learn About
The Unsung Hero of Your Shower: Understanding the Pan’s Curb
Before choosing a curtain or a door, you must first appreciate the most critical component of your shower pan: the curb or threshold. This raised edge is the single most important barrier that stands between the water in your shower and the rest of your bathroom floor. Its design and height are paramount to your success.
Shower pan curbs are not all created equal. Building codes typically mandate a minimum height of at least two inches from the top of the drain. For a setup with a shower curtain, a curb that is three to four inches high provides a much more significant safety margin, effectively acting as a dam against any water that might try to escape.
The importance of this curb cannot be overstated. It’s the physical barrier that the bottom of your shower curtain liner will rest against. A low-profile, minimalist curb might look sleek, but it offers very little forgiveness if your curtain liner is jostled or shifts, creating a smaller, less effective dam and increasing the risk of leaks.
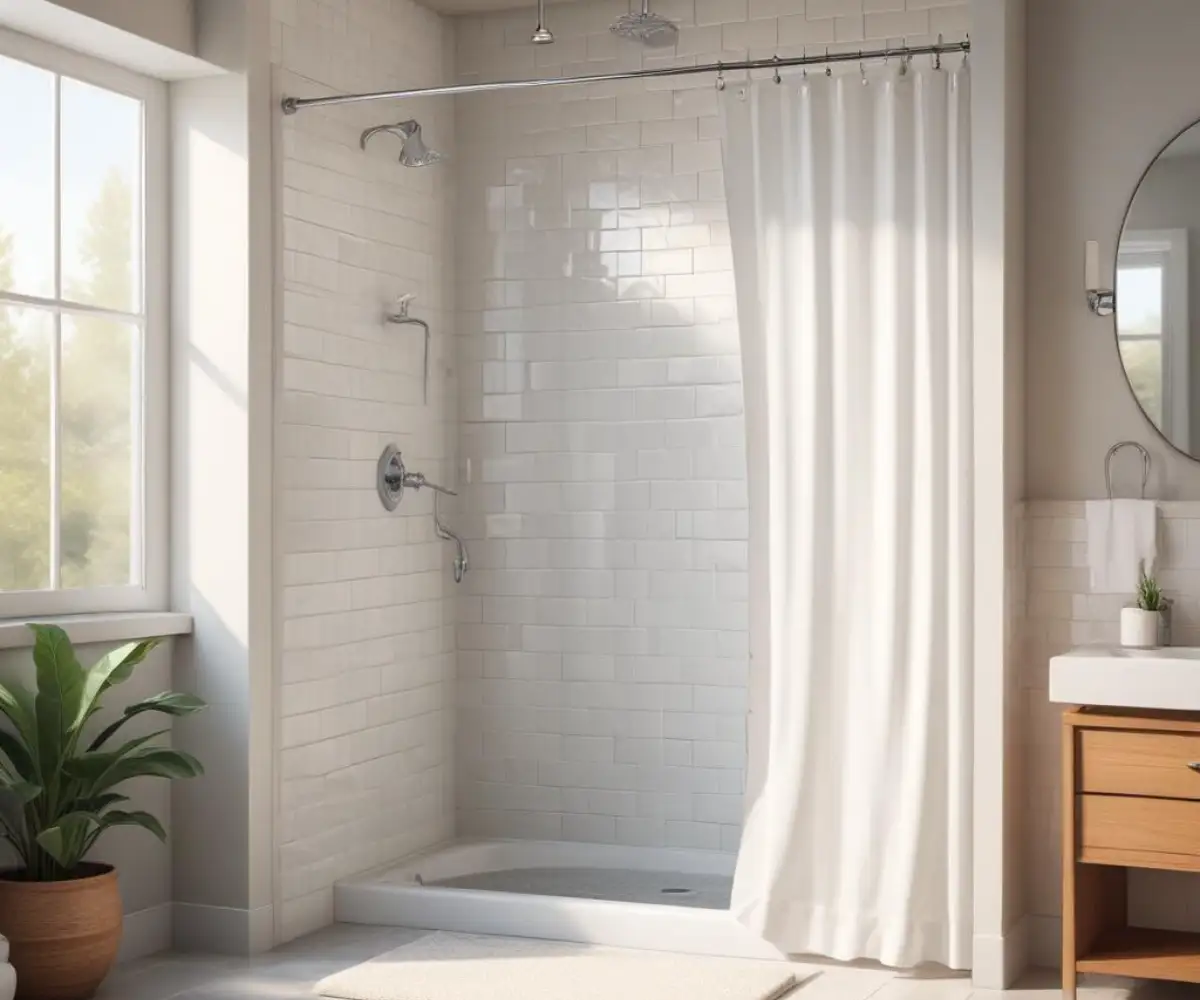
The Great Debate: Curtain vs. Glass Door Showdown
Choosing between a shower curtain and a glass door is about more than just looks; it’s a decision that impacts your budget, cleaning routine, and the overall feel of your bathroom. While glass doors offer a premium, spa-like aesthetic, they come with a higher price tag and more demanding maintenance.
For many, the flexibility and affordability of a shower curtain are unbeatable. This is especially true if you are looking for a temporary shower during renovation or simply enjoy changing your bathroom’s style frequently. Let’s break down the key differences to help you make an informed choice.
| Feature | Shower Curtain | Glass Shower Door |
|---|---|---|
| Initial Cost | Very low. A complete setup (rod, rings, curtain, liner) is typically under $100. | High. Costs can range from several hundred to thousands of dollars. |
| Installation | DIY-friendly, often requiring no tools for tension rods. | Professional installation is highly recommended to ensure a proper seal. |
| Maintenance | Prone to mildew; requires regular washing or replacement of the liner. | Requires daily squeegeeing to prevent water spots and soap scum buildup on the glass. |
| Accessibility | Excellent. The curtain can be pushed completely aside for unrestricted access. | Good, but access is limited by the width of the door opening. |
| Design Flexibility | Nearly limitless. Easily and cheaply changed to match new decor. | Permanent. Style is limited to the type of glass and hardware chosen. |
| Space Perception | Can make the bathroom feel smaller when closed. | Opens up the space, making the bathroom feel larger and brighter. |
Ultimately, if budget, flexibility, and ease of installation are your top priorities, a shower curtain is an excellent choice. If you’re aiming for a high-end, permanent fixture that may increase home value, a glass door is a worthy investment. You can explore options and get a better sense of project expenses by researching things like the Kohler shower installation cost to compare with the minimal expense of a curtain setup.
Your Blueprint for a Leak-Proof Shower Curtain and Pan Combo
Success with a shower pan and curtain lies in a methodical approach to choosing and installing your components. It’s not just about hanging a piece of fabric; it’s about creating a system where each part works together to contain water effectively.
Step 1: Choose Your Armor (The Right Curtain & Liner)
This is where most people make their biggest mistake. The decorative outer curtain is for looks; the inner liner is the real workhorse. Do not skimp on the liner. A cheap, flimsy vinyl liner is the primary cause of leaks and frustration.
Instead, invest in a high-quality, heavy-gauge fabric liner made from a water-resistant material like polyester. These liners are less prone to billowing, are often machine washable, and resist mildew growth far better than cheap plastic. Most importantly, select a liner that has weights or magnets sewn into the bottom hem. This added weight is crucial for keeping the liner hanging straight down and securely inside the shower pan’s curb, preventing it from blowing outwards and letting water escape.
Proper sizing is also critical. The liner must be long enough to hang several inches down the inside of the pan’s curb, but not so long that it bunches up on the shower floor. This trapped fabric can prevent water from draining properly and becomes a breeding ground for mold and mildew.
Step 2: The Critical Role of Rods and Hooks
The placement of your shower rod is the secret to a leak-proof seal. The rod must be positioned so that the shower liner hangs down the inside vertical face of the shower curb, not directly above it or outside of it. This ensures that any water running down the liner is directed back into the pan.
Consider upgrading to a curved shower rod. This simple change provides a surprising number of benefits. It gives you more elbow room in the shower, making the space feel larger, and it naturally pulls the curtain further into the center of the shower pan, away from the critical edge of the curb.
Finally, upgrade your hooks. Ditch the cheap plastic C-rings that snag and break. Invest in metal double-sided hooks or hooks with roller balls. Double-sided hooks allow you to hang the liner and the decorative curtain independently, making it much easier to remove the liner for cleaning. Rollerball hooks ensure a smooth, effortless glide across the rod.
Step 3: Installation Mastery for a Perfect Seal
This is where the plan comes together. The single most important rule to follow is this: the liner ALWAYS goes inside the pan, and the decorative curtain ALWAYS hangs outside the pan. This simple arrangement ensures water is directed where it belongs while keeping your decorative curtain dry and clean.
Before drilling any holes for a permanent rod, do a dry run. Hold the liner up against the wall to determine the perfect height. The bottom of the liner should rest about two to three inches below the top of the curb. Mark your rod height based on this measurement, remembering to account for the drop created by your shower rings. Following this process guarantees a custom fit that effectively seals the opening.
Advanced Tactics: Pro Tips to Conquer Every Last Drip
Once you’ve mastered the basics, a few extra tricks can elevate your setup from good to completely foolproof. These small additions provide extra security against leaks and solve common annoyances.
Tame the “Billowing” Curtain Effect
Have you ever felt the shower curtain creep in and stick to you mid-shower? This is known as the “billow effect,” caused by the air pressure difference between the warm shower spray and the cooler air in the bathroom. While a heavy, weighted liner is the best defense, you can add shower curtain clips or magnets to further secure the liner against the shower walls for a completely immobile barrier.
Seal the Gaps with Corner Splash Guards
The corners where the curtain meets the wall are the most vulnerable points for water to escape. The solution is simple and highly effective: adhesive corner splash guards. These small, L-shaped plastic pieces stick to the corner of your shower pan and wall, creating a physical barrier that blocks splashes and keeps the curtain liner tucked in place.
Perform Critical Curb Maintenance
Here is an often-overlooked secret to long-term success. Over time, soap scum and hard water deposits can build up on the inside face of your shower pan’s curb. This buildup can create a “ramp” that allows water to wick its way up and over the threshold. Regularly scrub the inside of the curb to keep it clean and smooth, ensuring water sheets down it correctly.
For those who ultimately decide against a curtain, there are still excellent options that don’t require a full renovation. A high-quality renter friendly shower door can provide the seal of glass without the need for drilling into your tile, offering a great alternative.
Conclusion: Embrace the Curtain and Pan with Confidence
Yes, you can absolutely and confidently use a shower curtain with a shower pan. The fear of a perpetually wet bathroom floor is unfounded if you approach the setup with intention and knowledge. By understanding the critical role of the shower curb, you can make an informed decision from the very start of your project.
The key to a dry and functional space lies in the details. Invest in a high-quality, weighted liner, position your shower rod correctly, and always ensure the liner hangs inside the pan’s curb. By following these guidelines and adding small enhancements like splash guards, you can enjoy the affordability, versatility, and style of a shower curtain without ever worrying about a single drop of water hitting your floor.