Using 12×24 Tile on Shower Walls: A Pro’s Guide to Avoiding Disaster
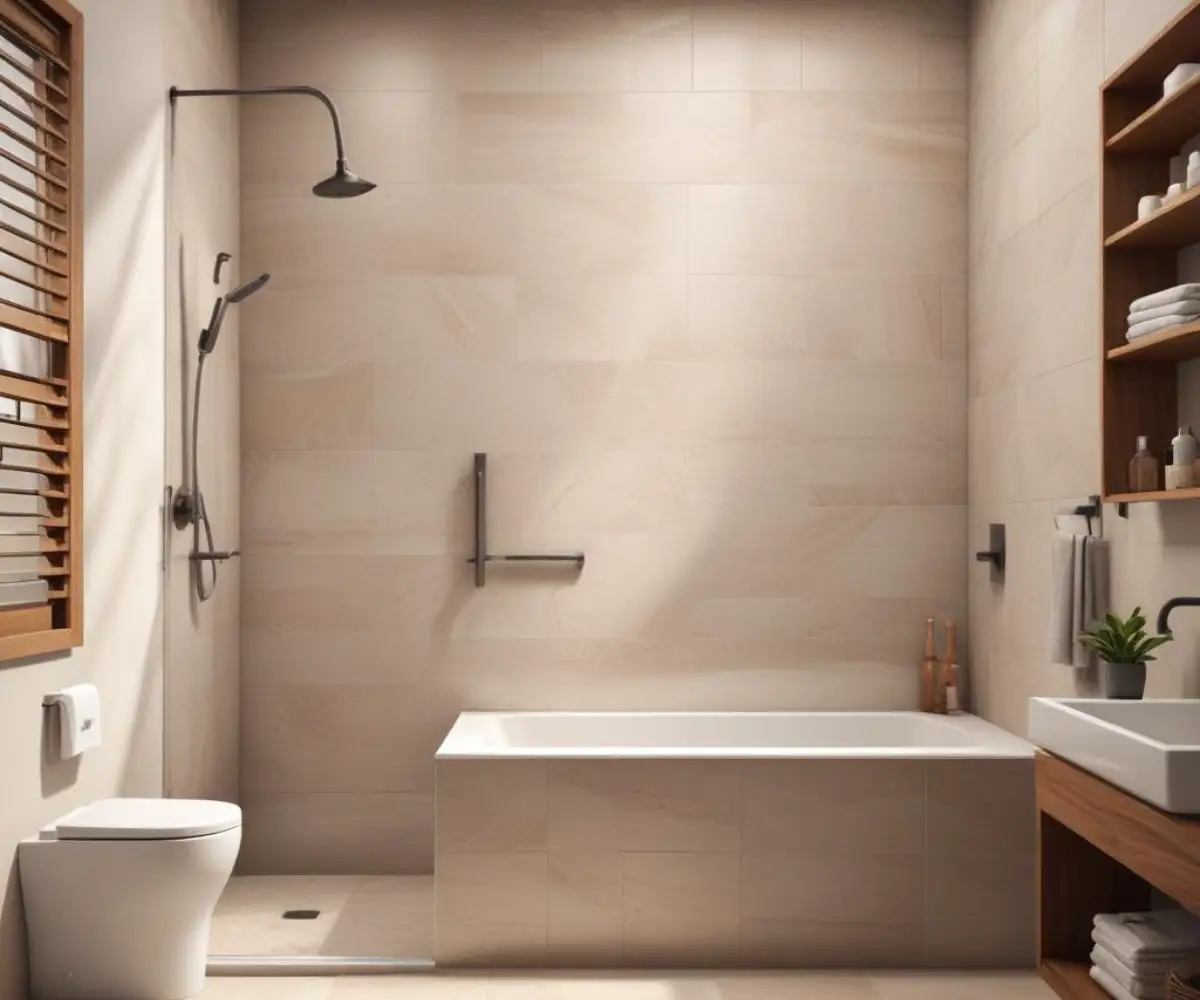
So, you’re dreaming of a modern, spa-like shower. You’ve seen the stunning photos of bathrooms with large, elegant 12×24 tiles, creating a clean look with minimal grout lines. But a nagging question stops you in your tracks: can you actually use 12×24 tile on a shower wall?
The simple answer is yes, absolutely. The more important and complex answer involves understanding that with large format tiles, the margin for error is virtually zero. A small mistake that you could hide with 4×4 inch tiles becomes a glaring, project-ruining disaster with 12x24s.
You'll Learn About
Why 12×24 Tiles Are a Game-Changer for Showers
Large format tiles have surged in popularity for good reason. Using them in your shower creates an immediate sense of luxury and space. The most significant benefit is the drastic reduction in grout lines, which are notoriously difficult to keep clean and free of mildew.
Fewer grout lines mean less maintenance and a cleaner, more seamless appearance. This minimalist aesthetic can make even a small shower feel more open and expansive, turning a purely functional space into a design statement.
The Critical Challenges You Absolutely Can’t Ignore
Before you buy a single tile, you must understand the challenges. Large format tiles are heavy, unforgiving, and demand meticulous preparation. Ignoring these core issues is the #1 mistake that leads to failure, from cracked tiles to catastrophic water damage down the line.
Wall Flatness: The Non-Negotiable Foundation
This is the single most critical factor for success. Standard walls are rarely perfectly flat. With small tiles, you can build up mortar in low spots to compensate, but with a 24-inch tile, that’s impossible. Placing a large tile over a wall with bows or dips will result in lippage—where one edge of a tile is higher than its neighbor—and poor adhesion, leading to loose or cracked tiles.
Professional tile setters follow the standards set by the Tile Council of North America (TCNA), which mandate that for tiles with any edge 15 inches or longer, the wall surface cannot vary by more than 1/8 of an inch over 10 feet. This is an incredibly tight tolerance that your average drywall or cement board installation will not meet without extra work.
Weight and Gravity: Your Biggest Enemies
A single 12×24 porcelain tile can weigh 8 pounds or more. When you cover a shower wall, you’re hanging hundreds of pounds. Standard tile adhesive, often called mastic, is completely inappropriate for this task and should never be used in a wet area.
You need a high-performance mortar specifically designed for large and heavy tiles (LHT). These mortars have a non-sag formula designed to hold the heavy tiles in place on a vertical surface without sliding down the wall while they cure.
Waterproofing: The Unseen Shield
Here’s a truth that surprises many homeowners: cement board is not waterproof. It is water-resistant, meaning it won’t fall apart when it gets wet, but it will absorb moisture and allow water to pass through to the wall studs behind it. Tile and grout are also not inherently waterproof.
Relying on these materials alone will lead to mold, rot, and structural damage. A topical waterproofing membrane, applied over the cement board, is mandatory. This creates a continuous, seamless barrier that prevents any water from ever reaching your wall cavity.
Your Step-by-Step Guide to a Flawless 12×24 Tile Installation
Feeling intimidated? Don’t be. By following a methodical, professional process, you can achieve a stunning result. The key is that 90% of a successful tile job is preparation. The actual act of setting the tiles is the final, easy part.
Step 1: Achieve a Perfectly Flat and Plumb Surface
Start by installing a proper substrate. The best choice is a 1/2-inch cement backer board. Ensure you’re installing it correctly; a solid foundation is crucial, which means avoiding installation over improper surfaces. You can learn more about why a proper substrate matters in our guide on installing cement board over OSB.
Once the board is up, check for flatness using a long, straight edge or a 6-foot level. Identify high spots and low spots. Grind down high spots with a rubbing stone and fill low spots with a patching compound, feathering the edges until the wall is perfectly flat.
Step 2: Absolute Waterproofing is Mandatory
Choose a liquid-applied or sheet membrane system like RedGard or Schluter-KERDI. For a liquid membrane, you’ll first tape all the cement board seams with alkali-resistant mesh tape and thin-set mortar. Once dry, you apply the liquid waterproofing with a roller or brush in two perpendicular coats, ensuring you achieve the required thickness specified by the manufacturer.
Pay special attention to corners and screw heads, ensuring they are thoroughly coated. This seamless barrier is your ultimate defense against water infiltration.
Step 3: Choosing the Right Mortar (and Mixing It Correctly)
As mentioned, you must use a mortar specifically labeled for “Large and Heavy Tile” or “LFT”. These premium mortars are stickier and have non-sag properties. Follow the mixing instructions precisely—the consistency should be like thick peanut butter, able to hold its shape on a trowel held upside down.
Step 4: The Art of Troweling and Back-Buttering
For large tiles in a shower, you need at least 95% mortar coverage on the back of the tile. To achieve this, use a 1/2″ x 1/2″ square-notched trowel. Key the mortar onto the wall with the flat side of the trowel, then comb the mortar in one direction, creating straight, uniform ridges.
Crucially, you must also “back-butter” each tile. This involves spreading a thin, smooth layer of mortar on the entire back of the tile before pressing it into the ridges on the wall. This technique collapses the ridges and ensures full contact, eliminating voids where water could collect.
Step 5: Setting, Spacing, and Leveling
Press each tile into the mortar with firm, even pressure and a slight back-and-forth motion perpendicular to the trowel lines. Using a tile leveling system—consisting of clips and wedges—is highly recommended. These systems lock the tiles together, preventing lippage and ensuring a perfectly flat surface as the mortar cures.
The choice of grout line size is also critical for aesthetics and function. For more on this, see our detailed guide on the perfect grout line size for 12×24 shower tiles.
The Hidden Stress Point: How Tile Layout Impacts Your Shower Niche
One detail that separates an amateur job from a professional one is the shower niche. A common mistake is to frame the niche without considering the tile size and layout. This results in awkward, thin slivers of tile around the niche, which looks unplanned and sloppy.
Before you even install the backer board, you should plan your niche location to align perfectly with your grout lines. The goal is to have full or half tiles bordering the niche, creating a clean, integrated look. This requires meticulous planning but makes a world of difference in the final aesthetic.
Horizontal vs. Vertical: Which Layout is Right for You?
The orientation of your 12×24 tiles can dramatically change the perception of your shower’s space. There is no right or wrong answer, only the effect you wish to achieve. A horizontal layout can make a narrow shower feel wider, while a vertical layout can make a low ceiling feel taller.
Consider the overall design of your bathroom, including the final touches like your fixtures. A sleek, modern tile job pairs beautifully with high-quality hardware. When you’re ready to choose, comparing top brands like in our Moen vs Kohler shower head review can help complete the look.
| Aspect | Horizontal Layout Effect | Vertical Layout Effect |
|---|---|---|
| Perception of Space | Makes the shower feel wider and more expansive. | Draws the eye upward, making the ceiling feel higher. |
| Style / Aesthetic | Classic, serene, and spa-like. Follows traditional patterns. | Modern, dynamic, and contemporary. Offers a more dramatic look. |
| Installation Notes | Often requires more cuts on the side walls of a standard tub surround. | May result in fewer vertical cuts, but layout must be perfectly plumb. |
| Best For… | Narrow or small showers where creating a sense of width is the priority. | Showers with standard or low ceilings that would benefit from a feeling of height. |
Common Questions and Expert Answers
Can I use 12×24 tiles in a very small shower?
Yes, and it’s often a great choice. The minimal grout lines can make a small, cramped shower feel larger and less busy. The key is a well-planned layout to avoid small, awkward cuts in visible areas.
What’s the best grout to use?
For a shower, always choose a high-performance grout that resists stains, mold, and mildew. Epoxy grout is the premium choice for durability and water resistance, but modern urethane or high-performance cementitious grouts are also excellent options. Grout color can also be a major decision, as a poor choice can lead to visible staining, a problem we discuss in our article about marble tile with white grout.
Do I need a special saw to cut 12×24 tiles?
A manual “snap” cutter can work for straight cuts on ceramic tiles, but for porcelain tiles, which are much harder, a wet saw with a high-quality diamond blade is essential. It will give you clean, chip-free cuts, which are necessary for a professional finish, especially around plumbing fixtures and niches.
The Final Verdict: Is 12×24 Tile Your Best Choice?
Using 12×24 tile on your shower wall is not just possible; it’s a fantastic way to create a durable, low-maintenance, and visually stunning bathroom. However, it is not a project to be taken lightly. It demands patience and a commitment to meticulous preparation.
Success lies not in the tile itself but in the system behind it: the flat walls, the complete waterproofing, the correct mortar, and a well-thought-out layout. If you are willing to invest the time in preparation, you will be rewarded with a shower that is both beautiful and built to last a lifetime.