Can You Unscrew a Screw From an Anchor? The Surprising Truth
It’s a scenario every DIY enthusiast has faced. You’ve installed a shelf, a picture frame, or a curtain rod using a drywall anchor. But now, you need to take it down. The simple act of turning the screw counter-clockwise suddenly becomes a frustrating battle. You’re left wondering, can you even unscrew a screw from an anchor?
The short answer is yes, you absolutely can. However, the process isn’t always as straightforward as driving the screw in. A number of factors can turn this simple task into a vexing problem, but with the right knowledge and techniques, you can overcome any challenge.
You'll Learn About
Why Screws Get Stuck: Understanding the Anchor’s Grip
To solve the problem, you first need to understand the mechanics at play behind your wall. Wall anchors are ingenious devices designed to create a secure mounting point in hollow materials like drywall. Their effectiveness hinges on one key principle: expansion and friction.
How Wall Anchors Actually Work
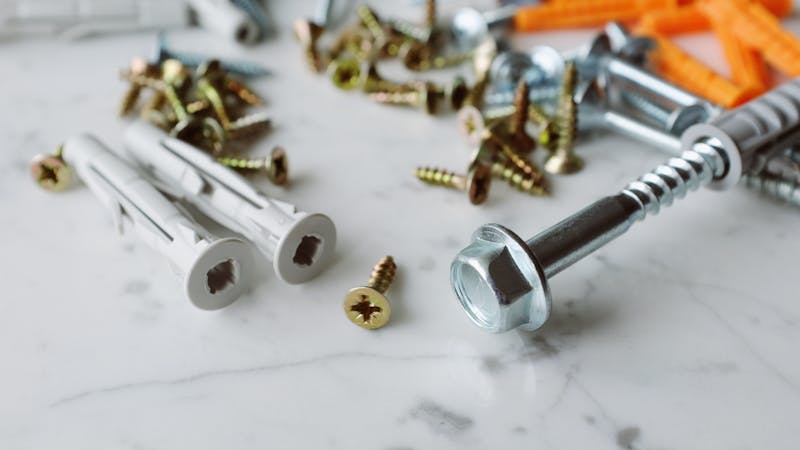
When you drive a screw into a typical plastic expansion anchor, the screw forces the anchor’s body to expand. This expansion pushes the anchor’s fins or ribs firmly against the inside of the drywall. It’s this outward pressure that creates a tight, friction-based grip, preventing the anchor from being pulled out.
Other types, like toggle bolts or molly bolts, have wings or a body that flares out behind the drywall, creating a mechanical lock. In every case, the goal is the same: to distribute the load over a wider area than the screw alone could manage.
Common Culprits Behind a Stuck or Spinning Screw
The very mechanism that makes an anchor strong can also be the source of removal headaches. If you’re struggling to back a screw out, it’s likely due to one of these common issues:
- The Anchor is Spinning: The most frequent problem is that the entire anchor assembly spins in the wall as you turn the screw. This happens when the anchor has lost its friction grip on the drywall, often because the hole was drilled slightly too large or the drywall has softened over time.
- Stripped Screw Head: If the screwdriver slips and damages the recesses in the screw head, you lose the ability to apply torque. The screw is willing to come out, but your tool can no longer grip it.
- Over-tightening Damage: Cranking down too hard on the screw during installation can strip the threads inside the plastic anchor. The screw is no longer engaged with the anchor’s threads, so it just spins in place without backing out.
The Simple Answer: Yes, You Can (Usually) Unscrew It
In an ideal situation, removing a screw from an anchor is simple. The anchor remains firmly lodged in the drywall while the screw backs out smoothly. If you encounter no resistance and the screw is coming out, you’re in luck.
Step-by-Step Guide for a Smooth Removal
For a basic removal, all you need is the correct screwdriver. Apply firm, steady pressure inward on the screw head to keep the screwdriver bit seated. Turn the screwdriver counter-clockwise slowly and deliberately. If the screw begins to emerge, continue until it’s completely free.
What to Do When the Screw Just Spins
The most common frustration is a screw that spins endlessly without backing out. This happens when the anchor itself is spinning in the drywall. The trick is to re-establish the friction that the anchor has lost. This requires a two-part motion: pulling while turning.
The “Pull and Turn” Technique
This is the most effective method for a spinning screw. You need to apply outward pressure on the screw as you turn it. This tension pulls the anchor’s fins or expanded body against the back of the drywall, creating enough friction to stop it from spinning and allow the screw threads to disengage.
You can achieve this by using the claw of a hammer, a pry bar, or a flathead screwdriver. Wedge the tool between the wall and the underside of the screw head. Gently pry outward while you simultaneously turn the screw counter-clockwise with your other hand. You should feel the threads catch, and the screw will begin to back out.
Using Pliers for Extra Leverage
If you have enough of the screw head exposed, you can grip it firmly with a pair of locking pliers or needle-nose pliers. Once you have a solid grip, pull the pliers directly away from the wall while turning them counter-clockwise. This combination of pulling and turning is often all that’s needed to free the screw.

Dealing with a Stripped Screw in an Anchor
A stripped screw head presents a different challenge. The anchor might be perfectly stable, but your screwdriver can’t get a purchase. Fortunately, there are several clever tricks to overcome this.
Rubber Band Method: A Quick Fix
This surprisingly effective method adds extra grip. Place a wide rubber band flat over the stripped screw head. Press your screwdriver bit firmly into the screw head through the rubber band. The rubber will fill the damaged gaps and provide the traction needed to turn the screw. Apply firm pressure and turn slowly.
When to Escalate: Screw Extractor Kits
If simpler methods fail, a screw extractor kit is the professional solution. These kits come with special bits that are designed to bite into damaged metal. You’ll typically use a drill to create a small pilot hole in the center of the stripped screw, then use the extractor bit in reverse to grip the screw and back it out.
| Problem Scenario | Primary Cause | Recommended Solution |
|---|---|---|
| Screw and anchor both spin together. | Anchor has lost its grip on the drywall. | Use the “pull and turn” technique with a pry bar or pliers. |
| Screw spins, but anchor is stationary. | Threads inside the plastic anchor are stripped. | Grip the screw head with pliers and pull directly outward while turning. |
| Screwdriver slips in the screw head. | Screw head is stripped. | Try the rubber band method or use a dedicated screw extractor kit. |
| Screw is stuck and won’t turn at all. | Corrosion or cross-threading during installation. | Apply a penetrating oil, wait, then attempt removal with pliers for maximum torque. |
To Reuse or Not to Reuse? The Great Anchor Debate
Once you’ve successfully removed the screw, you’re faced with a new question: can you reuse the anchor? While technically possible in some cases, it’s generally not recommended, especially for anything that needs to hold significant weight.
When Reusing an Anchor is a Bad Idea
An anchor’s holding power comes from its initial expansion, which permanently alters its shape and compresses the surrounding drywall. Removing and reinserting a screw weakens both the anchor and the drywall. Never reuse an anchor for heavy or critical items like television mounts, grab bars, or heavy shelving. The risk of failure is simply too high.
The Right Way to Reuse an Anchor (If You Must)
If you absolutely must reuse an anchor for a very lightweight object like a small picture frame, proceed with caution. Ensure the anchor is still snug in the wall. When you re-insert the screw, turn it gently. The moment you feel it become snug, stop. Over-tightening it a second time will almost certainly strip the anchor or the drywall, rendering it useless.
Beyond Removal: Dealing with the Aftermath
Successfully removing the screw and anchor is only half the battle. You will inevitably be left with a hole in your wall that needs attention before you can repaint or finish the surface.
Assessing the “Hidden” Drywall Damage
Before you grab the spackle, take a moment to assess the integrity of the drywall around the hole. The process of removing a stubborn anchor can cause damage that isn’t immediately visible. The drywall behind the wall’s paper face can become crushed or weakened.
Gently press on the area around the hole. If it feels soft, spongy, or gives way easily, you’ll need to remove the loose material before patching. A solid patch requires a solid foundation.
Patching the Hole for a Flawless Finish
For small anchor holes, a lightweight spackling compound is sufficient. Use a flexible putty knife to press the compound firmly into the hole, leaving it slightly proud of the wall surface to account for shrinkage as it dries. Once fully cured, a light sanding will leave you with a perfectly smooth, paint-ready surface.
Pro Tips for Preventing Future Anchor Headaches
The best way to deal with anchor problems is to avoid them in the first place. Proper installation is key. Always drill the correct size pilot hole as specified by the anchor manufacturer. An undersized hole makes the anchor hard to insert, while an oversized hole will prevent it from gripping properly.
Additionally, consider the surface you’re working with. Mounting items to a solid surface like concrete requires a different set of anchors and techniques. For instance, if you were to learn how to attach led strip lights to concrete, you would use specialized concrete anchors that are designed for that material’s density, ensuring a secure fit from the start.
Final Thoughts: Conquer Your Walls with Confidence
While a stuck screw in a wall anchor can be a source of immense frustration, it is a solvable problem. By understanding why anchors grip, what causes them to fail, and applying the right techniques like the “pull and turn” method, you can tackle the issue with confidence.
Remember that patience is your best tool. Rushing the process can lead to a bigger hole and more significant wall damage. With a methodical approach, you can successfully remove the screw, repair the wall, and move on to your next project.

