Can You Take a Prehung Door Off Its Frame? The Secret DIY Pros Use
You just brought home a brand new prehung door. It’s a perfect, all-in-one unit, with the door slab already mounted in its frame, promising a simple installation. But then reality hits: you can’t get the bulky frame through a tight hallway corner, or you realize painting it cleanly will be a nightmare.
The name itself, “prehung,” implies a permanent assembly that shouldn’t be tampered with. This creates a common dilemma for many DIYers who fear that taking it apart will ruin the perfect factory alignment, turning a simple project into a costly mistake. The good news is that you absolutely can, and often should, take a prehung door off its frame.
This isn’t a risky hack; it’s a standard procedure used by professionals to make transportation, finishing, and installation significantly easier. This guide will walk you through the entire process, demystifying the steps and ensuring you can handle your new door with confidence.
You'll Learn About
The “Prehung” Myth: Why Separating Your Door and Frame is Often Necessary
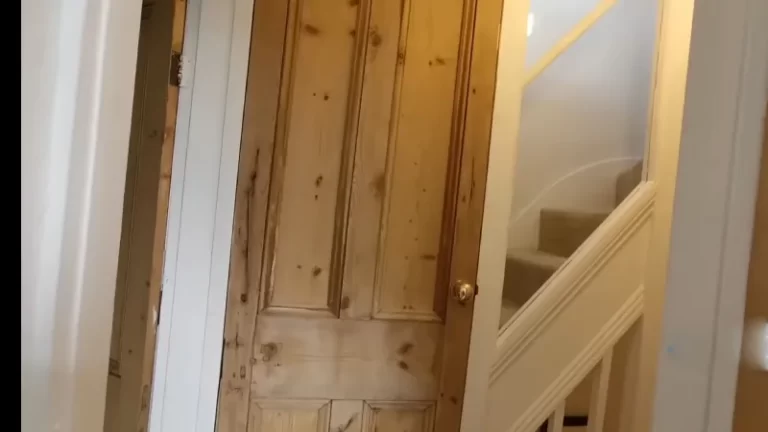
A prehung door is a complete package: the door slab, the side jambs (legs), the head jamb, and the hinges are all assembled and squared at the factory. This unit is designed to save time and guarantee a proper fit when installed into a rough opening. However, the assembly is not permanent and is designed to be taken apart.
Many situations make separating the door from its frame not just an option, but the best course of action. It simplifies logistics and dramatically improves the quality of the final finish. Understanding when to do this is key to a successful project.
Common scenarios include easier transportation through tight spaces, achieving a flawless paint or stain finish, and even making temporary room for moving large furniture. The convenience of the pre-assembled unit is primarily for the installation phase, not for every step that comes before it.
Easier Transportation and Maneuverability
A fully assembled prehung door is a large, heavy, and awkward object. Trying to navigate it up a narrow staircase, around a tight corner, or through an existing doorway can be incredibly difficult and risks damaging the door, the frame, or your walls.
By separating the two main components, you’re left with two much more manageable pieces. The door slab can be carried flat, and the three-sided frame is significantly lighter and less cumbersome. This simple step can prevent a lot of frustration and potential damage.
Achieving a Professional-Grade Finish
One of the biggest reasons professionals separate the door is for painting or staining. Trying to paint a door while it’s hanging in the frame is tedious and often yields sloppy results. You have to carefully tape off all the hinges and hardware, and it’s nearly impossible to get a clean finish where the door meets the jambs.
Removing the door allows you to lay it flat on sawhorses. This horizontal position prevents paint drips and allows you to apply a smooth, even coat with a roller or sprayer for a factory-like finish. It’s also the only way to properly seal the top and bottom edges of the door, a critical step for preventing moisture damage and warping over time.
Temporary Access and Repairs
Sometimes you need to remove the door for reasons that have nothing to do with the installation itself. You might need to move a large appliance, a sofa, or a piano into the room and require the maximum possible opening width.
Additionally, if the door slab gets dented or scratched during the renovation process, removing it from the frame allows you to perform repairs on a stable, flat surface. This is far easier than trying to sand and fill a vertical, swinging door.
Before You Begin: Essential Tools and Preparation
The process of removing a prehung door from its frame is simple and requires only a few basic tools. Having everything ready before you start will ensure the job goes smoothly and safely. Preparation is key to avoiding any damage to your new door.
You will need a stable work area, preferably a pair of sawhorses or a large, clean floor space covered with a moving blanket or cardboard. This protects the door from scratches while you work. Always prioritize safety, as even interior doors can be heavy and awkward to handle alone.
Here are the essential tools for the job:
- Hammer: A standard claw hammer will work perfectly.
- Hinge Pin Punch or Nail Set: This is the ideal tool for tapping out the hinge pins without damaging the hinge or the door. A large nail can also work in a pinch.
- Flathead Screwdriver: Useful for gently prying the head of the hinge pin up if it’s tight.
- Sawhorses: Two sawhorses provide the best and most stable work surface.
- Protective Blanket or Cardboard: To prevent scratches if you have to work on the floor.
The Step-by-Step Guide to Safely Removing the Door Slab
With your tools and workspace prepared, you’re ready to separate the door. The entire process relies on removing the hinge pins, which act as the axle for the door’s swing. This is a straightforward mechanical task that anyone can perform with a little patience.
First, lay the entire prehung unit flat on your sawhorses or protected floor space. This horizontal position is much safer and more stable than trying to do this while the unit is standing up. Ensure the door is well-supported before you begin.
Step 1: Identify the Hinge Pins
Look at the hinges that connect the door to the frame. Each hinge has a long pin that runs through the center of the knuckles. This pin is the only thing, besides gravity, holding the two halves of the hinge together.
Most hinge pins have a small, flat head at the top and are knurled at the very top to hold them in place. You will be tapping the pin out from the bottom.
Step 2: Tap Out the Bottom Hinge Pin
It’s best to start with the bottom hinge and work your way up. Place the tip of your nail set or hinge pin punch on the bottom of the hinge pin. Give the punch a few firm-but-controlled taps with your hammer.
The pin should begin to rise out of the top of the hinge. If the pin is tight, you can use a flathead screwdriver to gently pry under the head of the pin to help lift it. Once it’s loose, you can often pull it out the rest of the way by hand.
Step 3: Remove the Remaining Pins
Repeat the process for the middle and top hinges. Always support the door slab as you remove the last pin, as it will now be completely disconnected from the frame. Having a helper at this stage is highly recommended, especially with a heavy solid-core or exterior door.
A simple yet effective professional tip is to keep track of which pin came from which hinge. You can place a piece of tape on each pin and label them “top,” “middle,” and “bottom.” While the pins are usually interchangeable, putting them back in their original spots can help prevent minor fitment issues later.

Step 4: Lift the Door Away from the Frame
With all the hinge pins removed, you can now carefully lift the door slab straight up and away from the frame. The hinge knuckles on the door will disengage from the knuckles on the frame.
Set the door slab aside in a safe place where it won’t be scratched or damaged. You are now left with the lightweight frame, which is much easier to move and prepare for installation.
The Unspoken Advantage: The Perfect Paint Job
While easier transport is a great benefit, the single biggest advantage of removing the door slab is the vastly superior finish you can achieve. Ask any professional painter, and they will tell you that painting a door off its hinges is the only way to get a truly flawless result.
When the door is laid flat, you eliminate the risk of paint runs and drips that plague vertically painted surfaces. It also allows you to use a high-density foam roller or even a paint sprayer, which are the keys to a smooth, brush-stroke-free finish that looks like it came from the factory.
Most importantly, it allows you to easily paint and seal the top and bottom edges of the door. These are the most vulnerable areas for moisture absorption, which can cause the door to swell, warp, and delaminate over time. Sealing these edges is a critical step that is often skipped when a door is painted in place.
Reassembling Your Prehung Door: The Path to Perfect Alignment
After you’ve moved the frame, painted the components, or completed whatever task required the separation, it’s time to put it all back together. Thanks to the factory’s precise work, reassembly is just as simple as taking it apart. The key is to maintain the original alignment.
First, bring the door slab back to the frame. Carefully lower the door so that the knuckles of the hinges on the door nestle perfectly into the knuckles on the frame. It can help to have a helper to hold the door steady while you focus on alignment.
Start with the top hinge, as this will hold the weight of the door. Slide the corresponding hinge pin (this is where your labels come in handy) into the top of the aligned hinge knuckles. You may need to wiggle the door slightly to get everything perfectly lined up. Once the pin is in, tap it down gently with a hammer until the head is seated firmly.
Repeat this process for the middle and bottom hinges. Once all pins are in place, test the door by swinging it open and closed within the frame. It should move smoothly and have a consistent gap all the way around, just as it did when it left the factory.
Common Mistakes and How to Avoid Them
While the process is straightforward, a few common mistakes can lead to damaged components or a poor fit. Being aware of these potential pitfalls ahead of time is the best way to ensure a smooth, trouble-free experience. The table below outlines these common errors and how to steer clear of them.
| Mistake | Potential Consequence | Solution |
|---|---|---|
| Forcing the Door Out | Damaged hinges, splintered wood on the door or jamb, ruined alignment. | Never use force. The door should lift away easily once all hinge pins are completely removed. |
| Losing or Mixing Up Hinge Pins | A poorly fitting door, squeaky hinges, or a pin that won’t seat properly. | Keep pins organized. Tape them to the hinge they came from or use a labeled bag. |
| Working Alone with a Heavy Door | Dropping the door, causing damage to the door, floor, or yourself. Personal injury. | Always get a helper for solid-core or exterior doors. It is not worth the risk. |
| Removing Shipping Braces Prematurely | The door frame can rack and go out of square, making installation a nightmare. | Leave all temporary braces and clips on the frame until it is placed in the rough opening and ready to be shimmed. |
| Using the Wrong Tool for Pins | Mushrooming the head of the pin, scratching the hinge finish, or denting the wood. | Use a proper hinge pin punch or a nail set. Avoid using a screwdriver to hammer on, as it can slip easily. |
The Bigger Picture: When Disassembly Saves Your Project
Understanding that a “prehung” door is not a permanently fused unit is a game-changer for any DIYer. It transforms a bulky, intimidating object into two manageable components, opening up a world of possibilities for a better finish and an easier installation process.
This knowledge is foundational for many door-related tasks. It’s a similar principle used when working with individual slab doors with hinge cutouts, where alignment is equally critical. It all starts with knowing how the pieces fit together.
Of course, this entire process is predicated on starting with the right-sized unit. Before you even buy the door, you must be confident in your measurements. Accurately determining the required size is a crucial first step, and there are ways to learn how to measure a door without removing trim to ensure you get it right. Getting the size correct, like knowing whether a 30-inch door is truly 30 inches, prevents major headaches down the line.
So, the next time you’re faced with a prehung door, don’t be afraid to take it apart. By following these steps, you’re not breaking it; you’re simply using a professional technique to make your project simpler, safer, and ultimately, more successful. You now have the secret that pros use to achieve a flawless installation every time.