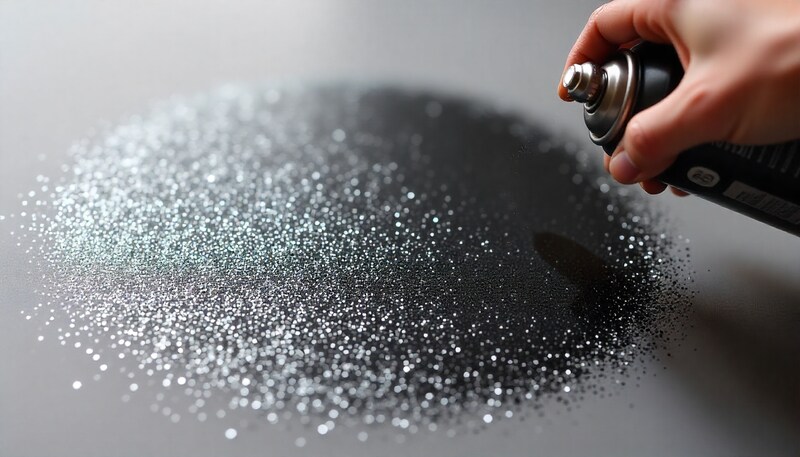
Can You Spray Paint Over Glitter? The Secret to a Flawless Finish
That glitter-covered object, once the star of your decor, now feels dated and out of place. You want to give it a fresh, modern look, but the thought of tackling that sparkling, textured surface is daunting. Can you just spray paint over it and hope for the best? This is a common dilemma for DIY enthusiasts looking to update their items without a complete overhaul.
The hesitation is understandable. Painting over glitter isn’t as straightforward as a typical paint job. The unique properties of a glittery surface present several challenges that can lead to a disappointing, unprofessional finish if not addressed correctly. From poor paint adhesion to a lumpy, uneven texture, the potential for a DIY disaster is high.
You'll Learn About
Why Painting Over Glitter is a Unique Challenge
Successfully spray painting over glitter requires understanding the core problems you’re up against. The very things that make glitter beautiful—its sparkle and texture—also make it a difficult substrate for new paint. Ignoring these challenges is the fastest route to a peeling, bumpy mess.
The primary issue is poor adhesion. Glitter flakes are typically non-porous and slick, creating a surface that paint struggles to grip onto. Furthermore, the adhesive used to bind the glitter can repel the solvents in spray paint, causing the new layer to bead up, crack, or peel off easily once dried.
Another significant hurdle is the uneven texture. Glitter creates a landscape of tiny hills and valleys. Simply spraying over it will often accentuate this texture, resulting in a finish that looks and feels rough. Achieving a smooth, professional-grade surface is impossible without first addressing the underlying bumpy foundation.
The Science of Adhesion on a Glitter Surface
At a microscopic level, paint needs a surface with enough “tooth” or roughness to create a strong mechanical bond. Each individual glitter flake is smooth, offering almost no profile for the paint to grab. This is fundamentally different from porous surfaces like wood or even primed metal, which have microscopic imperfections that welcome paint.
To overcome this, your preparation has to create a new, receptive surface. This involves a combination of mechanical abrasion (sanding) and chemical bonding (priming). The goal is to build a stable bridge between the slick glitter and the new topcoat of spray paint, ensuring a durable and long-lasting finish.
The Essential Prep Work: Your Foundation for Success
Proper preparation is not just a step; it is the most critical phase of the entire project. Rushing this stage will compromise everything that follows. The key to transforming a glittery object is a meticulous three-part process: cleaning, sanding, and priming.
First, clean the surface thoroughly. Use a solution of mild soap and water or a degreaser to remove any dust, oils, or grime. Any contaminants left on the surface will interfere with paint adhesion. Allow the object to dry completely before moving to the next step.
The next step, sanding, is often debated but is non-negotiable for a quality finish. The goal of sanding isn’t necessarily to remove all the glitter, but to scuff the surface. This light abrasion creates the essential “tooth” that primer and paint need to adhere properly. Use fine-grit sandpaper (around 220-grit) and wear a dust mask. If your goal is a glass-smooth finish, more aggressive sanding will be needed to level the texture.
Choosing Your Weapon: The Best Primer for the Job
Primer is the magic ingredient that ensures your spray paint sticks to the challenging glitter surface. It acts as a bonding agent and a surface leveler, hiding minor imperfections and blocking the glitter from showing through. For glitter, not just any primer will do. A high-quality, adhesion-promoting primer is essential.
Shellac-based primers are the gold standard for painting over tricky surfaces like glitter. They offer exceptional adhesion and are fantastic at blocking stains and preventing bleed-through. Oil-based primers are another strong option, providing a durable base. While latex primers are easy to use, they may not offer the same level of adhesion required for a slick, glittery surface.
When selecting a primer, consider the final color. A white or light gray primer is ideal for lighter topcoats, while a darker primer can enhance the richness of deeper colors. This thoughtful approach to priming is similar to tackling other detailed home improvement projects, such as when you need to how to fill gap between tile and wood floor, where the right filler material is crucial for a seamless result.
| Primer Type | Pros | Cons | Best For |
|---|---|---|---|
| Shellac-Based Primer | Excellent adhesion, blocks stains/bleed-through, dries quickly. | Strong odor, requires denatured alcohol for cleanup. | The most reliable choice for glitter, plastic, and glossy surfaces. |
| Oil-Based Primer | Very durable, good adhesion, smooths imperfections well. | Slow drying time, strong fumes, requires mineral spirits for cleanup. | Wood, metal, and surfaces needing a hard, durable finish. |
| Latex (Water-Based) Primer | Low odor, easy cleanup with water, flexible. | May not adhere as well to slick surfaces, can raise wood grain. | Drywall, unfinished wood, and general-purpose interior projects. |
Step-by-Step Guide to a Flawless, Glitter-Free Finish
With your surface prepared and primer selected, you are ready to transform your object. Patience and proper technique are your best friends during the painting process. Rushing will only lead to drips, uneven coverage, and frustration.
Step 1: Apply the Primer
Shake your can of primer vigorously for at least a minute. Holding the can 10-12 inches from the surface, apply a thin, even coat using smooth, sweeping motions. It’s far better to apply two or three light coats than one heavy one, which can lead to drips and long drying times. Allow the primer to dry completely between coats, as recommended by the manufacturer.
Step 2: Smooth the Primed Surface
Once the final coat of primer is fully cured, inspect the surface. It should feel much smoother, but you may still see a faint texture from the glitter. For an ultra-smooth final product, lightly sand the primed surface with very fine-grit sandpaper (320-grit or higher) to knock down any remaining bumps. Wipe away the dust with a tack cloth.
Step 3: Apply the Spray Paint
Now for the main event. Just as with the primer, shake the spray paint can well. Apply the paint in the same manner: multiple thin coats from a distance of 10-12 inches. Maintain a continuous motion, starting and stopping your spray past the edges of the object to prevent thicker buildup at the start and end of each pass. Allow sufficient drying time between coats.
Step 4: Protect with a Clear Coat
While optional for some projects, a clear topcoat is highly recommended for items that will be handled frequently or exposed to wear and tear. A clear sealer will protect the paint from chipping and scratching, add depth to the color, and provide a uniform sheen (matte, satin, or gloss). Apply two to three light coats of the clear sealer, allowing it to dry and cure fully for maximum durability.
Troubleshooting Common Problems
Even with careful preparation, issues can arise. Knowing how to fix them can save your project. If you notice the paint is cracking or wrinkling, it’s often a sign of incompatibility between the paint and the surface or applying a coat before the previous one has dried. The solution is to sand the affected area smooth, re-prime, and repaint.
If the glitter texture is still visible after painting, it means the primer coats were not thick enough to fill the texture. You may need to apply more coats of a high-build or filler primer, sanding between coats, to achieve a level surface. This attention to detail is part of any major home upgrade, much like evaluating power home remodeling windows cost where quality of installation is as important as the product itself.
Beyond the Basics: Long-Term Durability and Material-Specific Tips
The longevity of your new paint job depends heavily on the initial prep work and the final protective coat. For high-traffic items, consider using an automotive-grade clear coat for superior hardness and scratch resistance. Ensuring the object is fully cured—which can take several days—before putting it into use is also crucial for a lasting finish.
The material underneath the glitter also matters. For flexible plastics, a special flexible primer is necessary to prevent the paint from cracking when the object bends. For metal, using a rust-inhibiting primer is essential for outdoor or moisture-prone items. This level of specification is important in all renovation tasks; for instance, understanding a vinyl siding code lookup ensures you’re using the right materials for your home’s exterior.
Conclusion: A Smooth New Beginning is Possible
So, can you spray paint over glitter? The answer is a resounding yes, but only with the right approach. By understanding the challenges of adhesion and texture, and committing to a thorough process of cleaning, sanding, and priming, you can achieve a durable, professional, and flawlessly smooth finish. Don’t let a sparkly past dictate the future of your favorite objects. With these techniques, you can confidently give them a stylish new life.
![What Causes Joint Compound to Mold [And Prevention]](https://fixitinthehome.com/wp-content/uploads/2023/01/black-mold-in-joint-compoun-768x432.jpg)