Can You Insulate a Plastic Shed or Wooden Shed?
Ever opened your plastic shed on a hot summer day and felt a blast of heat that could rival an oven? Or perhaps you’ve ventured in during winter only to find your tools are colder than ice. This is a common problem for plastic shed owners, and it often leads to a crucial question: can you insulate a plastic shed to make it a more stable and usable space?
The short answer is a resounding yes. However, the unique properties of plastic sheds present specific challenges that require thoughtful solutions. Without insulation, these structures are highly susceptible to dramatic temperature swings and condensation, which can damage your stored items.
You'll Learn About
Why Your Uninsulated Plastic Shed is a Problem
Plastic, while durable and low-maintenance, is not a good insulator. This means that the temperature inside your shed will closely mirror the temperature outside. On a sunny day, the plastic can absorb and trap solar radiation, causing the interior to become excessively hot, potentially warping plastic items and damaging sensitive equipment.
In colder months, the reverse happens. The thin plastic walls offer little resistance to the cold, allowing the interior to become frigid. This can lead to liquids freezing and metal tools becoming prone to rust due to condensation.
The Menace of Condensation
Condensation is a major issue in uninsulated plastic sheds. It occurs when warm, moist air inside the shed comes into contact with the cold surfaces of the walls and roof. This moisture can lead to mold, mildew, and rust, creating an unhealthy environment and damaging your belongings.
Proper insulation helps to prevent condensation by keeping the interior surfaces of the shed warmer. When combined with adequate ventilation, insulation is your best defense against moisture-related problems.
Choosing the Right Insulation for Your Plastic Shed
When it comes to insulating your plastic shed, you have several effective options. The best choice for you will depend on your budget, DIY skills, and the specific climate you live in. Let’s explore the most popular and practical solutions.
Rigid Foam Boards: A Popular DIY Choice
Rigid foam boards are one of the most common and effective ways to insulate a plastic shed. These boards, typically made from polystyrene or polyisocyanurate, offer a high R-value (a measure of thermal resistance) for their thickness. They are lightweight, easy to cut, and relatively simple to install.
To install rigid foam boards, you’ll need to measure the wall and roof panels of your shed and cut the boards to fit snugly. You can then attach them using a construction adhesive that is suitable for plastic. For a secure fit, especially on the ceiling, you might also use screws with large plastic washers to prevent them from pulling through the foam.
Reflective Foil Insulation: Battling Radiant Heat
Reflective foil insulation, which often looks like a metallic bubble wrap, is another excellent option, particularly for hot climates. This type of insulation works by reflecting radiant heat, keeping your shed cooler in the summer. In the winter, it can help to reflect heat back into the shed, keeping it warmer.
Installation is straightforward. You can cut the reflective foil to size and attach it to the interior of your shed walls and roof using a strong adhesive or specialized reflective tape. It’s crucial to leave an air gap between the foil and the shed wall for it to be most effective.
Spray Foam Insulation: The Most Complete Seal
For a seamless and airtight layer of insulation, spray foam is an excellent, albeit more expensive, option. It expands to fill every crack and crevice, providing a superior thermal barrier and adding some structural rigidity to the shed. Closed-cell spray foam is the best choice for a plastic shed as it also acts as a vapor barrier, preventing moisture from passing through.
While DIY spray foam kits are available, this method is often best left to professionals to ensure a safe and effective application. Incorrect application can be messy and may not provide the desired results. If you’ve ever dealt with a DIY mishap, you know how frustrating it can be; sometimes a small mistake can lead to bigger problems, like needing to figure out how to get foam insulation out of hair.
| Insulation Type | Average R-Value per Inch | Pros | Cons | Best For |
|---|---|---|---|---|
| Rigid Foam Board | 3.6 – 6.5 | Easy to install, high R-value, moisture resistant. | Can be brittle, requires careful cutting for a snug fit. | DIY enthusiasts looking for a balance of performance and ease. |
| Reflective Foil | Varies (depends on air gap) | Excellent at reflecting radiant heat, lightweight, easy to handle. | Less effective against conductive heat loss, requires an air gap. | Hot climates where radiant heat is the primary concern. |
| Spray Foam | 5.0 – 7.0 (Closed-Cell) | Creates an airtight seal, high R-value, adds structural support. | More expensive, professional installation often recommended. | Those wanting the most effective insulation and air seal. |
Step-by-Step Guide to Insulating Your Plastic Shed
Insulating your plastic shed is a manageable weekend project. Here’s a general guide to get you started, focusing on the popular rigid foam board method.
Step 1: Prepare Your Shed
Start by completely emptying your shed. Give the interior walls and ceiling a thorough cleaning to ensure the adhesive will stick properly. This is also a good time to inspect for any cracks or gaps that need to be sealed with caulk.
Step 2: Measure and Cut Your Insulation
Carefully measure each wall and roof panel. Transfer these measurements to your rigid foam boards and cut them to size using a utility knife. For the best fit, it’s often helpful to create a template out of cardboard first.
Step 3: Install the Insulation
Apply a construction adhesive that is rated for use on plastic to the back of the foam boards. Press each board firmly into place. For overhead panels, you may need to use temporary supports to hold them in place while the adhesive cures. Adding screws with large plastic washers can provide extra security.
Step 4: Seal the Seams
Once all the boards are in place, use a specialized foil tape to seal all the seams between the boards. This will create a continuous thermal barrier and prevent air leaks. This step is crucial for maximizing the effectiveness of your insulation.
Don’t Forget Ventilation
Insulating your shed is only half the battle. To effectively combat condensation, you also need adequate ventilation. Installing a couple of wall vents, ideally on opposite walls, will allow air to circulate and moist air to escape. One vent should be placed low and the other high to encourage natural convection.
Without proper ventilation, you risk trapping moisture inside your newly insulated shed, which can lead to the very problems you’re trying to prevent. The interaction between insulation and airflow is key to a healthy shed environment, much like ensuring proper venting can prevent issues like a new dryer heating element smell in your home.
Can You Insulate a Wooden Shed? A Practical Guide
If you’ve ever tried to use your shed during the colder months, you know that insulation can make a huge difference in comfort. While plastic sheds can be tricky to insulate due to their material properties, wooden sheds offer more flexibility when it comes to adding insulation.
Insulating a wooden shed is a great way to enhance its functionality, making it more suitable for year-round use, whether you’re using it as a workshop, storage space, or even a tiny retreat.
In this guide, we’ll explore how to insulate a wooden shed, the materials you should consider, and the benefits of insulation for your structure.
Why Insulate a Wooden Shed?
Before jumping into the “how,” it’s important to understand why you should insulate your wooden shed. Here are some of the key reasons why insulating your shed makes sense:
-
Temperature Control
A well-insulated wooden shed can help maintain a comfortable temperature year-round. In summer, it will keep the inside cooler, preventing it from turning into a stifling sauna, and in winter, it will keep the warmth inside, reducing the chill and making it usable even in colder weather. -
Energy Efficiency
If you’re using your shed for workshops, offices, or other purposes that require electricity, insulation helps maintain a stable indoor temperature. This minimizes the need for additional heating or cooling, saving on energy costs in the long run. -
Noise Reduction
Insulation helps absorb sound, which can be particularly beneficial if you’re using the shed as a workspace. Whether it’s the sound of tools or music, insulation can help create a quieter, more pleasant environment. -
Condensation Prevention
Insulation helps prevent condensation from forming on the inside of the shed. This is especially important in wooden sheds, as excess moisture can lead to wood rot, mold, and mildew. Insulating your shed helps reduce humidity levels, keeping your belongings dry.
Materials for Insulating a Wooden Shed
When it comes to insulating a wooden shed, several materials can be used, each with its own advantages and disadvantages. Here’s a look at some of the best options:
1. Fiberglass Insulation
Fiberglass is one of the most common materials used for insulation, and it can be a good option for insulating a wooden shed. It’s easy to install, relatively inexpensive, and offers good thermal resistance.
Pros:
-
Affordable and widely available
-
Effective in both hot and cold weather
-
Fire-resistant properties
Cons:
-
Requires protective gear during installation (mask, gloves, goggles)
-
Can be messy to work with
-
Not as environmentally friendly as some other options
2. Rigid Foam Board Insulation
Rigid foam board insulation comes in large, solid sheets that are easy to cut and fit into the walls, ceiling, and floor of your shed. It provides excellent thermal resistance and is highly moisture-resistant.
Pros:
-
High R-value per inch (more effective insulation with less material)
-
Lightweight and easy to cut
-
Moisture-resistant, preventing mold growth
Cons:
-
More expensive than fiberglass
-
Can be difficult to install if you don’t have the proper tools
3. Spray Foam Insulation
Spray foam is one of the most effective types of insulation for sealing gaps and cracks. It’s sprayed directly onto the surfaces inside the shed, expanding to fill the spaces and creating an airtight barrier. This is a more costly option but offers excellent insulation.
Pros:
-
Provides an airtight seal, preventing drafts and moisture
-
Expands into all gaps and cracks, offering superior coverage
-
Helps prevent condensation
Cons:
-
More expensive than fiberglass and foam boards
-
Requires professional installation in most cases
-
Can be messy and difficult to remove
4. Reflective or Radiant Barrier Insulation
Reflective insulation works by reflecting heat away during hot months and keeping it inside during cold months. This type of insulation is especially useful for sheds that get a lot of direct sunlight. It’s a thin, lightweight material that’s easy to install on walls, ceilings, and even the floor.
Pros:
-
Lightweight and easy to install
-
Helps regulate temperatures by reflecting heat
-
Good for sheds in hot climates
Cons:
-
Less effective in cold climates where heat retention is needed
-
Doesn’t provide as much R-value as fiberglass or foam insulation
How to Insulate a Wooden Shed: Step-by-Step Guide
1. Prepare the Shed
Before you start insulating, clear out any items from the shed. You’ll also need to assess the condition of the shed, making sure that there are no leaks, cracks, or structural issues that need attention. Seal up any large gaps or holes in the walls, windows, and doors to ensure that the insulation material works as efficiently as possible.
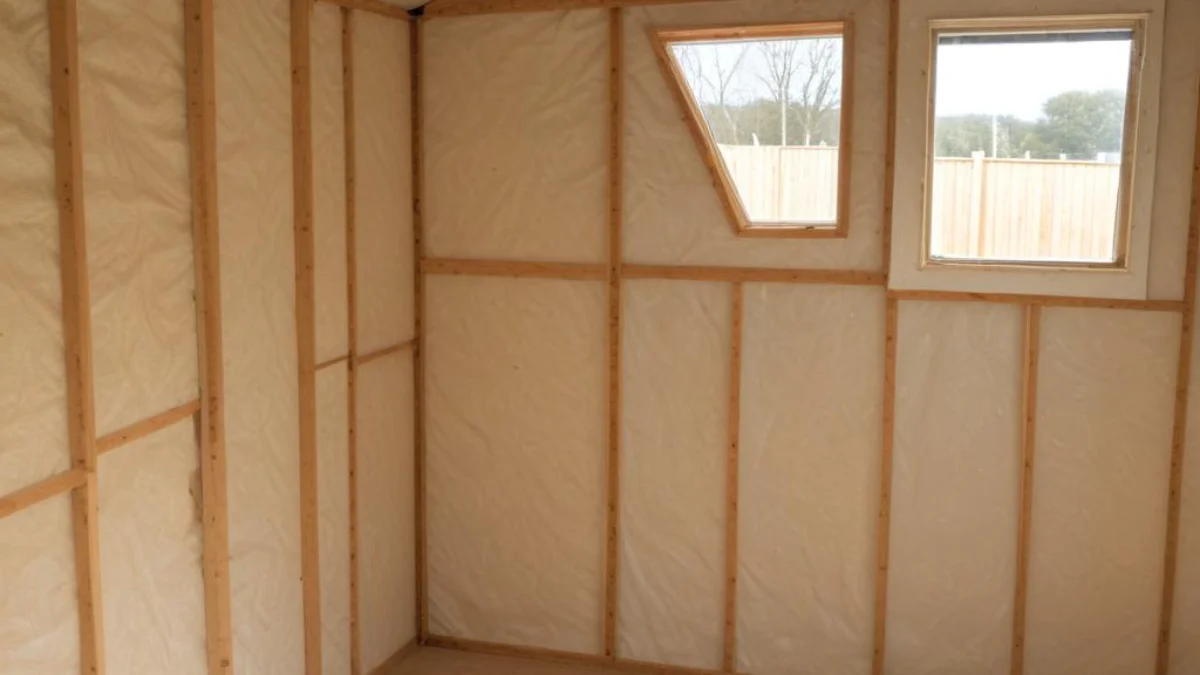
2. Install the Insulation
-
For walls: Start by measuring the wall cavities. Cut your insulation material (fiberglass batts, foam boards, etc.) to fit snugly between the studs. If you’re using fiberglass batts, make sure they fill the cavities without leaving any gaps.
-
For the ceiling: The ceiling of your shed is just as important as the walls. Use the same type of insulation as you did for the walls, making sure it’s installed tightly. Depending on the pitch of your roof, you might need to install extra batt insulation in the rafters.
-
For the floor: If your shed has a wooden floor, adding insulation beneath it can help reduce heat loss. Rigid foam boards work well here, but you may also use fiberglass batt insulation if the shed is on a concrete slab.
3. Seal the Gaps
Once you’ve installed the insulation, make sure to seal any gaps around windows, doors, and other potential leak points with caulk or foam spray. This step ensures that no heat escapes and no moisture gets in.
4. Finish the Interior
After insulating, consider covering the insulation with plywood or drywall. This not only protects the insulation but also provides a more finished look inside the shed.
Finishing Touches for a Usable Space
Once your shed is insulated and ventilated, you can consider adding an interior finish. Covering the insulation with thin plywood or hardboard panels will protect it from damage and give your shed a more polished look. This also provides a solid surface for mounting shelves and hooks.
If you’re planning to run electricity to your shed for lighting or power tools, it’s best to do the wiring before you install the interior panels. In some cases, you might need to plan for things like pipes. Learning how to properly drywall over a protruding pipe can be a useful skill for a tidy finish.
The Verdict: A Worthwhile Investment
So, can you insulate a plastic shed? Absolutely. By choosing the right materials and following the proper steps, you can transform your plastic shed from a simple storage container into a versatile, year-round workspace or a secure place for your valuable belongings.
An insulated plastic shed will be cooler in the summer, warmer in the winter, and drier all year long. This not only protects your stored items from extreme temperatures and moisture but also significantly expands the potential uses of your outdoor space. It’s a worthwhile investment that will pay dividends in comfort and functionality for years to come.