Basement Flooded with Vinyl Plank? Don’t Panic! Here’s What to Do
That sinking feeling in your stomach is all too real. You’ve walked downstairs to find your basement flooded, and your beautiful vinyl plank flooring is underwater. Your first thought might be relief—after all, you chose it because it’s waterproof. But the truth is more complicated.
While vinyl planks themselves can repel water, a flood creates a much bigger problem. Water doesn’t just sit on top; it seeps through the tiny seams between planks, getting trapped between the flooring and the concrete subfloor. This hidden moisture is a ticking time bomb for much more serious issues.
You'll Learn About
The Hidden Danger: Why “Waterproof” Isn’t Flood-Proof
The term “waterproof” applies to the vinyl material itself, not the entire flooring system. When installed, vinyl plank flooring creates a surface with countless micro-seams. During a significant water event like a flood, water is forced under pressure through these gaps, creating a hidden pool on your subfloor.
This trapped water has nowhere to go and won’t dry on its own. It creates the perfect breeding ground for mold and mildew, which can start growing in as little as 24 to 48 hours. This not only creates a musty odor but can also lead to serious health risks and structural damage to your home. In older homes, this cleanup process can sometimes uncover other hidden dangers, making it a good time to check for materials like Masonite board asbestos if your property dates back several decades.
Your Immediate 5-Step Action Plan for a Flooded Basement
Before you even think about the floor, your first priority is safety. Acting quickly and methodically can prevent further damage and keep you safe. Follow these critical first steps.
Step 1: Safety First!
Never step into a flooded basement until you are certain the electricity is turned off. Water and electricity are a lethal combination. Go to your home’s breaker box and shut off all power to the basement area. If you are unsure which breakers control the basement, turn off the main breaker for the entire house.
Step 2: Stop the Water Source
Identify what caused the flood and stop it. This could be a burst pipe, a failed sump pump, or a backed-up drain. A persistent leak, even a small one like a leaking sink drain, can cause immense damage over time if it contributes to the overall moisture problem.
Step 3: Remove All Standing Water
The faster you get the water out, the better. Use a sump pump for large amounts of water or a wet/dry shop vacuum for smaller floods. Once the bulk of the water is gone, use towels and mops to remove the rest from the surface of the vinyl planks.
Step 4: Document Everything for Insurance
Before you move anything, take photos and videos of the damage. Document the extent of the flooding, the high-water mark on the walls, and any damaged items. This evidence is crucial when you file a claim with your homeowner’s insurance.
Step 5: Move Belongings to a Dry Area
Get all furniture, boxes, rugs, and other items off the floor. Move them to a dry, well-ventilated area to prevent them from absorbing more moisture or developing mold. This also clears the space so you can properly address the flooring.
To Pull or Not to Pull? The Critical Vinyl Plank Flooring Decision
Once the standing water is gone, you face the most important question: should you remove the vinyl plank flooring? In almost every case of a significant basement flood, the answer is an unequivocal YES. Even if the floor looks fine, feels dry, or the squishing sound disappears, moisture is almost certainly trapped underneath.
Signs that water is trapped include a spongy or squishy feeling when you walk on the planks, visible water seeping up between the seams, or the beginning of a musty, mildew-like odor. Ignoring these signs is a recipe for disaster. The only way to properly dry the subfloor and prevent a major mold problem is to pull up the flooring.
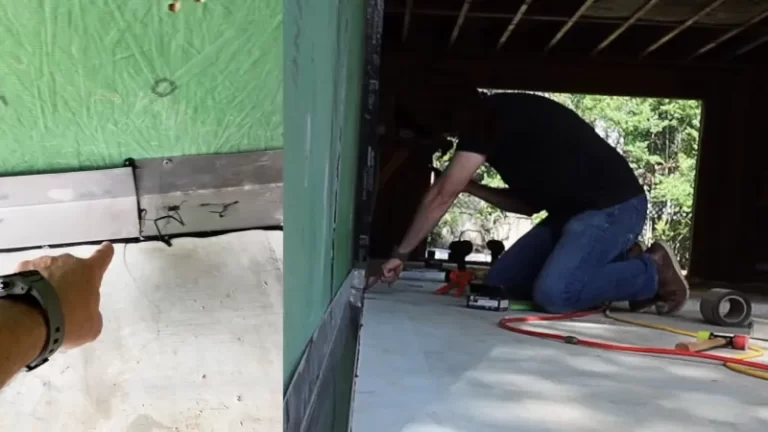
How to Safely Remove Your Vinyl Plank Flooring
If you have a “floating” click-lock vinyl floor, removal is a manageable DIY project. Glue-down vinyl is more difficult and often requires professional help. For click-lock systems, start at a wall and carefully remove the baseboards. Use a pry bar to gently lift the edge of the first row of planks, disconnecting them from the adjoining row. Numbering the back of each plank with a marker as you remove it will make reinstallation much easier.
The Drying Game: How to Win Against Moisture and Mold
With the flooring removed, your primary mission is to get the subfloor and the planks completely dry. This process requires patience and the right equipment; cutting corners here will lead to long-term problems.
Drying the Concrete Subfloor
Your concrete subfloor will have absorbed a significant amount of water. To dry it effectively, you need to create an environment that promotes rapid evaporation. Place several high-powered fans across the basement to keep air circulating continuously over the concrete surface.
Additionally, run a large-capacity dehumidifier 24/7. A good dehumidifier is your most powerful weapon, as it will pull gallons of moisture out of the air and the concrete itself. Expect this drying process to take several days, or even a week or more, depending on the extent of the flooding.
Cleaning and Saving Your Vinyl Planks
The good news is that the vinyl planks themselves can often be salvaged. Lay them out so they are not overlapping, allowing air to circulate around each one. Clean both sides of every plank with a mild detergent and water to remove any dirt or potential contaminants from the floodwater.
Inspect each plank for damage to the click-lock mechanism. Discard any planks that are warped or have broken edges, as they will not create a tight seal when reinstalled. Let the planks dry completely for several days before considering reinstallation.
Reinstallation: Putting Your Basement Back Together
Do not rush to reinstall your floor. The most common mistake homeowners make is reinstalling flooring over a subfloor that still contains moisture. Use a moisture meter to test the concrete; readings should be below 16% before you proceed.
Pre-Installation Checklist
Before you begin, ensure the subfloor is clean, level, and completely dry. This is also a good opportunity to consider adding an underlayment with a built-in vapor barrier for extra protection against future moisture issues. Allow the cleaned vinyl planks to acclimate in the basement for at least 48 hours to adjust to the room’s temperature and humidity.
The Reinstallation Process
If you numbered your planks, reinstallation will be much simpler. Start along the same wall where you began removal and carefully click the planks back into place. Remember to leave a small expansion gap (typically about 1/4 inch) around the perimeter of the room to allow the flooring to expand and contract with temperature changes.
| Factor | Saving Existing Vinyl Planks | Replacing with New Flooring |
|---|---|---|
| Upfront Cost | Low (mostly labor and equipment rental) | High (materials and potentially labor) |
| Time & Effort | High (requires careful removal, cleaning, drying, and reinstallation) | Moderate (requires removal of old floor and installation of new) |
| Final Appearance | Good, but may have minor imperfections or damaged planks | Excellent, perfectly new appearance |
| Peace of Mind | Moderate (success depends on thorough drying to prevent mold) | High (brand new materials with no risk of hidden flood damage) |
Future-Proofing Your Basement Against Floods
Once you’ve recovered from a flood, the last thing you want is a repeat performance. Investing in preventative measures is key. Ensure your property has proper grading that slopes away from the foundation. Installing or upgrading a sump pump and considering a French drain system can provide powerful protection.
Maintaining a watertight home envelope is also crucial. Issues in other parts of the house can sometimes lead to water problems in the basement. For instance, ensuring you have properly sealed sunroom replacement panels can prevent water from entering the structure and eventually finding its way down to the lowest level.
Your Resilient Floor and Peace of Mind
A flooded basement is a stressful event, but it doesn’t have to mean the end of your vinyl plank flooring. While the planks themselves are incredibly resilient, the key to a successful recovery is addressing the moisture trapped beneath them. By acting quickly, removing the floor to dry the subfloor completely, and taking preventative steps for the future, you can restore your basement and enjoy your beautiful, durable floor for years to come.