Bad Crown Molding Job? Here’s the Ultimate Guide to Fix It
Crown molding promises a touch of elegance, a classic finish that elevates a room from ordinary to extraordinary. But when that promise is broken by a botched installation, the result is anything but elegant. It becomes a constant, nagging eyesore that detracts from your home’s beauty.
A bad crown molding job is more than just a cosmetic issue; it’s a source of daily frustration. This comprehensive guide will explore the tell-tale signs of a poor installation, uncover the root causes, and provide actionable solutions to fix the mess and achieve the flawless finish you originally envisioned.
You'll Learn About
Why Your Crown Molding Looks So Bad: Common Signs of a Botched Job
Identifying the specific failures in your crown molding is the first step toward fixing it. A professional-looking installation is seamless, but an amateur job leaves a trail of obvious mistakes. These errors not only look terrible but can also worsen over time.
Gaping Seams and Mismatched Corners
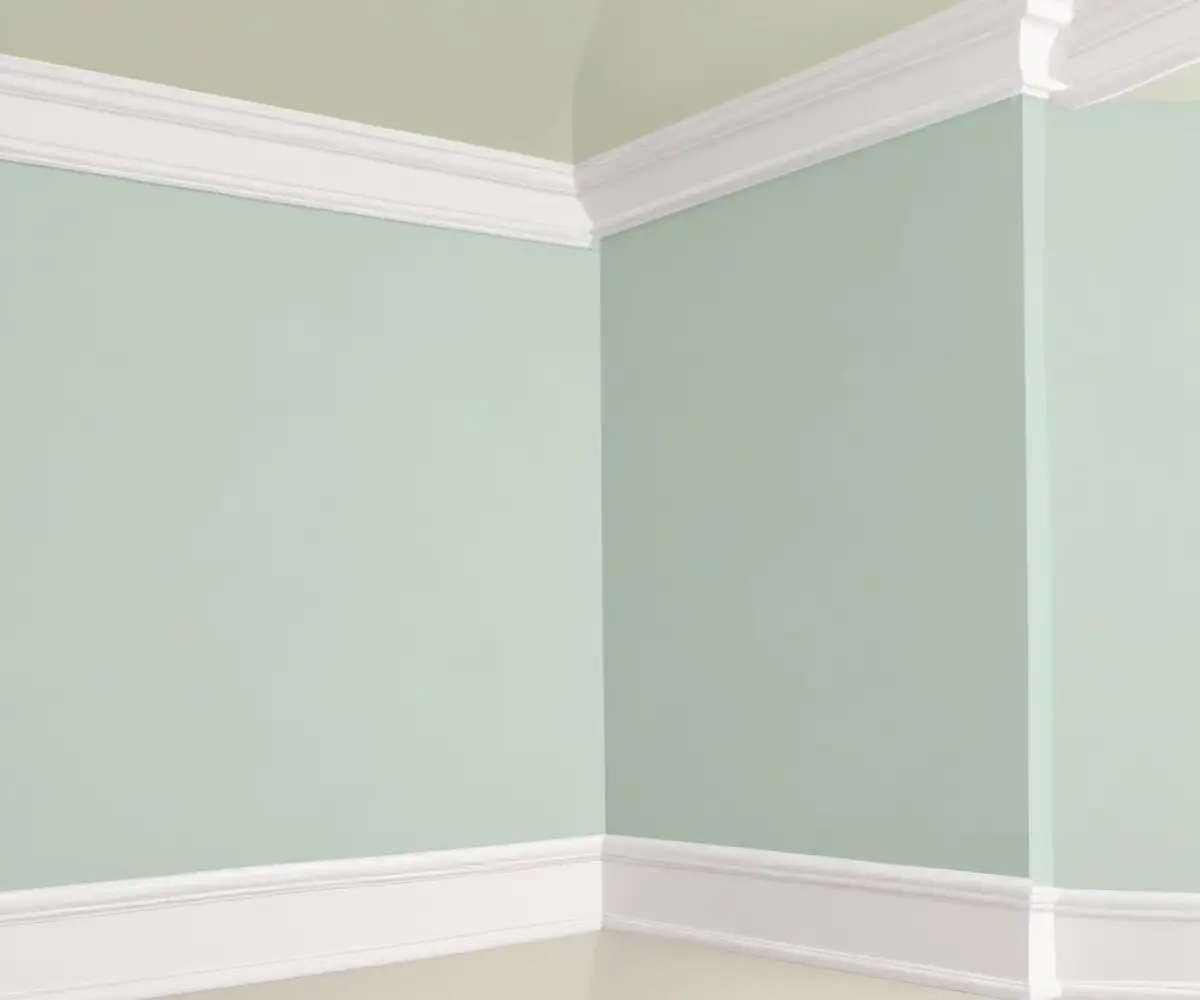
The most glaring sign of a bad crown molding job is found at the corners. Properly installed molding should have tight, almost invisible seams where two pieces meet, especially at inside and outside corners. Gaps, misaligned patterns, and corners that don’t meet crisply are hallmarks of an inexperienced installer.
These issues often stem from incorrect miter cuts, where the angles were not measured or cut precisely to match the corner. It’s a common failure point that instantly signals a low-quality installation.
Wavy Lines and Uneven Installation
Stand back and look at the molding along the length of the wall. Does it appear straight and level, or does it look wavy and uneven? A professional ensures the molding follows a straight, true line, even if the ceiling or wall has minor imperfections.
Wavy molding suggests the installer failed to scribe the molding to the wall or ceiling, or didn’t secure it properly to the studs. This can also happen if the wrong type of adhesive or fasteners were used, causing the molding to sag or pull away over time.
Messy Caulk and Sloppy Paint Finish
Caulk is meant to be a finishing touch that hides tiny imperfections, not a filler for massive gaps. Over-caulking is a desperate attempt to conceal poor cuts and installation. You’ll often see excessive, smeared, or cracked caulk lines along the top and bottom edges of the molding.
Similarly, a poor paint job can ruin the look. Drips, uneven sheen, and paint bleeding onto the walls or ceiling are signs of a rushed and unprofessional finish. The final coat should be smooth and crisp, creating a clean transition between surfaces.
The Root Causes of a Botched Crown molding Installation
Understanding why a crown molding job went wrong is crucial for both fixing it and avoiding a repeat scenario. The issues almost always trace back to a few key areas of failure, from lack of skill to environmental factors.
Installer Inexperience: The Number One Culprit
Crown molding installation is a finishing carpentry skill that requires precision and experience. Many DIY enthusiasts and even general handymen underestimate the complexity of cutting compound miter joints and coping inside corners. An installer without specialized experience is the most common reason for a bad outcome.
They may not own the proper tools, like a quality compound miter saw and a coping saw, or understand the geometry required for perfect fits. This lack of expertise leads directly to the gaps and misalignments that define a bad job.
The Wrong Materials for Your Home’s Climate
Not all molding materials are created equal, and choosing the wrong one for your home’s environment can lead to disaster. Wood molding, for example, is beautiful but susceptible to expansion and contraction with changes in temperature and humidity.
If solid wood molding is installed in a humid environment without proper acclimation, it will swell and shrink, causing joints to separate and cracks to appear. Materials like MDF or polyurethane are more stable in variable climates, but they come with their own installation nuances.
Ignoring a Home’s Imperfections: Uneven Walls and Ceilings
Very few homes have perfectly straight walls and perfectly level ceilings. A skilled installer knows how to compensate for these imperfections. They will scribe the top edge of the molding to match the contours of the ceiling, ensuring a tight fit.
An amateur will simply nail the molding up, leaving noticeable gaps where the wall or ceiling dips and bows. Attempting to fill these large, uneven gaps with caulk will only highlight the problem and lead to a wavy, unprofessional appearance.
The Hidden Impact of Humidity on Crown Molding
Beyond seasonal changes, the ambient moisture level inside your home can sabotage your crown molding. This is especially true for natural wood materials. A persistent issue, such as a clogged furnace filter affecting your humidifier’s performance, can lead to excessively dry or moist air.
This fluctuation causes wood fibers to expand or contract, putting stress on joints and seams. Over time, even a well-installed molding can develop gaps if the home’s interior climate is not stable. This is a critical factor that is often overlooked during initial installation.
Salvage or Start Over? Assessing Your Bad Crown Molding Job
Once you’ve identified the problems, the next decision is whether to attempt a repair or commit to a full replacement. This choice depends on the severity and type of installation errors you’re facing.
Minor Fixes You Can Tackle Yourself
If the overall installation is sound but suffers from minor cosmetic flaws, a DIY repair is often possible. Small gaps in seams or along the wall can be addressed with a high-quality, flexible, paintable caulk. Remember to apply a thin, clean bead and smooth it with a damp finger for a professional look.
Sloppy paint can be corrected by carefully sanding the affected areas, priming, and repainting. Use painter’s tape to create crisp lines between the molding, wall, and ceiling. These small touch-ups can make a significant difference.
When to Call it Quits and Rip it Out
Unfortunately, some jobs are too flawed to save. If you’re dealing with major structural issues like severely mismatched corners, wavy lines due to improper fastening, or molding that is the wrong scale for the room, a replacement is the only true solution. Trying to patch a fundamentally flawed installation is often a waste of time and money.
While ripping out work you paid for is painful, it’s better than living with a constant eyesore. A full replacement allows you to correct all the underlying issues and ensure the job is done right from the start.
Your Step-by-Step Guide to Fixing a Bad Crown Molding Job
If you’ve decided on a full replacement, following a methodical process is key to achieving a professional result. This is a challenging project, but with patience and the right approach, it is achievable.
Step 1: Gather the Right Tools and Materials
Success begins with the right equipment. You will need a high-quality compound miter saw capable of making precise angled cuts. Other essential tools include a tape measure, a stud finder, a coping saw for inside corners, a nail gun (or hammer and finish nails), a pry bar, and a utility knife.
When selecting your new molding, consider the material’s suitability for your home’s climate. The table below outlines the pros and cons of common crown molding materials to help you make an informed choice.
| Material | Pros | Cons |
|---|---|---|
| Solid Wood | Classic look, sharp details, stainable. | Expensive, prone to expanding/contracting, requires acclimation. |
| MDF (Medium-Density Fiberboard) | Inexpensive, stable, smooth finish for painting. | Can be damaged by water, doesn’t hold detail as well as wood, heavy. |
| Polyurethane | Lightweight, waterproof, won’t warp or crack, holds detail well. | More expensive than MDF, can dent easily if not high-density. |
| Polystyrene (Foam) | Very cheap, extremely lightweight, easy to cut and install. | Dents very easily, can look cheap, limited profiles available. |
Step 2: Carefully Remove the Old Molding
Removing the old molding without damaging your walls and ceiling is critical. Start by scoring the caulk lines along the top and bottom of the molding with a utility knife. This prevents the paint from peeling off the wall when you pry the molding away.
Gently insert a pry bar near a corner, using a small piece of wood as a fulcrum to protect the wall. Work your way along the length of the molding, carefully pulling it away from the wall. Be patient to minimize damage to the drywall.
Step 3: Prep the Walls and Ceiling for a Fresh Start
With the old molding removed, you’ll need to prep the surfaces. Pull any remaining nails from the wall and patch the holes with spackle or joint compound. Sand the patches smooth once they are dry.
This is also the perfect time to mark the wall studs using your stud finder. Draw a light pencil line down from the ceiling at each stud location. This will ensure your new molding is securely fastened to the wall framing.
Step 4: Mastering the Perfect Cut and Installation
This is the most critical phase. Measure each wall section carefully—and then measure again. For outside corners, you will typically cut 45-degree miters. For inside corners, the best practice is to use a coped joint for a tighter fit.
A coped joint involves cutting one piece of molding square to the wall and then using a coping saw to cut the profile of the second piece to fit snugly against the first. This technique accommodates out-of-square corners far better than a simple miter. Always cut your pieces slightly long and trim them down for a perfect, snug fit.
Step 5: The Art of Finishing: Caulking and Painting
Once the molding is installed and all nails are set, it’s time for the finishing touches that separate amateur from professional work. Use a flexible, paintable caulk to fill the nail holes and any tiny gaps along the wall and ceiling. Apply a smooth, consistent bead and wipe away the excess immediately.
After the caulk has fully cured, you can prime and paint. A high-quality semi-gloss or satin paint is typically used for trim, providing a durable and elegant finish. Again, use painter’s tape for clean, professional lines.
How to Hire a Pro and Avoid a Bad Crown Molding Job from the Start
If tackling this project yourself seems too daunting, hiring the right professional is the surest way to get the results you want. However, you must be diligent in your selection process to avoid repeating the same mistakes.
Vetting Your Contractor: Questions to Ask
Don’t just hire the first person who gives you a low bid. A quality installation is an investment. Some contractors may offer comprehensive services, and it’s worth asking about their experience with related tasks, especially if you’re considering other upgrades; for instance, some homeowners weigh options like comparing Power Home Remodeling windows vs. Andersen at the same time.
Ask potential installers for a portfolio of their recent trim work. Inquire specifically about their experience with crown molding. Ask them if they use coped joints for inside corners—a professional will always say yes. Check their references and look at online reviews.
Understanding Quotes and Contracts
Get at least three detailed, written quotes. A quote should clearly break down the costs for materials and labor. Be wary of quotes that are significantly lower than others, as this could be a red flag for inexperience or subpar materials.
Your contract should specify the exact type of molding being installed, the project timeline, and the payment schedule. Never pay for the entire job upfront. A typical structure is a deposit to start, with the final payment due upon satisfactory completion of the work.
The Importance of a Detailed Project Plan
A good contractor will discuss the entire process with you. This includes how they will manage the work area and minimize disruption to your home. Managing a home improvement project, even a smaller one, can be inconvenient, so clarity on the process is essential.
Knowing the timeline and what to expect can help you plan accordingly. For homeowners undertaking larger projects, thinking about logistics, such as setting up a temporary bathroom during a renovation, highlights the importance of detailed planning, a principle that applies to all successful home improvements, including your crown molding project.