Backer Rod for Caulking Shower: The Pro Secret to Stop Leaks
You’ve done it before. You spent an afternoon carefully cutting out old, moldy shower caulk, cleaning the joint meticulously, and applying a pristine new bead of sealant. It looks perfect, but a few months later, the dreaded cracks and gaps reappear, letting moisture seep in and creating a breeding ground for mildew. This frustrating cycle happens because caulk alone cannot handle the stress of wide or deep gaps in a shower environment.
The constant expansion and contraction from temperature changes, coupled with the weight of water and movement of the tub or shower pan, puts immense strain on the sealant. When caulk is forced to fill a deep void, it adheres to three sides of the joint—the two walls and the back. This “three-sided adhesion” is the number one enemy of a durable seal; it prevents the caulk from flexing properly, causing it to tear and fail prematurely.
The solution is a simple, inexpensive foam product that professionals swear by: the backer rod. This flexible foam tube is the key to creating a perfect, long-lasting waterproof seal that stands up to the demanding conditions of a shower.
You'll Learn About
What is a Backer Rod and Why is it Essential?
A backer rod is a cylindrical strip of foam, typically made from polyethylene or polyurethane, designed to be inserted into a joint or gap before caulking. Its purpose is threefold: it fills the bulk of the gap to reduce the amount of caulk needed, it creates a consistent depth for the sealant, and most importantly, it acts as a bond-breaker to prevent three-sided adhesion.
By solving these core problems, a backer rod ensures your new caulk bead can properly stretch and move with the joint, dramatically extending its life and keeping your shower watertight. Think of it as the hidden foundation that makes your visible caulk line strong and durable.
The Nightmare of Three-Sided Adhesion
Imagine stretching a rubber band. If you pull it from two ends, it stretches evenly. Now, imagine gluing the middle of that rubber band to a fixed point and then trying to stretch it—it will concentrate stress at the adhesion point and snap much more easily. This is exactly what happens to your shower caulk.
When caulk sticks to the two visible surfaces (like the tile and the tub) and the wall behind them, it cannot properly elongate when the joint expands. The stress is too great, and the sealant rips, usually right down the middle. This failure opens a direct path for water to get behind your tiles and tub, leading to serious water damage and mold growth.
How Backer Rod Creates the Perfect “Hourglass” Seal
The genius of the backer rod is that it provides a surface the caulk will not stick to. When you press the rod into the joint, it creates a two-point adhesion system. The caulk now only adheres to the sides of the joint, leaving the back free to stretch and compress as needed.
This allows you to tool the sealant into a perfect “hourglass” shape. This profile is wider at the adhesion points and thinner in the middle, which is the ideal geometric shape for a flexible joint. It maximizes the caulk’s ability to move without tearing, ensuring a waterproof seal that can last for years, not months.
Choosing the Right Backer Rod for Your Shower Project
Selecting the correct backer rod is critical for success. The two primary factors to consider are the material type (open-cell vs. closed-cell) and the diameter. For a wet environment like a shower, the choice is straightforward, but getting the size right is essential for a professional result.
Open-Cell vs. Closed-Cell: A Critical Distinction
Backer rods come in two main types: open-cell and closed-cell foam. Open-cell foam is like a sponge; it’s very soft and compressible, but it can absorb and hold water. This makes it completely unsuitable for a shower, where trapped moisture would lead directly to mold and rot.
Closed-cell backer rod is the only choice for a shower. This type of foam has a dense, water-repellent skin that blocks moisture. It is slightly more rigid than open-cell foam but provides the waterproof barrier necessary to protect the joint and ensure a lasting seal. Using the right material is non-negotiable for any wet area application.
Sizing is Everything: Getting the Perfect Fit
To work effectively, the backer rod must fit snugly within the joint. The golden rule is to choose a backer rod that is approximately 25% larger in diameter than the widest part of the gap. For example, if your gap is 1/2 inch wide, you should use a 5/8 inch backer rod.
This oversizing allows the rod to compress slightly upon insertion, creating tension that holds it firmly in place at the correct depth. A rod that is too small will fall into the joint, while one that is excessively large will be difficult to install and may stretch or damage the joint. Taking a quick, accurate measurement is a crucial step.
| Feature | Closed-Cell Backer Rod | Open-Cell Backer Rod |
|---|---|---|
| Water Resistance | Excellent (Waterproof) | Poor (Absorbs Water) |
| Recommended Use | Showers, Bathtubs, Siding, Windows, Concrete | Interior Drywall, Furniture, Sound-Proofing |
| Compressibility | Good | Excellent |
| Vapor Permeability | Very Low | High |
Your Step-by-Step Guide to Using Backer Rod in a Shower
Using a backer rod is a simple process that adds only a few minutes to your caulking project but yields significantly better results. Follow these steps for a professional-grade, waterproof seal.
Step 1: Preparation is Key
A successful caulk job begins with a perfectly prepared surface. Start by removing every trace of the old caulk using a caulk removal tool or a utility knife, being careful not to scratch the surfaces of your tile or tub. For stubborn residue, use a silicone remover solvent.
Once the old caulk is gone, clean the joint thoroughly with isopropyl alcohol to remove any soap scum, oils, and dust. The joint must be completely clean and dry for the new sealant to adhere properly. Skip this step, and your new caulk is guaranteed to fail.
Step 2: Measuring the Gap and Cutting the Rod
Use a tape measure to determine the width of the gap at its widest point. Select a closed-cell backer rod that is about 25% larger than this measurement. Cut the backer rod to the length of the joint you are sealing.
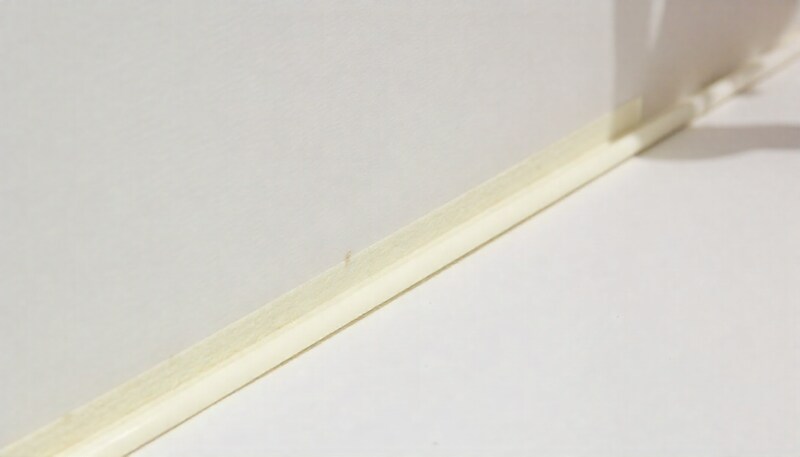
Step 3: Inserting the Backer Rod
This is the most crucial step. Using a blunt tool—such as a 5-in-1 tool, a thin putty knife, or even your fingertips—gently press the backer rod into the joint. Be careful not to use a sharp object like a screwdriver, as puncturing the waterproof skin of a closed-cell rod can cause gas to escape and create bubbles in your curing sealant.
The goal is to set the rod to a consistent depth, typically about 1/4 inch below the surface. This depth creates enough space to apply a substantial bead of caulk, forming that ideal hourglass shape for maximum flexibility and durability.
Step 4: Applying the Sealant
With the backer rod in place, it’s time to caulk. Use a high-quality, 100% silicone sealant designed for kitchens and baths, as these contain mildewcides. Cut the nozzle of the caulk tube at a 45-degree angle to a size that matches the joint.
Apply a steady, consistent bead of caulk over the backer rod, ensuring it makes full contact with both sides of the joint. Immediately after applying the caulk, tool the bead with a caulk finishing tool or a wet finger to press the sealant into the joint and create a smooth, professional finish. Allow the caulk to cure completely according to the manufacturer’s instructions before exposing it to water.
Common Mistakes to Avoid
While the process is straightforward, a few common errors can undermine your efforts. Being aware of these pitfalls will help you get the job done right the first time.
Using the wrong type of backer rod is the most critical mistake. Never use open-cell backer rod in a shower or any wet location. Also, avoid using materials like foam insulation boards for filling gaps, as they are not designed for this purpose; proper installation with products like Sentinel Foam Board Installation is crucial for their intended use.
Incorrect sizing is another frequent issue. A rod that is too small won’t stay in place, while one that’s too large can be impossible to insert correctly. Always measure the gap and buy the corresponding size.
Puncturing the rod during installation with a sharp tool can compromise a closed-cell rod, leading to bubbles in your sealant. Always use a blunt instrument to press it into the joint.
Frequently Asked Questions
Here are answers to some common questions about using backer rod for a shower caulking project.
What if the gap is too small for even the thinnest backer rod?
If the gap is less than 1/4 inch wide and deep, a backer rod is generally not necessary. For these smaller joints, focus on applying a high-quality 100% silicone sealant and tooling it into a proper concave shape. The principles learned from understanding gaps are universal, whether you’re trying to How to Insulate Glass Block Windows or seal a small shower corner.
What kind of caulk should I use over the backer rod?
Always use a 100% silicone sealant that is rated for kitchens and baths. These sealants offer excellent flexibility, adhesion, and resistance to mold and mildew, making them perfect for the high-moisture environment of a shower. This is a key step, whether you decide to Replace Grout With Caulk in Shower or are just resealing existing joints.
How long will a caulk joint with a backer rod last?
While no caulk job lasts forever, a properly installed sealant joint using a backer rod can easily last 5-10 years or more, whereas a joint without one may fail in as little as 6-12 months. The small investment in time and materials pays off with a vastly more durable and protective seal.
A Final Word
Stop fighting a losing battle with failing shower caulk. The presence of a wide, deep gap is often the root cause of the problem, and simply injecting more caulk into it will only lead to the same result. By incorporating a closed-cell backer rod into your process, you can solve the underlying issue of three-sided adhesion.
This professional technique creates a flexible, durable, and truly waterproof seal that protects your home from water damage and mold. The next time you face a caulking project, remember this simple foam rod—it’s the secret to getting the job done right.