Aunt Nellie’s Pickled Beets Recipe: The Ultimate Copycat
There’s a certain magic to the sweet, tangy, and perfectly crisp bite of Aunt Nellie’s pickled beets. For many, it’s a taste of nostalgia, a staple at family gatherings, and a trusted pantry favorite. But what happens when you want that specific flavor in a larger batch, desire to use fresh beets from your garden, or simply wish to avoid store-bought preservatives and high-fructose corn syrup? The quest for a perfect Aunt Nellie’s pickled beets copycat recipe begins, but it’s often fraught with disappointing results.
The common problem is a failure to replicate that signature texture and taste. Many homemade attempts end in mushy, overly soft beets that lack the delightful firmness of the original. Others miss the mark on the flavor balance, resulting in a brine that is either too harsh with vinegar or cloyingly sweet. This guide provides the solution: a meticulously developed copycat recipe and professional techniques to ensure your homemade pickled beets are indistinguishable from the beloved Aunt Nellie’s version, every single time.
You'll Learn About
Deconstructing the Signature Aunt Nellie’s Flavor
To create a successful copycat, one must first understand the original. The ingredient list for Aunt Nellie’s Pickled Beets is refreshingly simple: beets, water, high fructose corn syrup, vinegar, salt, and spice. This tells us several key things. The sweetness is prominent, the vinegar provides a sharp tang, and a subtle, warming spice blend rounds out the flavor profile. The “spice” is likely a simple, classic combination such as allspice and cloves, which are traditional in many sweet pickle recipes.
The true secret, however, lies in the perfect ratio of these components. It’s not just about sweetness; it’s about a balanced sweet-sour dynamic that enhances the natural earthy flavor of the beets without overpowering it. Our recipe focuses on recreating this delicate equilibrium using standard household ingredients, replacing high-fructose corn syrup with granulated sugar for a cleaner, more traditional sweetness.
The Ultimate Aunt Nellie’s Pickled Beets Copycat Recipe
This recipe is designed to produce pickled beets with the iconic flavor and, most importantly, the firm texture that defines Aunt Nellie’s. It relies on precise cooking times and the right ingredients to achieve perfection. Follow these steps closely to avoid the common pitfalls of homemade pickled beets.
The foundation of this recipe is controlling the initial cooking of the beets. Overcooking the beets before they are pickled is the primary cause of a mushy final product. The goal is to cook them until they are just fork-tender, meaning a fork can pierce them with slight resistance, but they are not soft. They will continue to soften slightly in the hot brine and during the canning process.
Key Ingredients for Success
For the most authentic result, fresh, high-quality ingredients are non-negotiable. Choose small to medium-sized beets, as they tend to be sweeter and more tender than larger ones. For the brine, use a standard white distilled vinegar with 5% acidity, which is crucial for safe canning and achieving the correct flavor profile. Finally, use non-iodized salt, such as pickling salt or sea salt, to prevent the brine from becoming cloudy.
Here is a breakdown of the ingredients needed. The table below provides quantities for producing approximately four pint-sized jars, but it can be easily scaled up or down depending on your needs.
| Ingredient | Quantity (for 4 Pints) | Notes |
|---|---|---|
| Fresh Beets | Approx. 4 pounds (about 12-15 medium beets) | Choose firm beets with smooth skin. |
| White Distilled Vinegar | 3 cups | Must be 5% acidity for safety and flavor. |
| Water | 1 ½ cups | Use filtered or distilled water for a clearer brine. |
| Granulated Sugar | 2 cups | Adjust slightly to your preference, but this ratio is key. |
| Pickling or Sea Salt | 1 ½ teaspoons | Do not use iodized table salt. |
| Whole Allspice | 1 teaspoon | Using whole spices prevents a cloudy brine. |
| Whole Cloves | ½ teaspoon | Adds a subtle, warm spice note. |
Step-by-Step Instructions
1. Prepare the Beets: Start by washing the beets thoroughly. Trim the tops, leaving about one inch of the stem attached, and leave the root tail intact. This prevents the beets from “bleeding” their color and flavor into the cooking water. Place the beets in a large pot and cover with water. Bring to a boil and cook until just fork-tender, which can take anywhere from 25 to 45 minutes depending on their size. Drain the beets and place them in a bowl of ice water to stop the cooking process and make them easier to peel.
2. Peel and Slice: Once the beets are cool enough to handle, the skins should slip off easily with your hands. Use a paring knife to trim the stem and root ends. You can leave small baby beets whole or slice larger beets into uniform ¼-inch thick rounds, just like the classic Aunt Nellie’s style.
3. Prepare Jars and Brine: If you are canning the beets, wash your jars and lids in hot, soapy water and keep the jars hot until you are ready to pack them. In a separate, non-reactive saucepan (like stainless steel or enamel), combine the vinegar, water, sugar, and salt. Place the whole allspice and cloves into a spice bag or a piece of cheesecloth tied securely. Add the spice bag to the saucepan. Bring the brine to a rolling boil, stirring until the sugar and salt have completely dissolved. Reduce the heat and let it simmer for about 5 minutes to infuse the flavors. Remove the spice bag before canning.
4. Pack and Process: Tightly pack the sliced or whole beets into your prepared hot jars, leaving about ½-inch of headspace at the top. Ladle the hot brine over the beets, ensuring they are completely covered but still maintaining the ½-inch headspace. Use a bubble remover tool or a clean chopstick to run along the inside of the jars and release any trapped air bubbles. Wipe the jar rims clean with a damp cloth to ensure a proper seal. Place the lids and screw bands on, tightening until just fingertip-tight.
5. Canning for Shelf Stability: For long-term storage, place the jars in a water bath canner. Ensure the jars are covered by at least one inch of water. Bring the water to a full rolling boil and process the jars for 30 minutes (for both pints and quarts), adjusting the time for your altitude if necessary. After processing, turn off the heat, remove the canner lid, and let the jars stand in the hot water for 5 more minutes before removing them to a towel-lined countertop to cool undisturbed for 12-24 hours. You will hear the satisfying “ping” as the lids seal. If you’re not canning, you can simply let the jars cool and store them in the refrigerator for up to 6 weeks. For best flavor, allow the beets to sit for at least a week before enjoying.
Mastering the Texture and Clarity
The difference between good pickled beets and great ones often comes down to small, crucial details. Beyond the basic recipe, mastering a few key techniques will elevate your homemade beets to a professional level, ensuring they have the perfect crispness and a crystal-clear brine that looks as good as it tastes.
Many recipes overlook the science behind pickling. The acidity of the vinegar not only preserves the beets but also interacts with their cellular structure. By controlling temperature and using the right ingredients, you can manipulate this process to achieve the ideal texture. A clear brine is also a hallmark of quality, indicating a clean process and pure ingredients.
The Secret to Crisp Beets
The most critical factor for a firm texture is to avoid overcooking the beets initially. They should be cooked only until a fork can pierce them with some resistance. The subsequent hot brine bath and canning process will continue to soften them slightly, bringing them to the perfect consistency. Immediately plunging the cooked beets into an ice bath is a vital step that halts the cooking process, preventing them from becoming mushy while they wait to be peeled and sliced.
Another advanced technique involves the type of beet used. While any beet will work, varieties known for holding their shape and color, like ‘Detroit Dark Red’, are excellent choices for canning. These varieties tend to have a denser flesh that stands up well to the pickling process.
Achieving a Crystal-Clear Brine
A cloudy brine can be unappealing and is usually caused by one of three things: using the wrong salt, impurities in the water, or using ground spices. Always use non-iodized salt like pickling salt or pure sea salt. The anti-caking agents in regular table salt can cause the liquid to become cloudy. Similarly, hard water with a high mineral content can affect clarity; using distilled or filtered water is a simple solution for a brilliantly clear brine.
Furthermore, while ground spices are potent, they release fine particles that cloud the pickling liquid. Using whole spices, contained in a cheesecloth bag that can be easily removed, infuses the brine with pure flavor without compromising its appearance. This small step makes a significant visual difference in the final product.
Safe Canning and Storage Practices
Properly canning your pickled beets ensures they can be safely stored in your pantry for up to 18 months, ready to be enjoyed at a moment’s notice. The high acidity of the vinegar brine makes pickled beets suitable for water bath canning, a straightforward process that doesn’t require a pressure canner. Safety is paramount, so following tested procedures is essential.
Before you begin, inspect all your canning jars for nicks or cracks and discard any that are damaged. Wash jars and lids in hot, soapy water. Jars must be kept hot to prevent them from breaking when the hot brine is added. You can do this by keeping them in the simmering water of your canner until they are ready to be filled. The processing time of 30 minutes in a rolling boil is crucial to destroy any potential spoilers and to ensure a strong vacuum seal. After processing, let the jars cool naturally on the counter for at least 12 hours. Do not rush this process or expose them to cold drafts, as this can cause seal failure.
Troubleshooting Common Pickling Problems
Even with a great recipe, issues can arise. Here’s how to troubleshoot some common problems:
- Mushy Beets: This is almost always due to overcooking the beets before pickling. Next time, reduce the initial boiling time.
- Cloudy Brine: The culprit is likely iodized table salt, hard water, or ground spices. Stick to pickling salt, distilled water, and whole spices.
- Beets Lost Their Color: Leaving the stem and root on during the initial boil helps retain color. Some beet varieties also hold their color better than others.
- Jars Didn’t Seal: This can happen if the jar rims were not wiped clean, if the bands were screwed on too tightly, or if the processing time was too short. Any unsealed jars should be refrigerated and eaten within a few weeks.
When organizing your kitchen for a canning project, having everything in its place is key. A clear counter space near your stove is ideal. If you’re considering the layout of your kitchen, the proximity of your primary food prep areas is important. For instance, having your refrigerator next to the sink can create an efficient workflow for washing and preparing produce.
Creative Ways to Enjoy Your Homemade Pickled Beets
While delicious on their own as a simple side dish, these copycat Aunt Nellie’s pickled beets are incredibly versatile. Their sweet and tangy flavor can elevate a wide range of dishes, adding a vibrant splash of color and a complex taste that balances rich and savory foods.
Think beyond the relish tray. Finely dice the beets to create a vibrant relish for burgers or hot dogs. Slice them into salads for a sweet and earthy counterpoint to bitter greens and creamy cheeses like goat cheese or feta. They are also a fantastic addition to grain bowls, pairing beautifully with quinoa, farro, and roasted vegetables. For a classic combination, serve them alongside a rich, savory pot roast or pork shoulder, where their acidity cuts through the fat and brightens the entire plate.
You can even use the brine itself. Whisk it with a good quality olive oil to create a flavorful vinaigrette for salads. The beautiful pink hue of the brine can also be used to make stunning pickled eggs. Setting up a dedicated canning station on a sturdy counter is a great way to streamline your preserving process. It’s always wise to ensure your surfaces can handle the load, which brings to mind the surprising importance of understanding structural limits, even for something as simple as asking how much weight can a kerdi curb hold in a bathroom renovation—the principles of stability are universal. Handling large, heavy pots of boiling water also requires a good grip; if you ever find your appliances hard to manage, you might even wonder, can you add handles to a fridge for better leverage?
The Rewarding Taste of Homemade Perfection
Replicating a beloved commercial product at home is a deeply rewarding experience. This Aunt Nellie’s pickled beets copycat recipe empowers you to create a pantry staple that is not only delicious but also made with simple, wholesome ingredients you control. By mastering the key techniques of cooking the beets to the perfect tenderness, balancing the sweet and tangy brine, and adhering to safe canning practices, you can enjoy the iconic taste you love anytime.
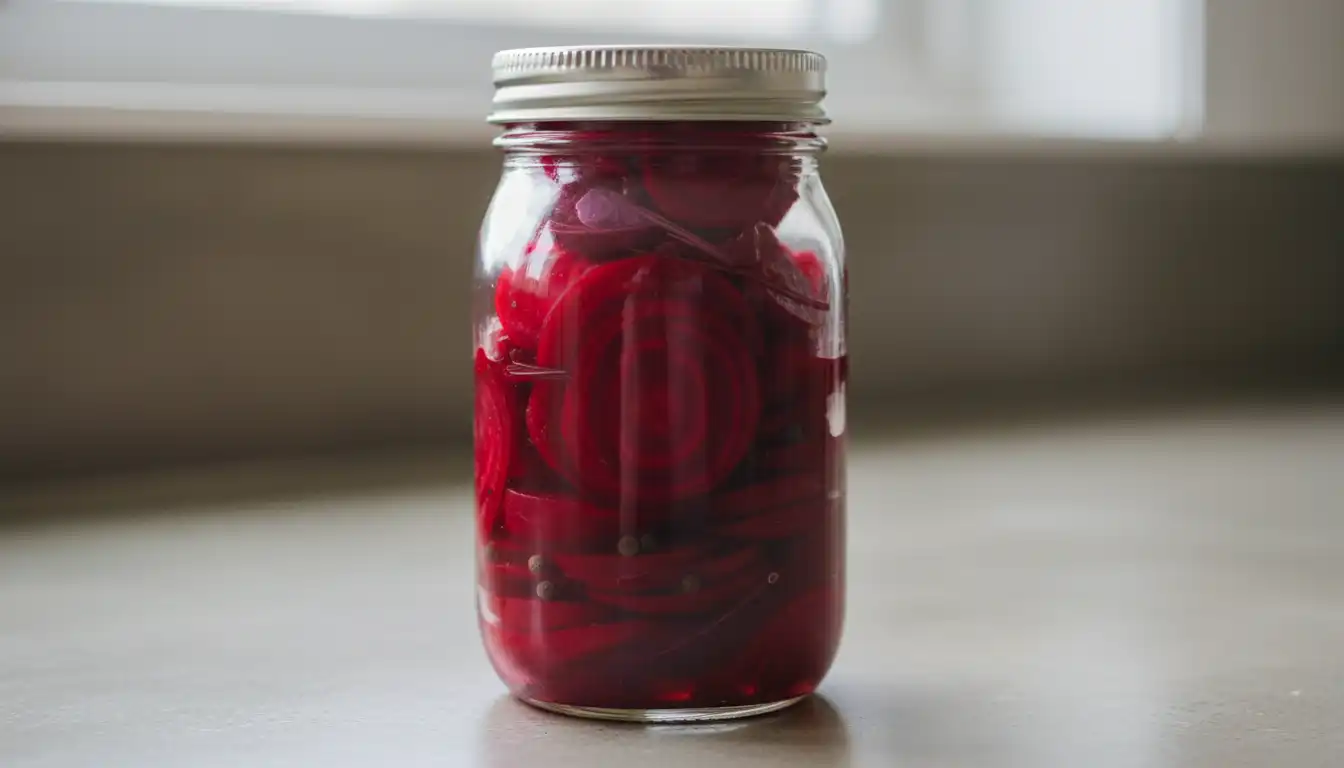
The result is a jar of shimmering, jewel-toned beets that are crisp, flavorful, and endlessly versatile. Whether you’re preserving the bounty from your garden or simply stocking your pantry with a taste of home, this recipe provides a clear path to pickled beet perfection.
Conclusion
Finding the secret to that perfect balance of earthy sweetness and sharp acidity is the key to unlocking the signature flavor at home. By mastering the ratio of sugar to vinegar and infusing the brine with the right warming spices, you can transform a fresh harvest into a shelf-stable treasure.
Recreating this classic isn’t just about the taste; it’s about honoring a culinary tradition while taking full control of your ingredients. Once you nail the brine, you’ll have a pantry staple that rivals the original, ensuring that the nostalgia of Aunt Nellie’s remains a delicious, wholesome part of your family’s table for years to come.