Attic Open? The Hidden Dangers & How to Seal It Now
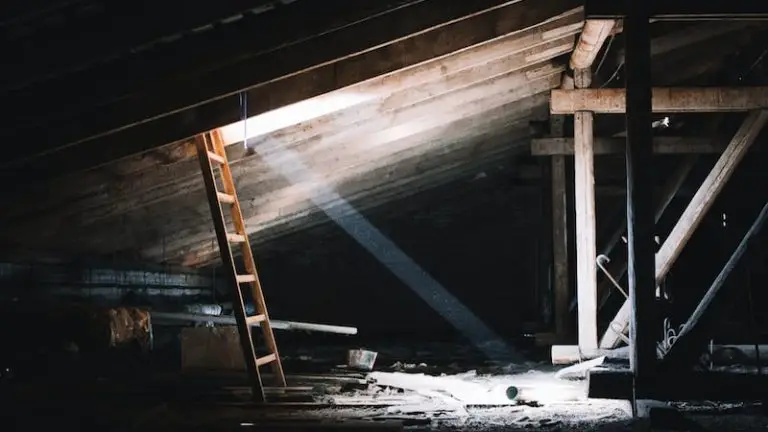
That unassuming square in your ceiling—the attic hatch—is one of the most overlooked yet significant sources of problems in a home. Many homeowners treat it as just a simple door, but an unsealed or poorly insulated attic opening acts like a major leak in your home’s protective barrier. This single weak point can quietly drain your wallet, compromise your comfort, and even impact your health.
Leaving your attic open to the rest of your home is like leaving a window wide open all year round. It creates a direct pathway for conditioned air to escape and for outside problems to enter. Understanding the risks is the first step toward a more efficient, comfortable, and healthier living environment.
You'll Learn About
The Hidden Dangers Lurking Above: Why an Open Attic Is a Major Problem
An improperly sealed attic access is far more than a simple draft. It’s an energy black hole, a welcome mat for pests, and a source of moisture and air quality issues that can have serious consequences for both your home’s structure and your family’s well-being.
Sky-High Energy Bills: The Great Air Escape
The most immediate and costly consequence of an open attic is massive energy loss. During winter, the warm air you pay to heat naturally rises due to a phenomenon called the “stack effect.” An unsealed attic hatch provides the perfect escape route, forcing your heating system to work overtime to maintain a comfortable temperature.
In the summer, the opposite happens. Super-heated air from the attic radiates downward, forcing your air conditioner to run constantly. This constant battle against escaping air can significantly increase your utility bills, making a small gap in the ceiling one of the most expensive problems in your house.
An Open Invitation for Pests
To a mouse, squirrel, cockroach, or wasp, the tiny gap around your attic hatch is a wide-open door. These pests seek shelter, warmth, and a safe place to nest, and an unsealed attic provides the ideal environment. Once inside the attic, it’s a short journey for them to travel into your walls and living spaces.
A pest infestation can lead to significant damage, including chewed electrical wires, shredded insulation, and unsanitary droppings. Sealing all potential entry points is a critical first step in pest prevention and protecting your home from unwanted guests.
Moisture, Mold, and Mayhem
Warm air from your living space carries moisture. When this humid air flows into a cold attic through an unsealed opening, it condenses on cold surfaces like roof sheathing and rafters. This persistent moisture creates the perfect breeding ground for mold and mildew.
Over time, this can lead to wood rot, compromising your home’s structural integrity. Furthermore, mold spores can filter back down into your living area, leading to musty odors and potential respiratory health issues for your family.
Compromised Indoor Air Quality
Your attic contains dust, insulation fibers, and potentially mold spores or pest droppings. An unsealed hatch allows air to circulate between the attic and your home, bringing these contaminants down into the air you breathe. This can aggravate allergies and asthma and reduce overall indoor air quality.
Properly sealing the attic is essential for creating a healthier living environment. It works in conjunction with your home’s ventilation system, and understanding issues like a cold air return with no ductwork can further improve the air your family breathes.
Your Step-by-Step Guide to Sealing Your Attic Opening Properly
Thankfully, sealing and insulating your attic access is a manageable and highly effective DIY project. With the right materials and a little time, you can eliminate these risks and start enjoying the benefits of a properly sealed home. This project offers one of the highest returns on investment for home energy efficiency.
Step 1: Assess Your Attic Access Type
Before you begin, identify what kind of attic opening you have. The most common types are a simple push-up hatch (a piece of drywall or plywood), a scuttle hole, or a set of pull-down stairs. Carefully inspect the perimeter for visible gaps, drafts, and a lack of insulation on the hatch itself.
For pull-down stairs, the large, unsealed frame is a major source of air leakage. A simple push-up hatch often has no insulation and rests loosely, allowing significant air movement.
Step 2: Gather Your Sealing Materials
Most of the materials needed for this project are inexpensive and available at any home improvement store. You will likely need a measuring tape, utility knife, caulk gun, and some of the following:
- Weatherstripping: Adhesive-backed foam or rubber weatherstripping is perfect for creating an airtight seal around the opening.
- Sealant: A quality acrylic latex caulk or expanding foam sealant is used to fill gaps between the trim and the ceiling drywall.
- Rigid Foam Board Insulation: This is the best material for insulating the hatch or the cover box itself.
- Construction Adhesive and Fasteners: You’ll need an adhesive that’s compatible with foam board, along with screws or nails.
Step 3: Applying Weatherstripping for an Airtight Seal
The first line of defense is creating a tight seal. For a push-up hatch, apply adhesive-backed foam weatherstripping to the top of the trim that the hatch rests on. When the hatch is in place, its weight will compress the foam, creating an effective air barrier.
For pull-down stairs, apply the weatherstripping to the perimeter of the door itself or to the frame in the attic that the door closes against. The goal is to create a continuous seal when the unit is closed and latched.
Step 4: Insulating the Attic Hatch Itself
An air seal alone isn’t enough; the hatch must also be insulated to the same R-value as the rest of your attic if possible. Never use loose fiberglass batts directly on the hatch, as the fibers can fall into your home.
For a simple hatch, cut one or more layers of rigid foam board slightly smaller than the hatch and attach them to the attic side using construction adhesive and screws. For pull-down stairs, the best solution is to build a lightweight, removable cover box from rigid foam board that sits over the entire folded stair assembly in the attic.
| Sealing Method | Best For | Cost Estimate | Difficulty Level |
|---|---|---|---|
| Foam/Rubber Weatherstripping | All Access Types (especially simple hatches) | $10 – $20 | Easy |
| Rigid Foam Board on Hatch | Simple Push-Up Hatches | $25 – $50 | Easy |
| DIY Rigid Foam Cover Box | Pull-Down Stairs | $50 – $100 | Moderate |
| Pre-made Insulated Cover/Tent | Pull-Down Stairs | $75 – $200 | Easy |
Advanced Solutions & Long-Term Maintenance
For those seeking even greater efficiency or convenience, several commercial products are available. Combining these with good maintenance habits will ensure your attic remains sealed for years to come.
Pre-made Attic Covers and Tents
If building a DIY box seems too daunting, consider a pre-made attic stair cover or “attic tent.” These products are readily available online and at home improvement stores. They are designed to fit standard pull-down stair openings and often feature a zipper for easy access.
While convenient, be sure to check their R-value to ensure it’s adequate for your climate. Installation is typically straightforward, involving stapling and sealing the cover’s flange to the attic floor around the opening.
Don’t Forget the Insulation Dam
If you have loose-fill insulation (like cellulose or blown-in fiberglass), you must build an insulation dam around the attic opening. This is a short barrier, typically made of plywood or rigid foam, that prevents the insulation from spilling into the house or onto the stairs when you open the hatch.
The dam should be a few inches taller than the depth of your insulation. This simple step is crucial for maintaining your attic’s overall insulation integrity and keeping your home clean.
Perform Regular Check-ups
Make it a habit to inspect your attic seal at least once a year, preferably before the peak of winter or summer. Check that the weatherstripping is still intact and compressing properly. Ensure your insulated cover is sitting correctly and hasn’t been damaged.
These quick checks can save you from developing new air leaks and ensure your home remains protected and efficient season after season.
The Broader Impact of a Well-Sealed Home
Sealing your attic hatch is a fantastic starting point for improving your home’s overall energy performance. This single fix is part of a “whole-house” approach to efficiency. Once you see the benefits, you might be inspired to tackle other areas where energy is lost.
For instance, understanding how to insulate skylights for winter applies the same principles of preventing heat transfer. Similarly, learning how to insulate glass block windows can further reduce drafts and lower your energy consumption, creating a comprehensively sealed and comfortable living space.
Conclusion: A Small Fix with a Huge Payoff
The open secret of home energy loss is often floating right above your head. An unsealed and uninsulated attic opening is a significant liability, contributing to high energy bills, pest problems, moisture damage, and poor indoor air quality. It is a problem that should never be ignored.
By taking the time to properly air seal and insulate your attic access, you are making one of the most cost-effective upgrades possible. This straightforward project will immediately improve your home’s comfort, lower your utility costs, and create a healthier environment for you and your family. Don’t wait—inspect your attic hatch today and seal the leak for good.