Are KitchenAid Handles Interchangeable? Your Ultimate Upgrade Guide
You’ve curated the perfect kitchen design, but there’s one detail that just doesn’t sit right: the appliance handles. Perhaps they’re dated, don’t match your new cabinetry hardware, or one is simply broken. This common frustration leads many homeowners to ask a critical question before undertaking a costly remodel.
The question is, are KitchenAid handles interchangeable? Can you truly swap the handle from a sleek, modern refrigerator to your slightly older dishwasher to create a cohesive, updated look? The answer is a promising “yes, but with conditions,” and this guide will walk you through every critical detail.
You'll Learn About
Why Consider Swapping Your KitchenAid Handles?
Changing your appliance handles might seem like a small modification, but its impact on your kitchen’s overall aesthetic and functionality can be immense. It’s one of the most cost-effective upgrades you can make, offering a significant visual return on a minimal investment. Before we dive into the “how,” let’s explore the “why.”
Achieve a High-End, Cohesive Kitchen Design
The single most compelling reason to swap handles is to unify your kitchen’s design. Mismatched handles across your refrigerator, oven, and dishwasher can make a kitchen feel disjointed and unplanned. By installing matching handles, you create a seamless, professional look that suggests a custom-designed space, elevating the entire room’s appeal.
This is especially true if you’ve purchased appliances at different times or from different KitchenAid collections. A simple handle swap can bridge the design gap between the Architect Series and the Professional Series, for example, making everything look like it was installed on the same day.
A Fast and Affordable Kitchen Refresh
A full kitchen renovation is a massive undertaking in terms of both time and money. Swapping appliance handles, on the other hand, is a project that can be completed in an afternoon for a fraction of the cost. It provides that satisfying sense of immediate transformation without the disruption of a major overhaul.
If you’re planning to sell your home, this simple upgrade can also boost curb appeal—or in this case, “kitchen appeal.” It signals to potential buyers that the space has been well-maintained and thoughtfully updated, potentially increasing its perceived value.
Improved Ergonomics and Functionality
Aesthetics aren’t the only factor. The feel and function of a handle matter every single day. Some older, curved handles can be difficult for individuals with arthritis or limited hand strength to grip securely.
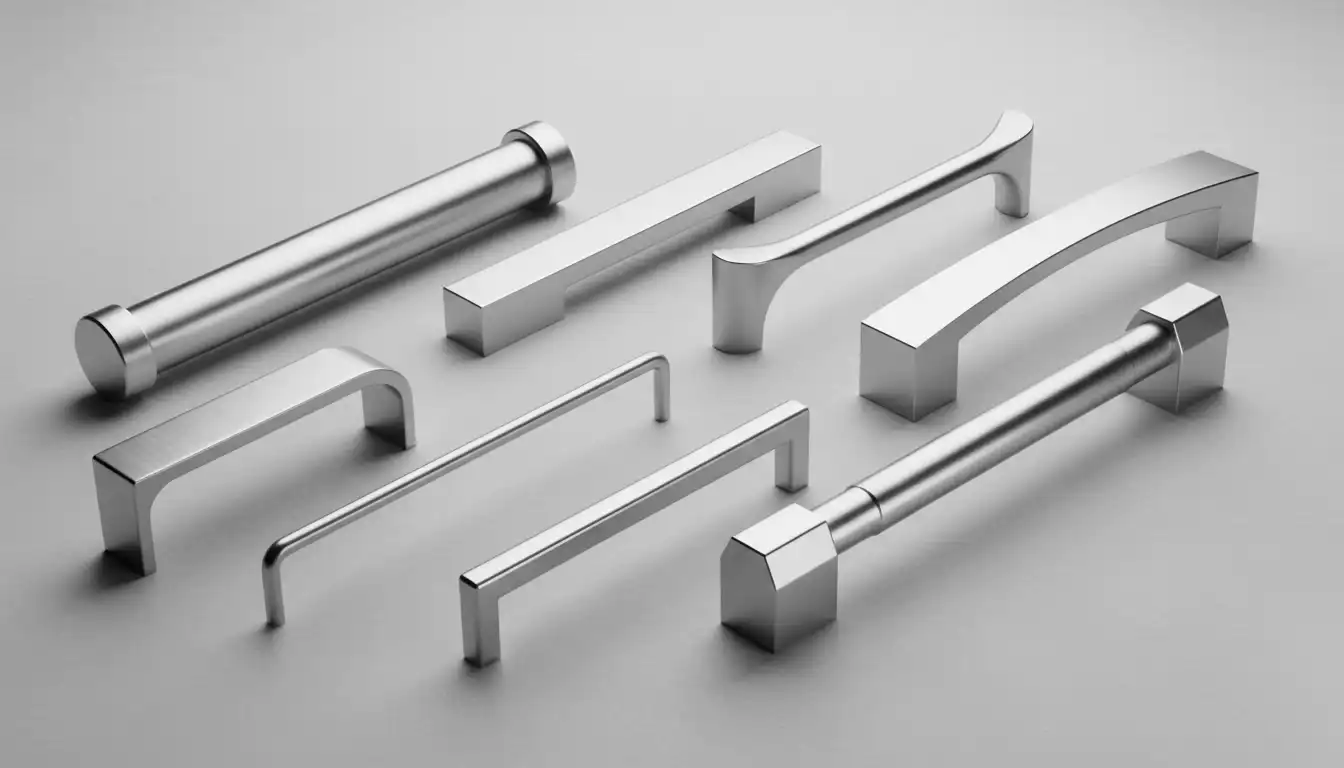
Upgrading to a modern, full-length bar pull can provide a more accessible and comfortable user experience. Furthermore, replacing a handle that is broken, loose, or damaged is not just a cosmetic fix; it’s a necessary repair to restore the proper function of your appliance door or drawer.
The Core Challenge: Understanding Handle Compatibility
While the idea of swapping handles is exciting, success hinges on one critical factor: compatibility. KitchenAid does not have a universal handle mounting system across all its products. Interchangeability is determined primarily by a specific measurement and the design series of your appliances.
The Most Important Measurement: Center-to-Center
The key to a successful handle swap lies in the center-to-center measurement. This is the exact distance between the center of one mounting screw hole to the center of the other. If the new handle’s center-to-center measurement does not perfectly match the holes on your appliance, it simply will not fit without drilling new holes—a modification that is highly discouraged and will void your warranty.
This measurement is the universal language of hardware, whether for cabinets or appliances. Understanding and accurately measuring it is the first and most crucial step in your project.
Variation Across KitchenAid Collections and Years
KitchenAid offers several distinct design collections, such as the Professional Series, known for its bold, restaurant-inspired look with knurled handles, and the Architect Series, which often features a more streamlined, elegant design. Handles are generally interchangeable within the same series and production era.
However, a handle from a 2015 Architect Series dishwasher may not fit a 2023 Architect Series refrigerator. Designs are updated, and mounting points can change. Therefore, you cannot assume compatibility based on the series name alone.
How to Guarantee a Perfect Fit: A 4-Step Process
Don’t leave your project to chance. Follow these precise steps to find a compatible handle and ensure a smooth installation process. Taking the time to do this research upfront will save you the headache of return shipping and project delays.
Step 1: Locate Your Appliance’s Model and Serial Number
This is your starting point. The model number is the unique identifier for your specific appliance and is essential for finding official parts lists. You can typically find the identification tag in the following locations:
- Refrigerator: Inside the fresh food compartment, along the upper side wall or ceiling.
- Dishwasher: Along the edge of the inner door panel or on the tub frame, visible when the door is open.
- Wall Oven: Around the frame of the oven cavity, visible when the door is open.
- Microwave: Just inside the door, on the frame of the unit.
Take a clear photo of this tag with your smartphone. You will need this information to search for parts online or to speak with customer support.
Step 2: Accurately Measure Your Current Handle
Next, you must measure the center-to-center distance of your existing handle. This confirms the measurement your new handle needs to have.
- Open the appliance door or drawer. The mounting screws will be on the inside surface.
- Using a tape measure or ruler, measure the distance from the absolute center of one screw head to the absolute center of the other.
- Be precise. A difference of even a few millimeters will prevent a proper fit. Write this measurement down in both inches and millimeters to make searching easier.
Step 3: Use the Model Number to Find Official Part Numbers
Navigate to the official KitchenAid appliance parts website or a reputable third-party appliance parts dealer. Enter your appliance’s model number into the search bar. This will bring up a series of diagrams for your appliance.
Find the diagram for the door assembly. The handle will be listed as a specific item with a corresponding part number. This part number is for your original handle. You can now use this number to search for its specifications, which will often list the center-to-center measurement, confirming your own physical measurement.
Step 4: Cross-Reference and Verify
Now, find a KitchenAid handle you like from another appliance. If possible, find the model number of that appliance and look up its handle part number. You can then search for the specifications of the new handle part number.
If the center-to-center measurement and the screw size match your original handle’s specs, you have found a likely compatible match. Many online parts retailers have Q&A sections or customer support that can help verify if a handle part number is compatible with your model.
A Deeper Look: Handle Swapping by Appliance Type
While the measurement principle is universal, each appliance type presents its own unique considerations. Understanding these nuances will help you navigate the specific challenges associated with your refrigerator, dishwasher, or oven.
Refrigerator Handles
Refrigerator handles are often the longest and most prominent in the kitchen. French door models, in particular, require two handles that are mirror images of each other. When searching for replacements, ensure you are ordering the correct left-hand or right-hand handle if they are sold separately.
Compatibility is most likely among refrigerators of the same size and configuration. A handle from a 36-inch French door model from the same series is your best bet for fitting another 36-inch French door model. Be mindful of the door’s curvature, as a handle designed for a flat door may not sit flush on a curved one.
Dishwasher Handles
Dishwasher handles can be the most challenging. Some models feature a “towel bar” style handle that is relatively straightforward to replace, following the standard center-to-center measurement rule. However, other models have handles that are integrated with the control panel or latch mechanism.
These integrated handles are typically not interchangeable unless you replace the entire front control panel, which is a much more complex and expensive repair. Stick to replacing towel bar styles unless you are an experienced technician.
Wall Oven and Microwave Handles
Handles for wall ovens and microwaves are generally more standardized within their product line. A handle from a single wall oven is very likely to fit another single wall oven from the same collection. The same applies to double ovens and microwave drawers.
The primary consideration here is the “standoff” height—the distance the handle projects from the door. Ensure the new handle provides enough clearance for your hand to grip it comfortably without bumping against the glass or surrounding cabinetry.
KitchenAid Handle Swap Compatibility Table
To simplify the process, here is a quick reference table summarizing the key factors you must consider for a successful handle swap. Use this as a checklist during your research phase to ensure you cover all your bases.
| Factor to Consider | Why It Matters | Pro Tip |
|---|---|---|
| Center-to-Center Measurement | This is the single most critical dimension. If it doesn’t match, the handle will not fit the existing holes on your appliance. | Measure your existing handle twice before you even begin searching online. This is your non-negotiable number. |
| Appliance Model Number | This is the master key to finding correct parts diagrams, original part numbers, and official compatibility information. | Keep a photo of your appliance’s model and serial number tag saved in a folder on your phone for easy access. |
| KitchenAid Collection/Series | Handles within the same design family (e.g., Architect Series II, Professional Series) have the highest likelihood of being cross-compatible. | Identify the visual style of your handle. Does it have the textured, knurled look of the Pro series or the smooth curve of an older Architect model? |
| Mounting Screw Specifications | The diameter and thread pitch of the mounting screws must match the threaded inserts in the appliance door. | Plan to reuse your original screws if they are in good condition, as they are guaranteed to fit. New handles may not always include screws. |
| Handle “Standoff” Height | This is the distance the handle projects from the door surface. It affects ergonomics and clearance with adjacent walls or cabinets. | Make sure the new handle provides enough room for your knuckles to avoid scrapes, especially on ovens where the surface can be hot. |
The Pro Secret: Unlocking a Perfect Match and Finish
While finding a handle with the right measurements is a technical victory, achieving a truly professional look involves more nuanced details. This is where you can elevate your project from a simple repair to a genuine aesthetic upgrade. Paying attention to the material, finish, and iconic branding details is what separates a good result from a great one.
Beyond “Stainless Steel”: The Importance of Finish
One of the biggest pitfalls is assuming all “stainless steel” finishes are the same. They are not. Finishes can vary in sheen (brushed, satin, polished), warmth, and even texture. A new handle from a different product line may be technically compatible but have a finish that clashes subtly with the appliance surface.
To avoid this, order a single handle first as a test. Hold it up against your appliance in different lighting conditions to ensure it’s a perfect match before you commit to ordering a full set for your kitchen. This is especially important when considering third-party handles, which may not use the same finishing process as KitchenAid.
The Iconic Red Medallions
Many KitchenAid handles are distinguished by their signature red medallions on each end. This is a core part of the brand’s premium identity. When you swap handles, you must decide what to do about this detail. A new handle, even an official one from a different series, may not feature these medallions or have the same size indentation for them.
Consider if the absence of these medallions will bother you. For the dedicated DIYer, it’s sometimes possible to carefully remove the old medallions using a thin pry tool and re-attach them to the new handles with a strong, high-quality two-part epoxy. This preserves the iconic branding and creates a truly custom look.
Your Step-by-Step Guide to Replacing a KitchenAid Handle
Once you have your new, verified-compatible handle in hand, the installation process is remarkably simple. With the right tools and a bit of care, you can complete this task in under 15 minutes.
Gather Your Tools
You won’t need a large toolkit for this job. Most KitchenAid handles are attached with either a Phillips head screw or a hex/Allen key screw. You will need:
- The appropriate screwdriver or hex key set.
- A soft, clean cloth.
- A helper (optional but recommended) to hold the handle.
Step 1: Locate and Loosen the Mounting Screws
Open the door of the appliance. Look on the inside of the door, directly behind where the handle is mounted on the outside. You will see two or more screw heads. If you have a helper, ask them to hold the handle on the outside of the door to prevent it from falling when the screws are removed.
Begin loosening the screws. Turn them counter-clockwise until they are free. Keep the screws in a safe place, as you may need to reuse them.
Step 2: Remove the Old Handle and Clean the Surface
With the screws removed, the old handle should come right off the front of the door. Place it aside. Now, take your soft cloth and some mild cleaner to wipe down the surface of the door where the handle was mounted. This area often collects dust and grime.
A clean surface is essential for a good fit. This is also a good opportunity to tackle other cleaning tasks. For instance, if you’ve ever dealt with stubborn bathroom stains, you know the value of proper cleaning techniques, which can be just as important in the kitchen as when you need to get purple shampoo stains out of a shower.
Step 3: Position and Secure the New Handle
Align the new handle with the mounting holes on the front of the door. Have your helper hold it firmly in place. From the inside of the door, insert the screws into the holes and begin tightening them by hand to ensure they are not cross-threaded.
Once they are started, use your screwdriver or hex key to tighten them until they are snug. Do not over-tighten, as this can strip the screw or damage the door panel. The handle should feel solid with no wiggle or play.
Common Mistakes and How to Avoid Them
This is a straightforward project, but a few common errors can cause frustration. Being aware of them beforehand is the best way to ensure success.
Mistake 1: Guessing the Measurement
Never estimate the center-to-center measurement. “It looks about 10 inches” is not good enough. A precise measurement is the only way to guarantee a fit.
Mistake 2: Disregarding the Finish
As mentioned, assuming all stainless finishes are identical can lead to a mismatched look. Always test one handle first or order from the exact same KitchenAid collection and year if possible.
Mistake 3: Using the Wrong Tools
Using a power drill to tighten the screws is risky. It’s very easy to apply too much torque and strip the threads. Always tighten the screws by hand for better control. This level of care is important for all home maintenance, including checking on equipment like you would when confirming the proper GX340 oil capacity before use.
Conclusion: A New Look is Within Reach
So, are KitchenAid handles interchangeable? The answer is a resounding yes, provided you do your homework. By focusing on the critical center-to-center measurement, using your model number to find official parts, and paying close attention to details like finish, you can absolutely swap handles to create the custom, cohesive kitchen of your dreams.
This project proves that significant home improvements don’t always require a massive budget or timeline. It’s an empowering DIY task that delivers instant gratification and a lasting impact on your home’s most important room. And once you’ve refreshed your kitchen, you may find yourself looking for other ways to upgrade your home’s style, perhaps even considering projects like a sunroom curved glass replacement to let in more light.